
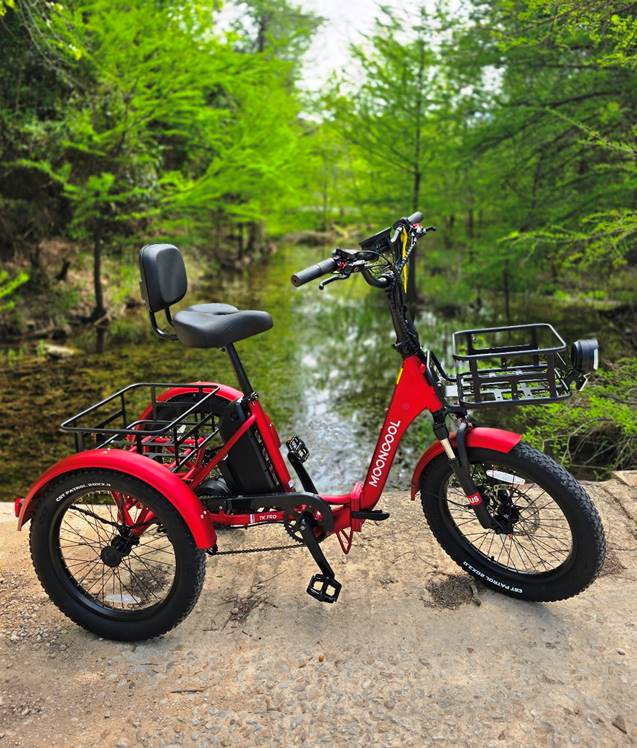
Unboxing & Assembling the TK Pro
Congratulations on choosing Mooncool! Waiting for the shipment seems to be the hardest part, and my wait was only 6 days! Mooncool works diligently to ensure prompt shipping, though delivery times may vary based on your location. In my case, the Mooncool arrived just 6 days after placing the order. If you’ve already ordered, you can prepare to unbox your Mooncool and get it ready to ride! Your new ride will be delivered soon in a well-packed box.
This is a long article because I tried to be thorough. Don’t let the article length deceive you, because unboxing and assembly is very simple for the TK Pro. This article provides detailed guidance for those undertaking this process for the first time.
Note: These instructions are not a substitute for the official Mooncool instructions. Be sure to locate and read the included user manual. In many cases, the order of assembly varies from the official Mooncool manual. This order of assembly is not necessarily better than the manual; it is just different and reflects my personal preferences.
STEP ONE
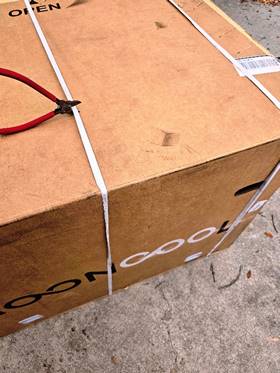
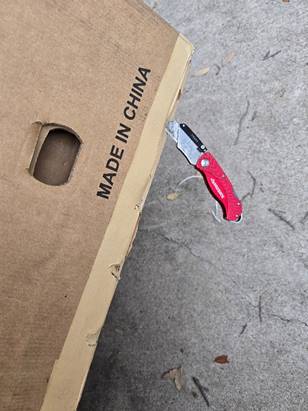
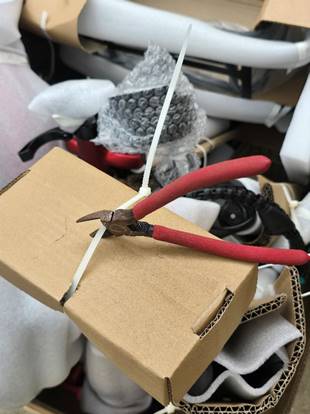
Gather the needed tools. Mooncool provides tools for assembling the e-trike. You can find them in the shipping box. Of course, you can choose to use your personal tools. All you need right now is a pair of snips to remove the straps around the box, a knife or box knife, and the zip ties inside. Using a knife to remove packing material is riskier for both you and your new Mooncool TK Pro!
STEP TWO
Take a couple of minutes to photograph your shipment. Be sure to include any damage to the shipping box and all labels on the box.
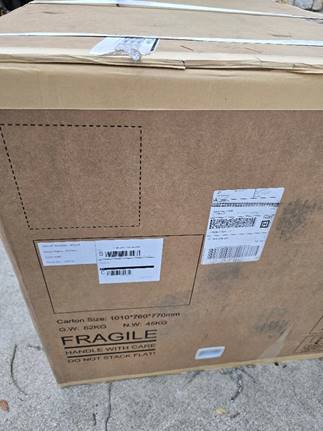
STEP THREE
The Mooncool shipping box has some convenient features. You have no staples to remove! First, cut the shipping straps—and don’t remove the staples:
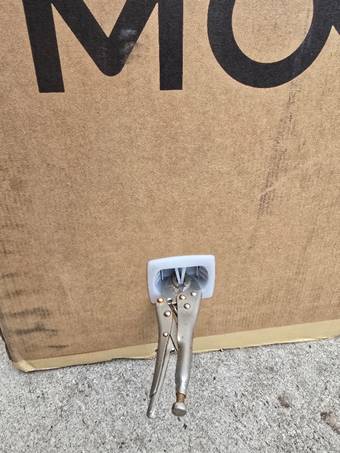
The second feature is the several retaining clips near the bottom edge as shown below. These can be removed by hand, but a pair of pliers makes it easier.
STEP FOUR
Now you are ready to open the shipping box. With the retaining clips removed, the box easily slides upward and off. You will probably need to cut the tape along the bottom edges.

STEP FIVE
After removal, turn the box upside down and use it to collect the packing materials you are about to remove. Fold down the remaining sides of the box, completely revealing the shipping protection provided by Mooncool. You might want to preserve the shipping box, just in case of the unlikely need to re-box the trike.
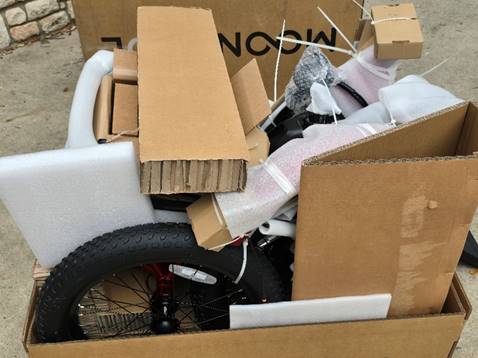
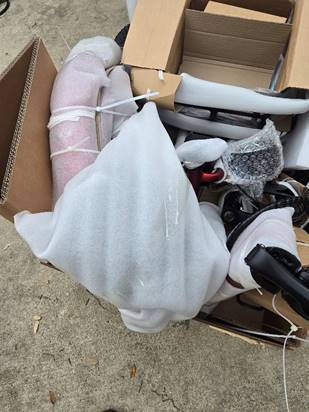
Careful and Detailed Protective Packing
STEP SIX
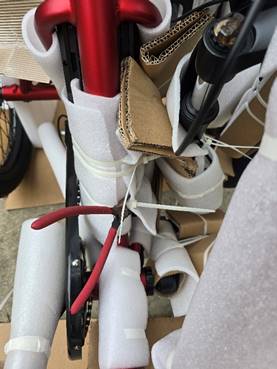
Remove any items you can get to easily. A knife will do the job, but it is best to use snips to avoid injury to yourself or the trike. Work cautiously. Notice how the Mooncool TK Pro is very carefully and thoroughly protected for shipping. Despite rough handling by the shipping company, my Mooncool TK Pro arrived in perfect condition.
STEP SEVEN
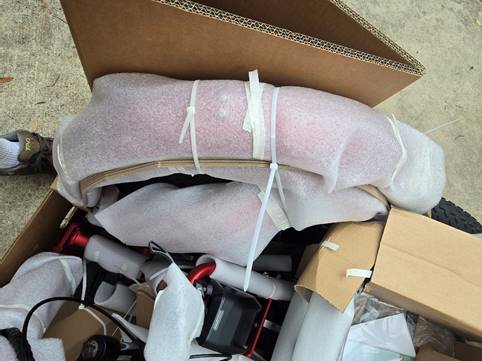
To save yourself a lot of cleanup work later, continue throwing packing materials into the shipping box.

STEP EIGHT
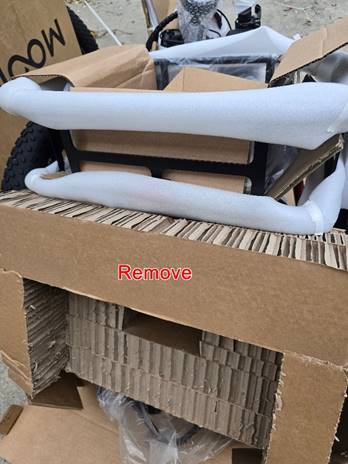
If they are still in place, fold down the box sides (flaps) and prepare to roll the trike out. Remove anything that appears to be “in the way” such as the large cardboard block under the rear basket.
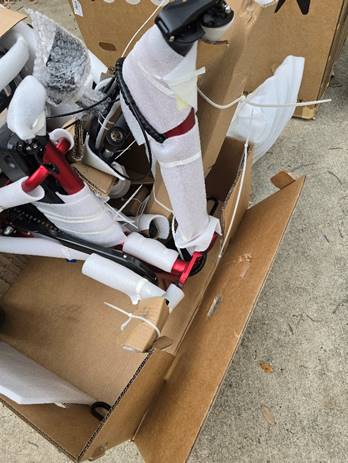
Carefully and methodically remove most of the packing material so that you can easily unfold the trike.
When it is ready to unfold, take care to not just yank it. Go slowly, carefully.
STEP NINE
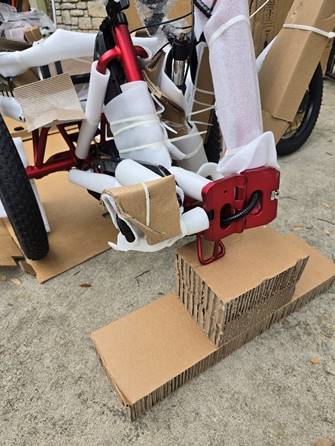
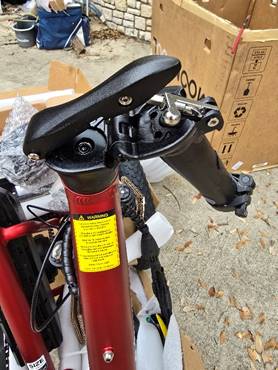
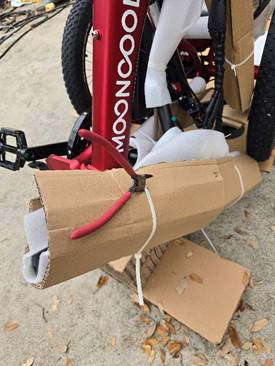
Unfold the trike and lock the folding mechanism securely into place, referring to the user manual if necessary.
Pull the release indicated above and push the clamp forward to secure it firmly in place.
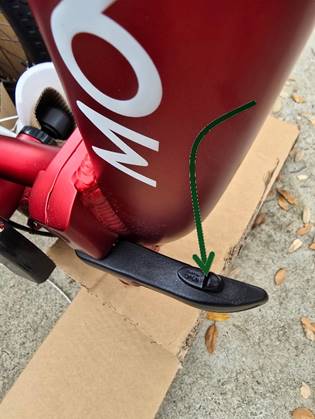
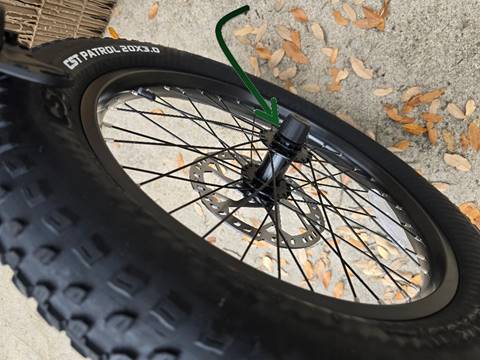
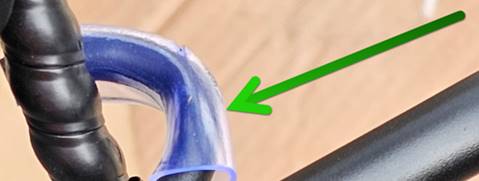
At this point, you can access the battery. Locate the battery charger and begin charging while you continue the assembly process. The battery charging port is near the top right-hand side of the battery as indicated by the green arrow in the photo above. It is not necessary to remove the battery for charging. The light on the charging unit will be red. When the battery is fully charged, that light becomes green.
For more tips on keeping your battery charge at a safe level, at your convenience please refer to the following article:
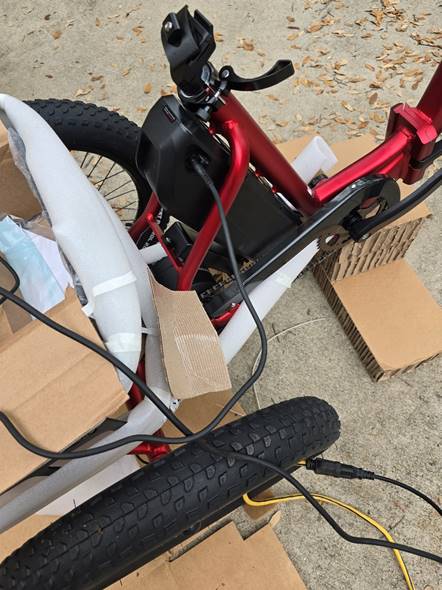
Here’s a view of the battery with the charger cord connected.
STEP TEN
Locate the Folding Stem Tube, raise it to the upright position, and lock it into place.
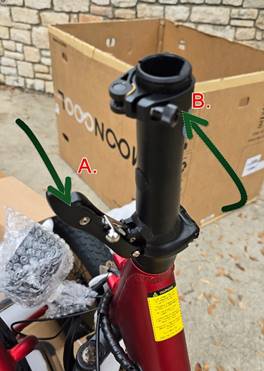

Open the locking clamp (B. — see arrows above) near the top of the tube, and insert the handlebar extension tube. Close the clamp handle (A.). You can adjust the handlebar position later. If you don’t have enough “slack” to insert the handlebar stem, just open the clamp and lower the tube to the side, insert the stem, then lift it to the upright position and clamp it again.
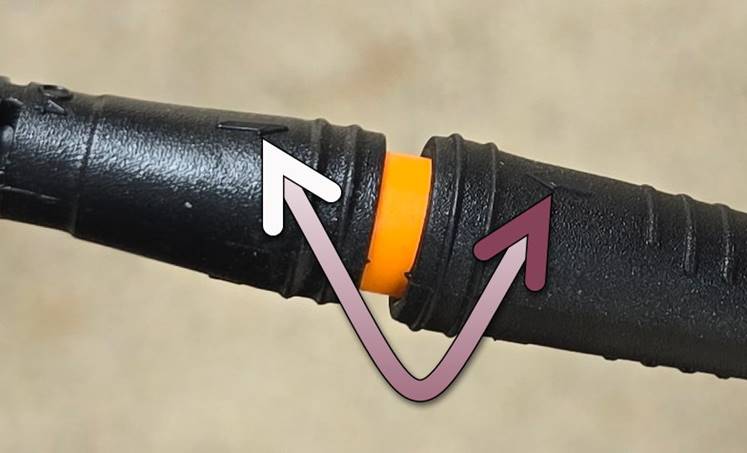
This is a good time to trace every wire that you see in front of the handlebar. Make sure that all wires are securely connected. If you need to connect a wire, check to see that the plug color is the same on both sides and that the small arrows are aligned:
STEP ELEVEN
Install the front wheel. First, position the trike so that it is easy to maneuver the front wheel into place. I used packing blocks to elevate the front of the trike, but you could use anything stable and safe. If the protective spacer is still in place between the front forks, remove it.
Now prepare the front wheel for installation. First, remove the protective piece as shown below.
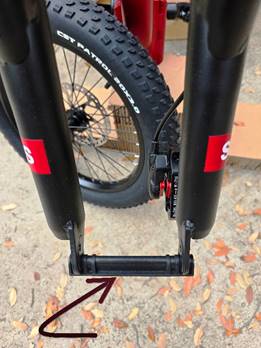
Locate the quick-release for the front axle and prepare it for use as shown:
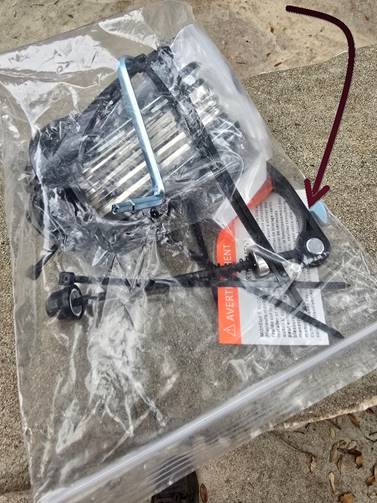

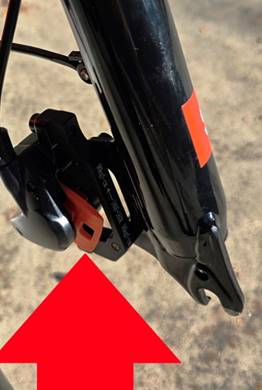
Note carefully the position of the 2 springs indicated above. Also, your TK Pro is shipped with a protective plastic spacer between the front brake disc pads. If it is still in place, remove it now…it just slides out.
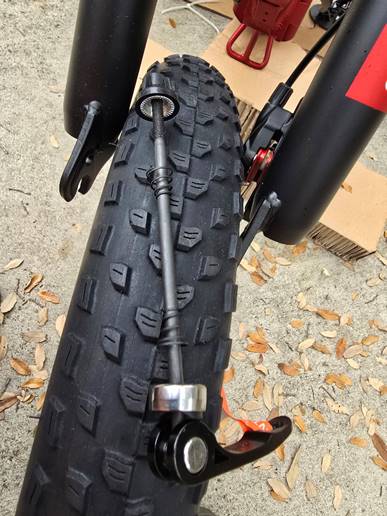
Carefully position the front wheel between the front forks, ensuring the brake disc (rotor) slides smoothly between the brake pads. Remove the nut and one spring and insert the axle quick-release into the disc brake side of the wheel (left side of trike).
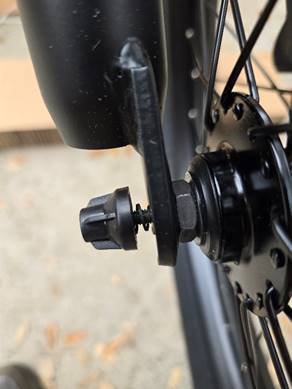
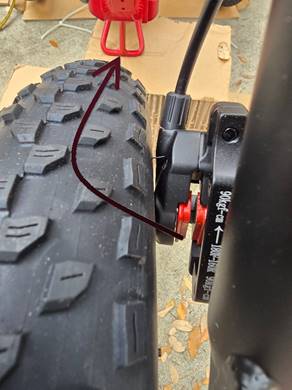
Push it all the way through until it protrudes from the opposite side. Slide the spring on (same orientation as when you removed it) and screw on the nut. Tighten and then close the locking clamp. I like to close it toward the rear, and it should be tight enough that effort is required to close the clamp.
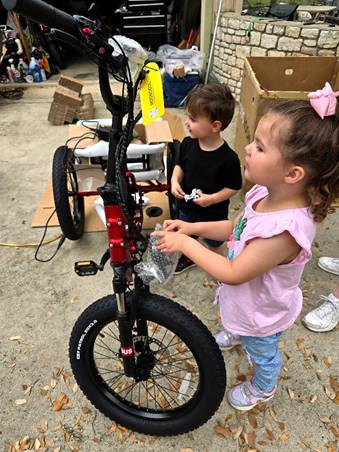
Then make the grandkids get out of the way…just kidding!
STEP TWELVE
Now install your seat and post.
The rear basket of your Mooncool TK Pro is a convenient place to work on attaching the seat to the seat post. You can place the seat upside down in the basket. Then loosen the clamp at the top of the post and. attach it to the seat. I like to spread the bottom and top parts of the clamp as far as possible without entirely removing the bolt. It may require some patience, but you can work the two parts of the clamp into position.
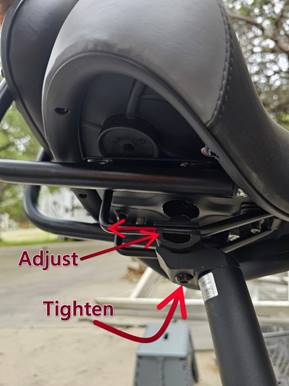
After attaching the seat to the post, open the locking clamp on the seat post tube by pulling the handle outward. Insert the seat post into the tube and note the minimum insertion point marked on the seat post. Take a guess on a comfortable seat height and close the clamp lock by pushing the locking handle toward the tube. You can adjust seat height later. So that when pedaling, the knees are only slightly bent when the pedal is at its lowest point.
STEP THIRTEEN
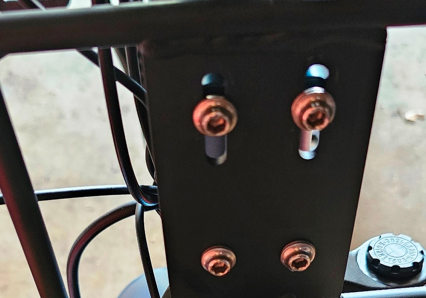
Install the front basket. First, remove the four mounting bolts (don’t lose them) from the front of your trike as shown below.
Use the same four bolts to attach the front basket base to your trike. The front basket sits on it, and the entire assembly is strong and stable.
Now attach the front basket onto the base bracket. Tuck the wiring harness into the retainer hook before tightening the first screw of the front basket base bracket. Attach the headlight to the front of the basket.


STEP FOURTEEN
Next is the installation of the rear fenders. To make it easier, some owners like to remove the rear basket. This is fine to do, and may even be the best approach. I don’t like taking time for the removal and re-attachment, so I prefer to work with the basket in place, using the long-shaft wrench.
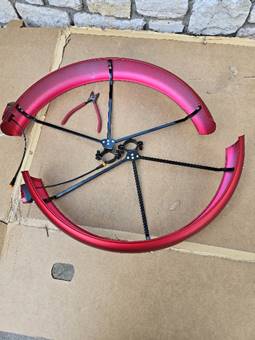
Remove any remaining shipping protection and remove one bolt from each fender clamp.

With the clamp still open. Slide it down between the wheel and the basket, manipulating it in place onto the axle. Be sure the notch shown below is holding the clamp in the proper position.
Then insert the bolt and tighten it by hand as much as possible.
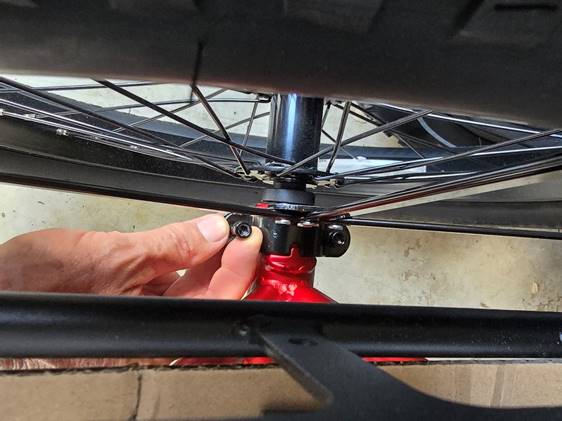
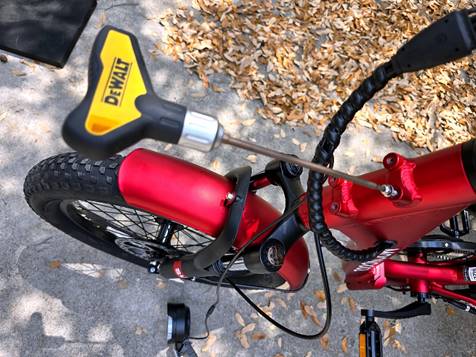
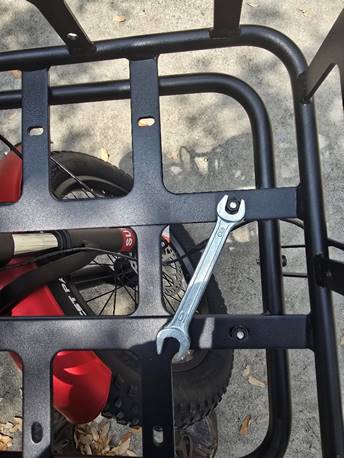
When it becomes too hard to turn with your fingers, that’s the time to use the long-shaft wrench. It can also be done with the wrench included in your shipment, but there’s not much room and it requires patience.
The notch will help hold it in position, but these bolts must be tight!
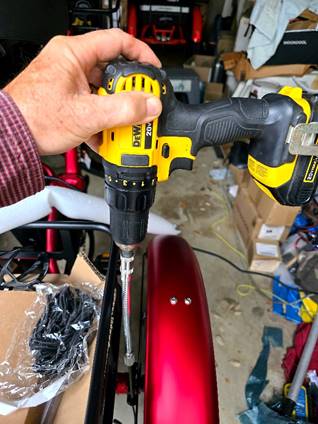
Another option is to use a power drill and an extension as shown below:
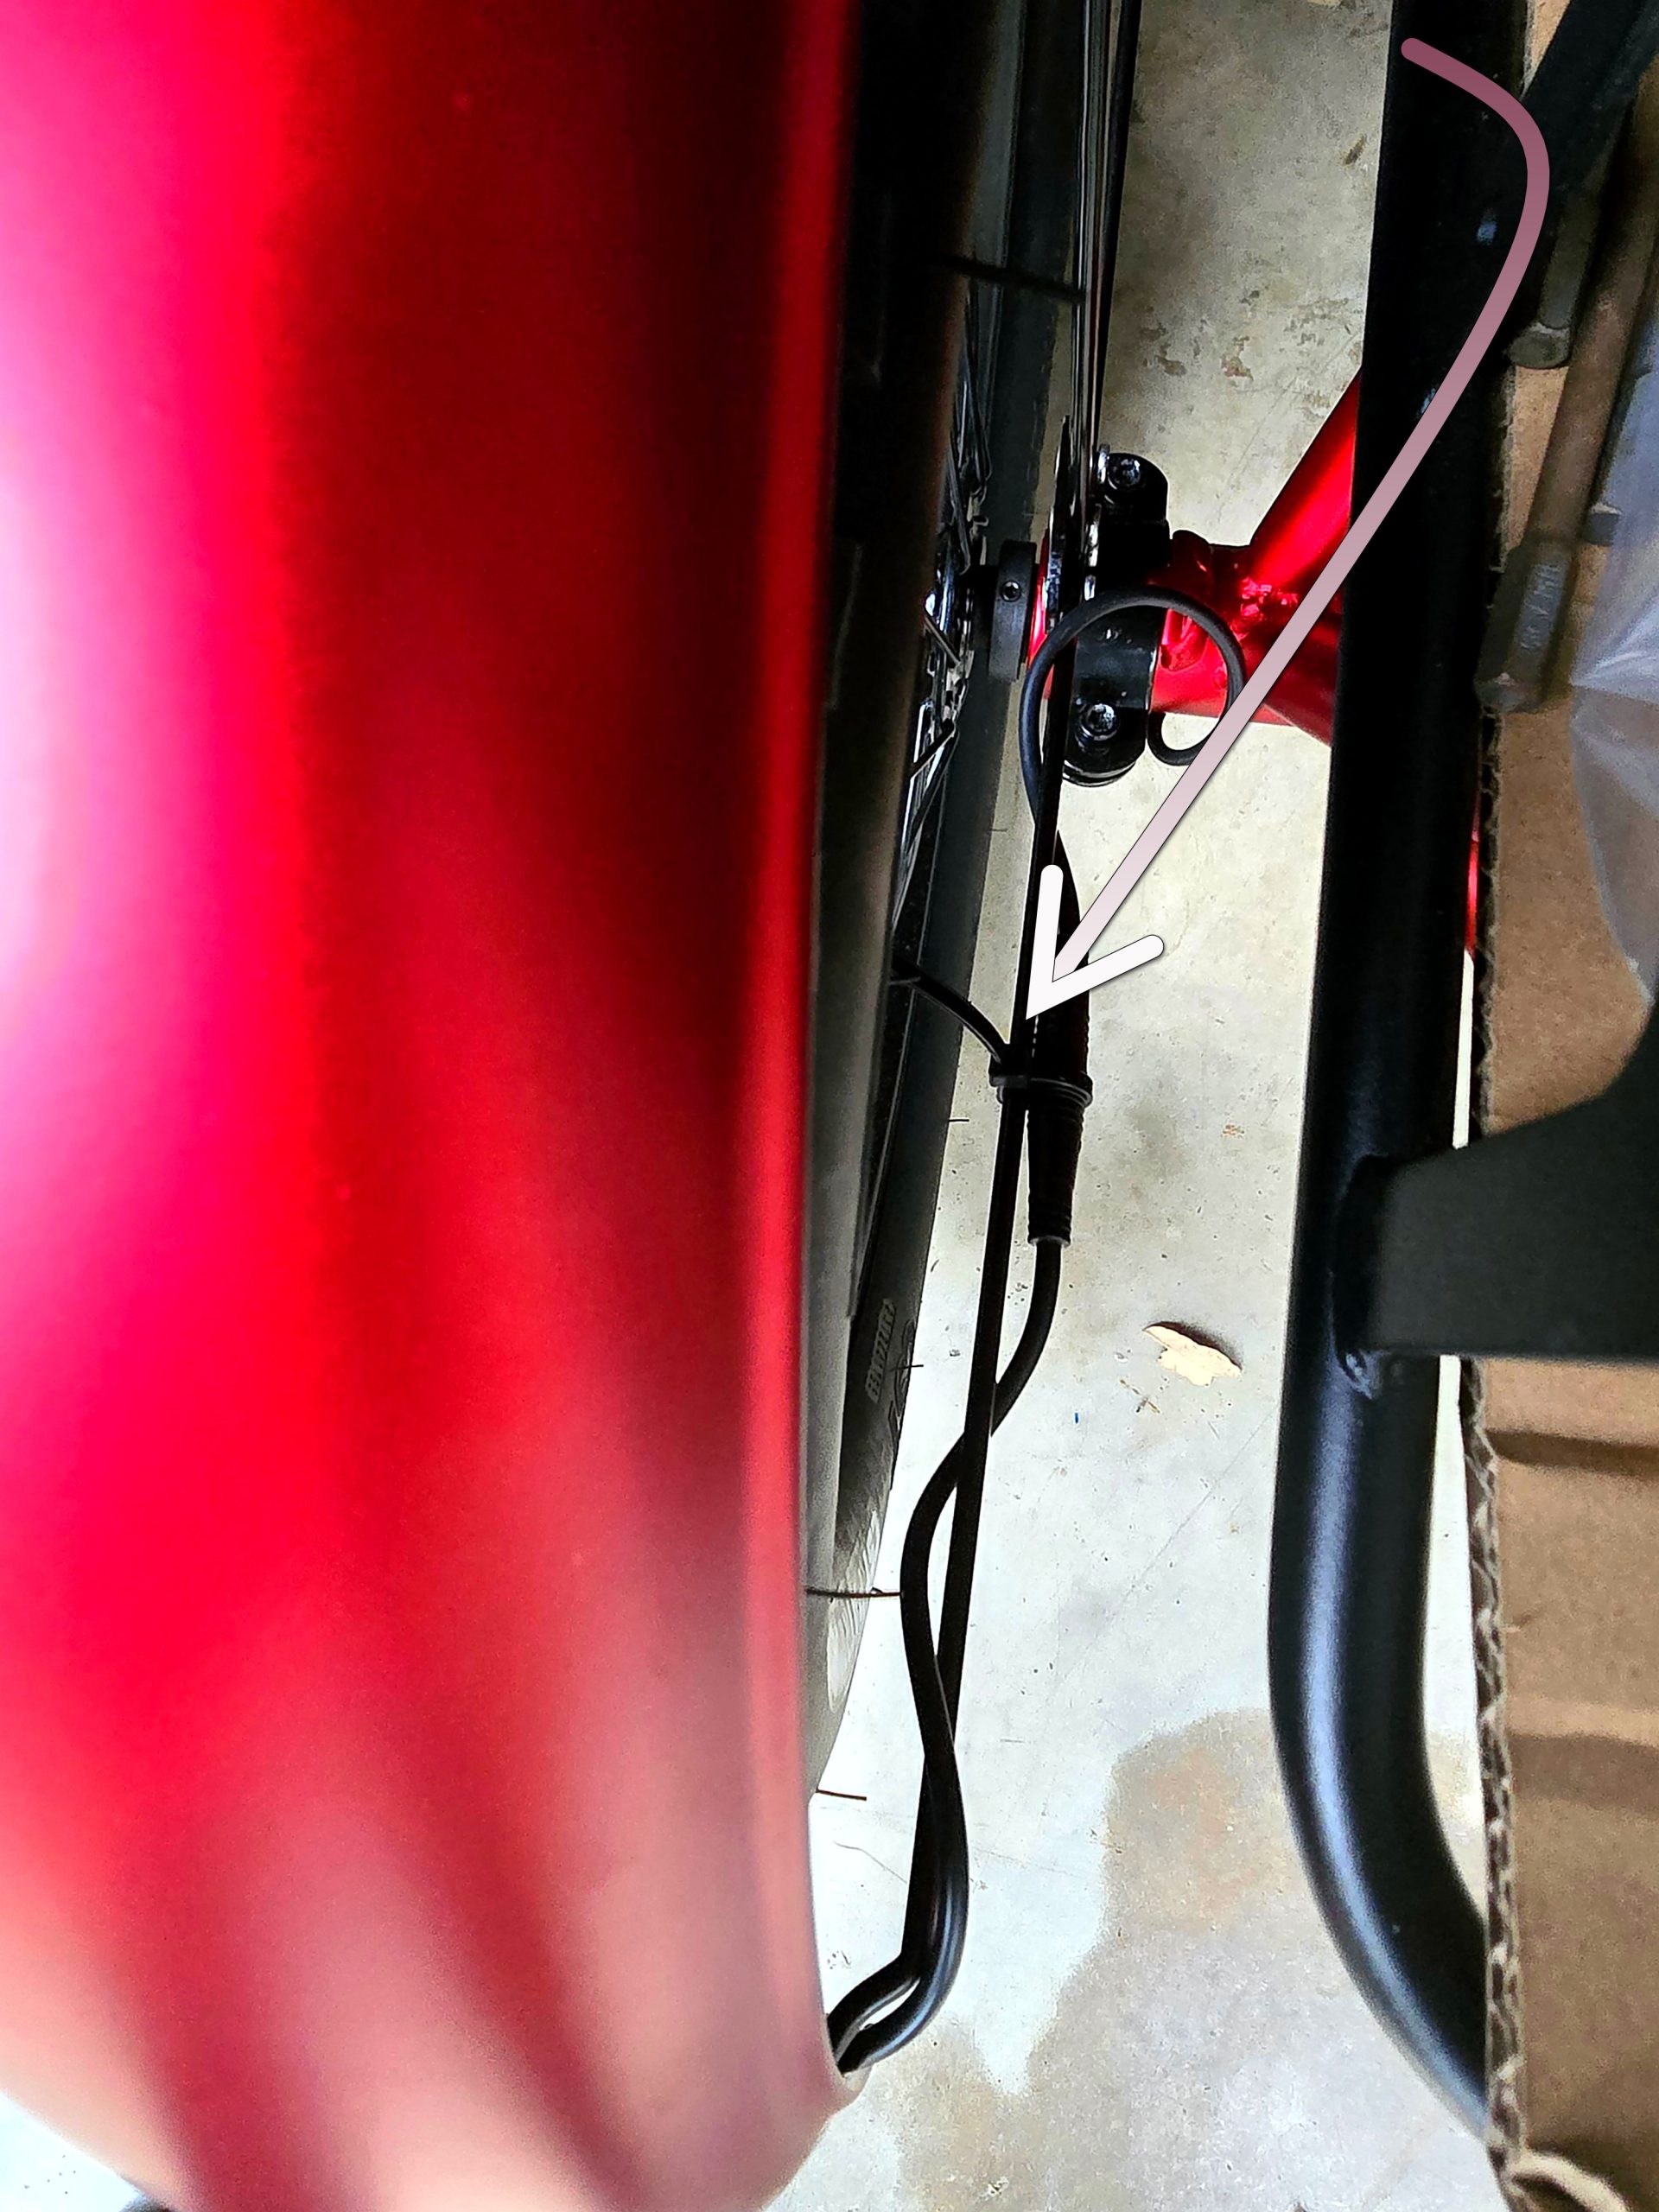
Locate the wires that provide power to the taillights. Carefully, align the small arrows on each plug and secure the connection, taking care to not bend the pins. Then use a zip tie to retain the wire:
STEP FIFTEEN
Check the primary drive chain. If it is not properly in place, it may be necessary to remove the bolt that holds the front end of the chain guard. You can then raise that end of the guard upward to give better access to the chain. You might need to slightly loosen the rear bolt holding the chain guard.
STEP SIXTEEN
Be aware that you may need to adjust the derailleur and/or the brakes…or not! My TK Pro arrived needing just a slight tweak to the derailleur and none to the brakes. Search on YouTube for detailed instructions.
It is smart to also check the electrical connections under your trike. Tilt it and lean it against something safe, so that you have easier access. The photo below shows zip ties that I added for more secure connections:
When you believe your trike is ready to ride, read this article: Your First Ride
BEFORE YOU RIDE
Conduct a thorough visual inspection of the assembled trike to ensure you haven’t missed anything.
Read Your Owner’s Manual — This is a step too often skipped in preparing to ride. Who wants to take the time to read the instructions, right? You do! It is very important that you are as knowledgeable as possible before you take your first ride. After all, your safety is a priority! And be sure to learn how to adjust the Advanced settings on your display. You might want to “slow down” the PAS or adjust other settings.
Select Your Terrain — As you begin your riding experiences, there is plenty to think about without having to deal with bumps, rocks, hills, or traffic. Make your plans to get started where the terrain is level and safe. Perhaps an empty parking lot or a quiet neighborhood street with almost no traffic. Make sure you can easily concentrate on your Mooncool and not be concerned with your surroundings.
Confirm Your Brakes — Stopping is even more important than starting! Before mounting your Mooncool, walk along slowly while pushing the e-trike. Then gently squeeze the left-hand brake to stop your forward motion. Now begin pushing forward again and do the same with your right-hand brake. This will confirm that both the front and the rear brakes are working. If either brake does not easily stop your forward motion, do not ride until your brakes have been adjusted and are working properly.
Control Your Speed — Slow is good! Sure, part of the fun of e-trikes is that they are capable of higher speed, but now is not the time for that. Begin your ride by selecting Pedal Assist (PAS) level 1, but also do not pedal. Pedaling an e-trike has a little different feel than a conventional trike, and you need time to adjust. Instead, mount your Mooncool TK Pro and begin your ride by VERY SLOWLY accelerating with your throttle. Your e-trike will begin to move forward and you can experiment with steering at a slow and safe speed. When you feel comfortable, you can try pedaling, and eventually adjust your Pedal Assist from 1 to 2. But be careful — your Mooncool may go faster than you expect with Pedal Assist.
Always Wear a Helmet — Nobody expects to fall for any reason, but we all know that the possibility exists. You have only one head and one brain, so take care of them. A good protective bike helmet doesn’t have to be expensive. I bought mine for $4 at a Salvation Army store.
Use the Throttle for Safe Starts — Your e-trike has a throttle, and you can use it to enhance your safety. As you begin riding a trike for the first time, or as you return after a long absence from cycling, a throttle is very helpful. From a dead stop, use the throttle rather than pedaling. When making a turn, use the throttle. This allows you to concentrate on stability and smoothly making a safe turn.