Unboxing and Assembling the Mooncool Folding TK1
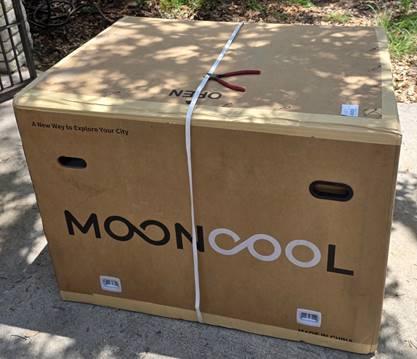
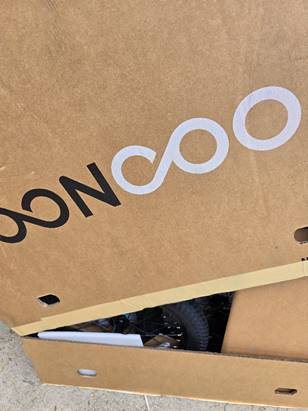
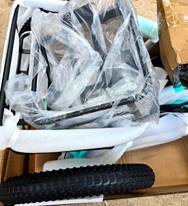
The big day has finally arrived! Mooncool works diligently to be prompt with shipping, and has established four US-located warehouses. Shipping time naturally varies according to your address. In my case, the Mooncool arrived just 3 days after placing the order. If you have already ordered, while you wait you can prepare and be ready to do a great job of unboxing your Mooncool and getting it ready to ride! Your new ride will be delivered soon in a big box…here’s a look at what arrived at my house…
This article is not a substitute for the Mooncool instructions. Be sure to locate and read the included user instruction booklet. This is a long pictorial guide, containing about 45 photos. Don’t let the length discourage you. I went into detail for the sake of those readers who have never done anything like this e-trike assembly.
STEP ONE
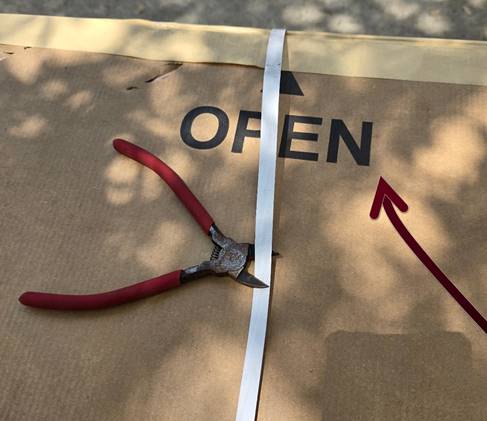
Gather the needed tools. Your Mooncool shipment provides tools needed for assembling the e-trike, or you can opt to use your own. All you need right now is a pair of snips to remove the straps around the box and the zip ties you will find inside the box. Yes, you could use a knife, but that’s much riskier for both you and your Mooncool trike! You can ignore the “OPEN” labeling on top of the shipping box. Trust me, that is not the place to open this box.
STEP TWO
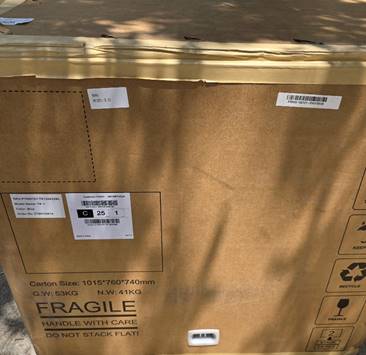
It’s important to take a couple of minutes to photograph your shipping box. Be sure to include any damage to the shipping box and all labels on the box.
STEP THREE
The Mooncool shipping box has some very nice and convenient features. The first special feature to notice is that you do not need to remove any of the staples. You will see several staples along the top of the box, but don’t take time to remove them – that’s a waste of time and effort. Read on to see why!
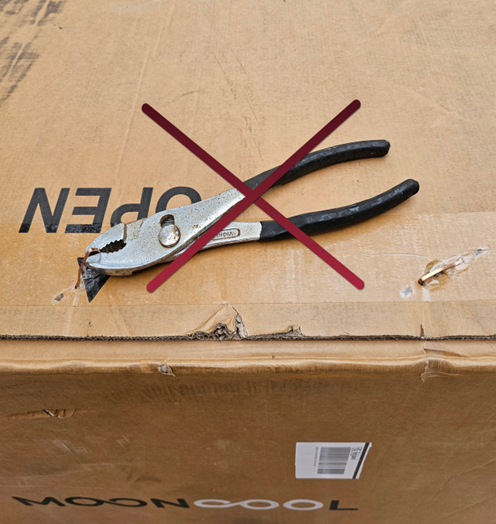
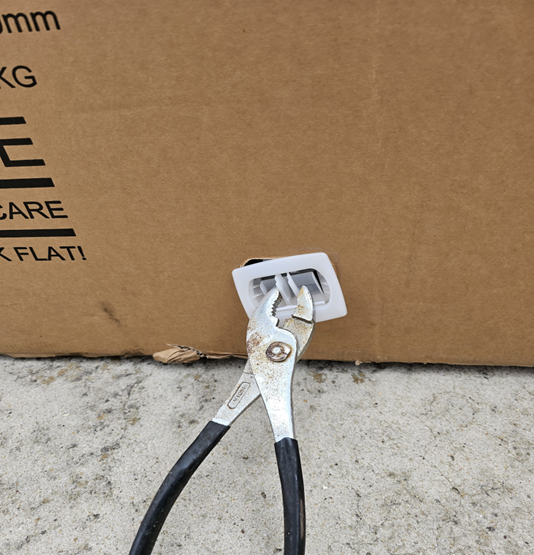
The second special feature of the shipping box is the several retaining clips near the bottom edge.
These can be removed by hand, but a pair of pliers makes it easy.
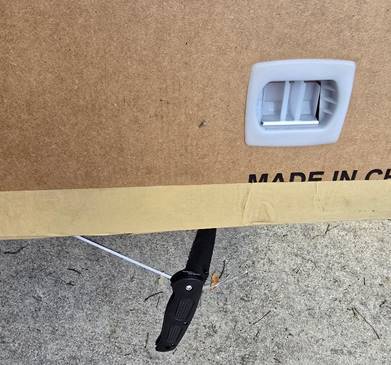
STEP FOUR
Now you are ready to open the shipping box. It’s time to cut the sealing tape along the bottom edge and remove any remaining plastic clips:
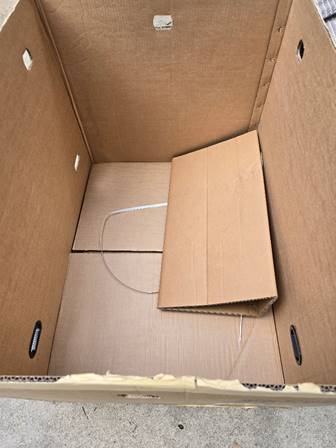
Then slide the box upward. If it sticks, be sure all the sealing tape has been cut:
After removal, it’s a good idea to turn it upside down and use the box as a place to collect the packing materials you are about to remove.
STEP FIVE
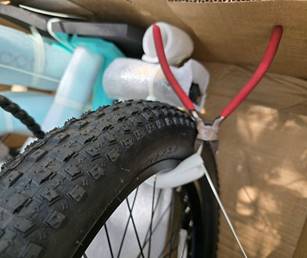
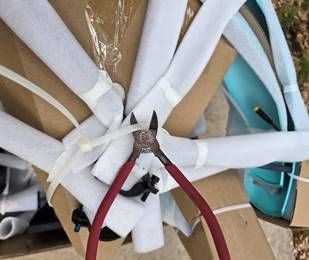
The removal of the protective packing materials requires care. A knife will do the job, but it is best to use snips so that injury to yourself or the trike is avoided. Don’t be in a hurry – work cautiously.
Notice how the Mooncool trike is very carefully and thoroughly protected. Although the shipping boxes are sometimes handled roughly by the shipping company, my Mooncool TK1 Folding arrived in perfect condition. I inspected the beautiful Cyan Green paint and could not find even one scratch.
STEP SIX
As you remove packing material, take out any obviously accessible parts. For example, the front tire and the fenders:
Keep an eye out for the battery charger, and place it nearby:
STEP SEVEN
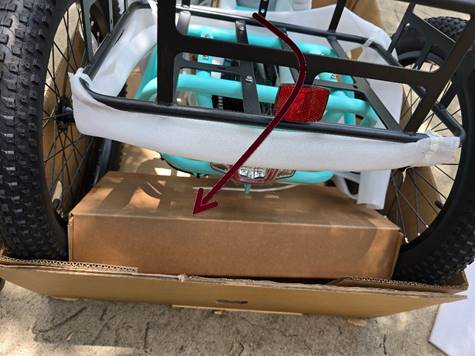
Remove any remaining items that might make it hard to roll the trike from the box:
STEP EIGHT
Lower the front flap of the box:
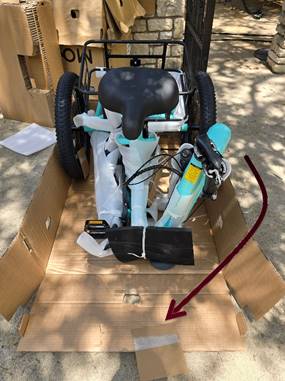
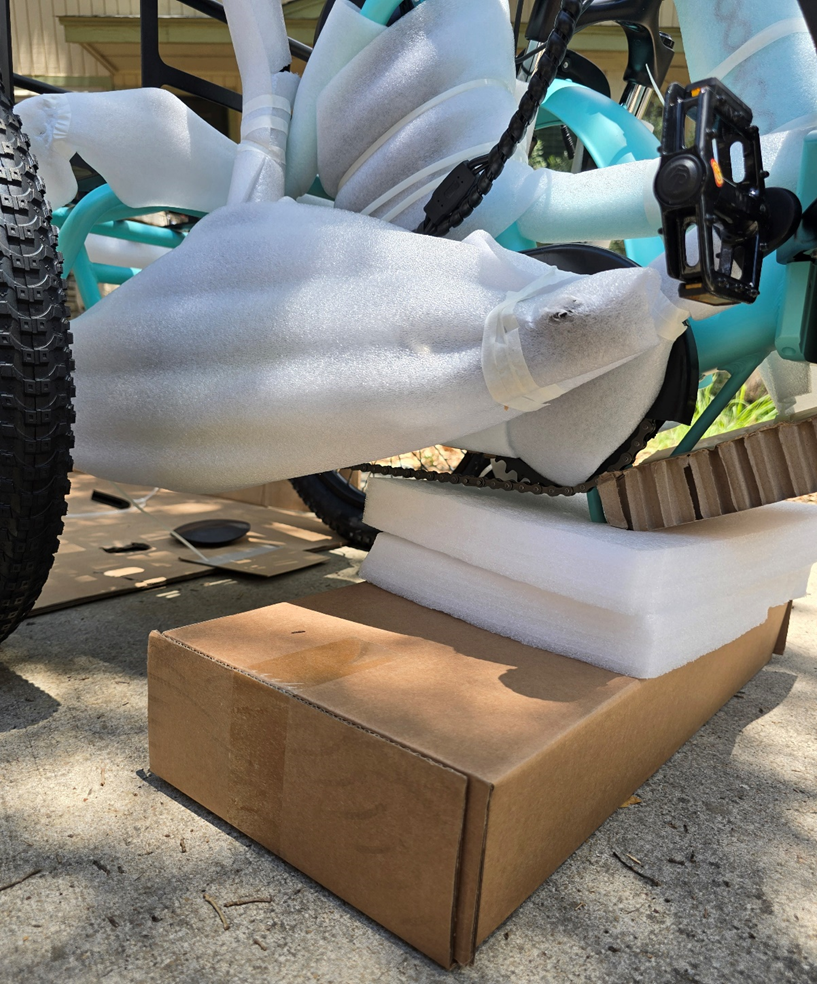
Lift the front of the trike and roll it from the box. Use packing material or other blocks to safely elevate the front end in preparation for installing the front wheel:
STEP NINE
Remove any remaining packing material that might hinder unfolding the trike:

Don’t forget the handlebar!
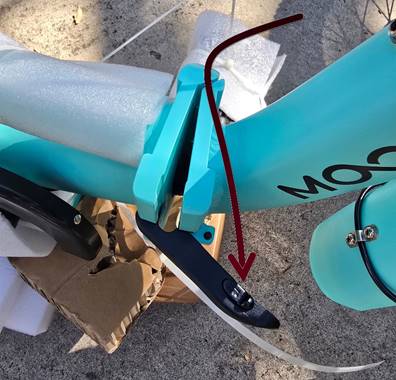
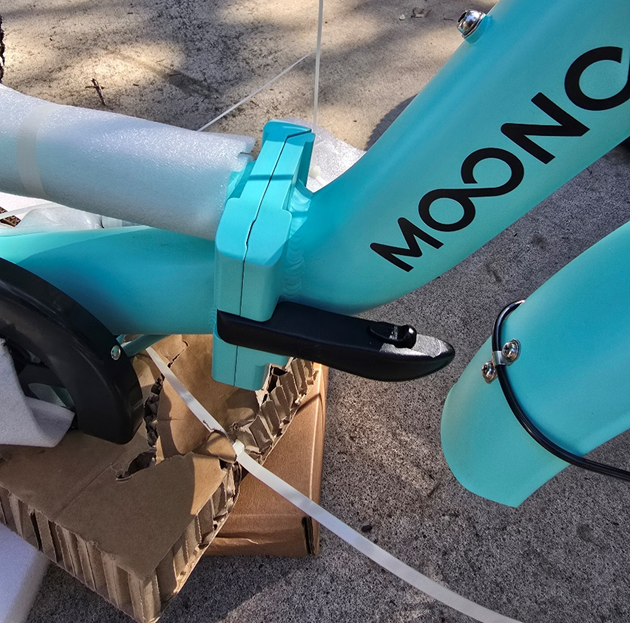
Unfold the trike and lock the folding latch securely into place, following instructions in the user manual or this pictorial guide. There is a slide on top of the latch lever that you must use to close the latch:
STEP TEN
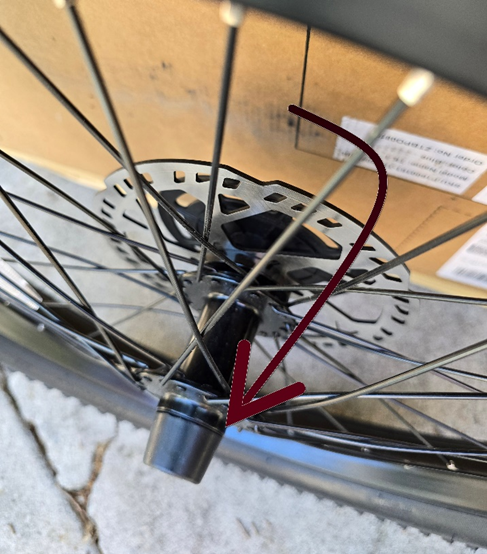
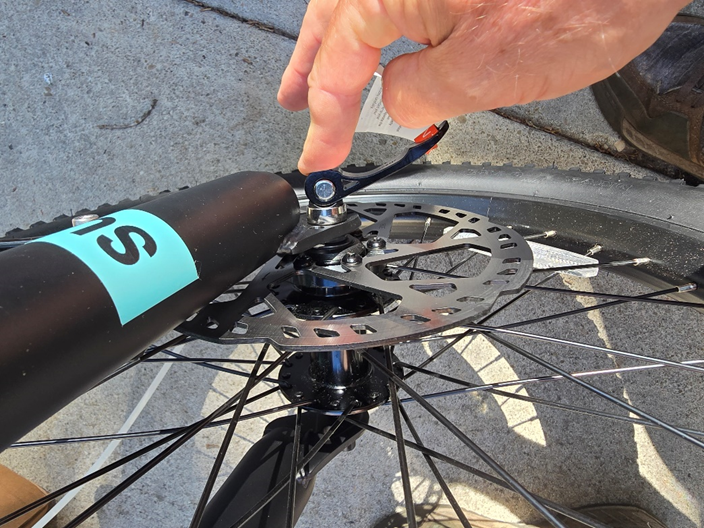
Install the front wheel. First, remove the protective caps from both sides of the wheel as shown below. Sometimes the larger cap gets knocked off during shipping.

Remove (slide out) the colored protective spacer from between the brake pads:
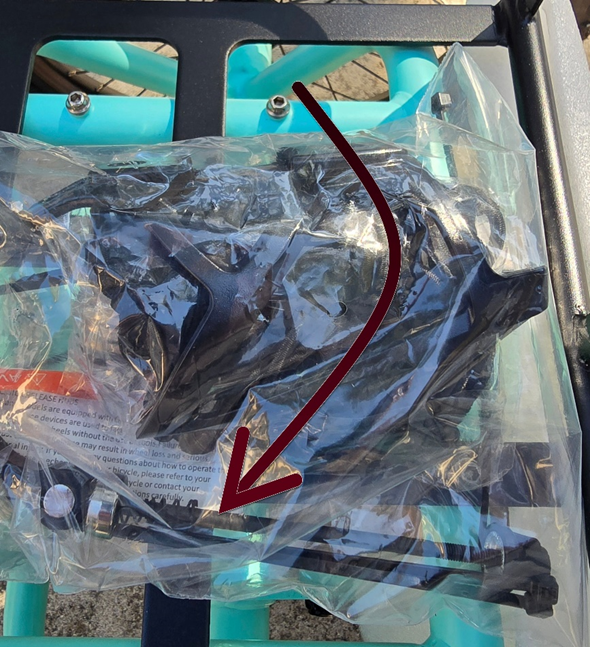
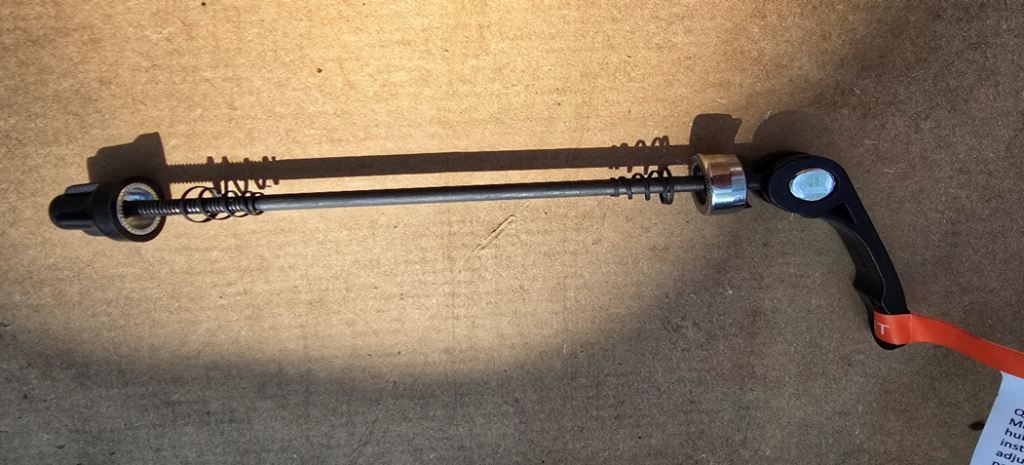
Next, locate the plastic bag of parts included in your shipment. Find the quick-release axle:
IMPORTANT: Take note of the exact position of the springs. This is how they MUST be oriented when the quick-release axle is installed.
Roll or lift the front wheel into position between the stems of the front fork. At the same time, carefully slide the brake rotor (disc) between the brake pads (where the spacer was located):
At the bottom of both sides of the front fork, there is an area known as a “dropout.” Your trike’s fork dropout is designed for a quick-release skewer (axle). These dropouts have a specific shape to accommodate the axle and the clamping mechanism of the quick-release.
NOTE: The quick-release feature makes removing and re-installing the front wheel quick and easy. This is not only true for you, the rider, but it’s also true for thieves. Do not lock up the front wheel with a chain and think it will prevent theft of your trike!
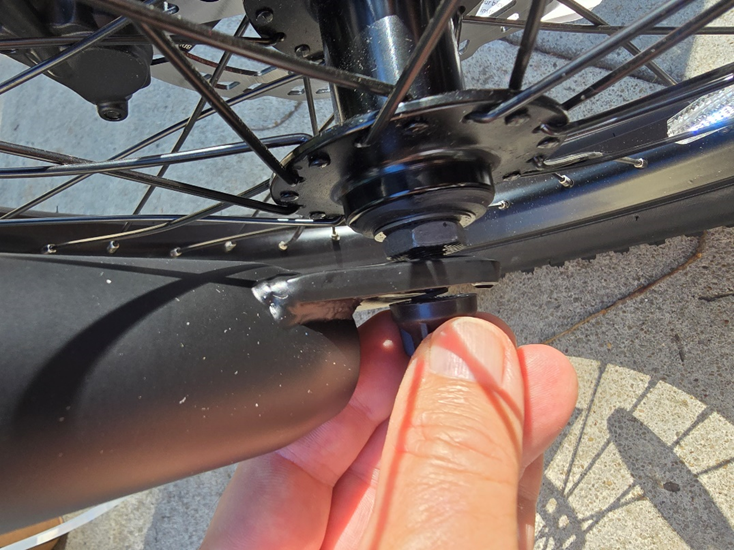
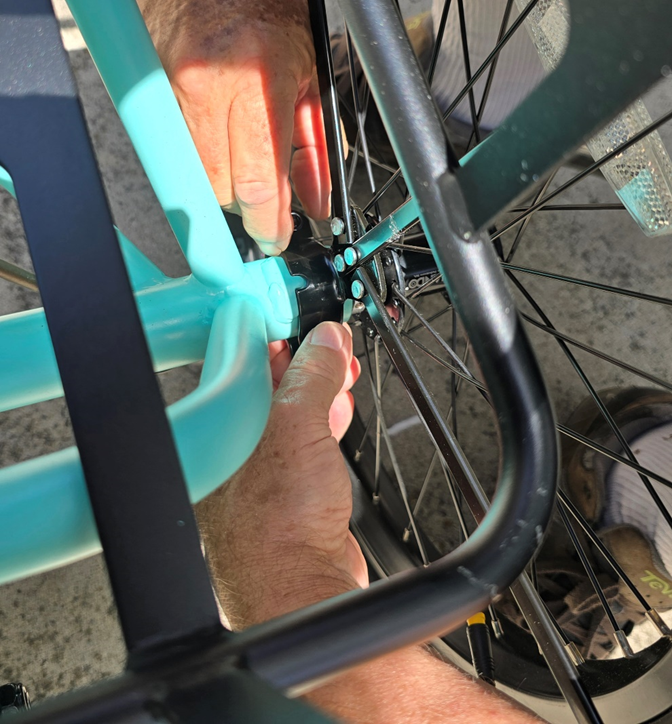
Next, remove the nut from the end of the quick-release axle and slide off one spring, again noting the orientation of the spring. With the wheel resting securely in the front fork dropouts, slide the axle into place from the left side of the trike, the same side as the brake disc. Slide it all the way through and use a finger to keep some pressure on it.
Then slide the spring onto the opposite side, properly oriented, and attach the plastic nut. Without a little pressure on the clamp side of the quick-release axle, the axle will not protrude far enough on the opposite end for you to easily attach the spring and nut.
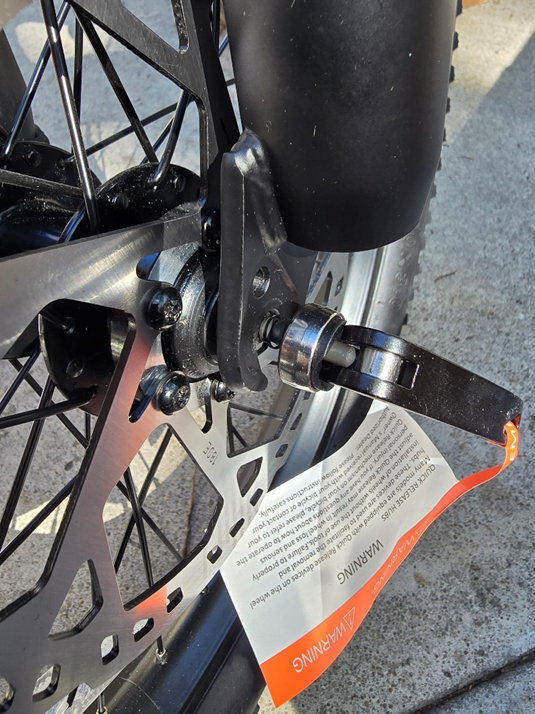
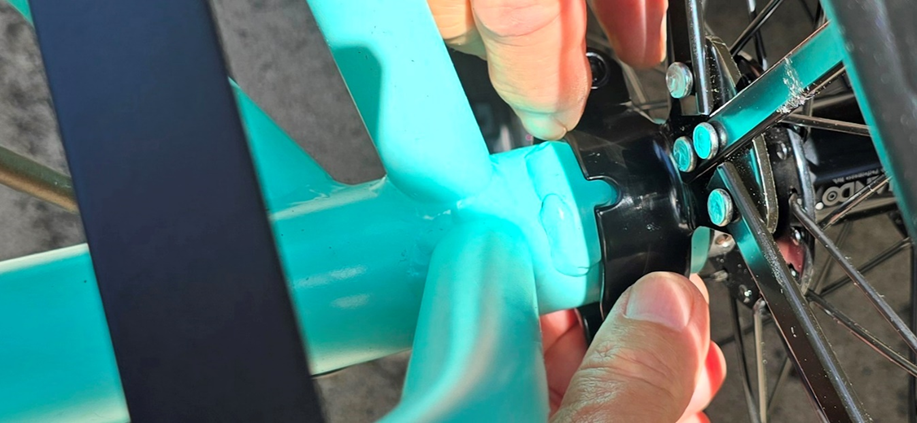
Orient the quick-release clamp so that the lever (handle) points to the front when the clamp lever is open. When it is closed, it will point to the rear of your trike. Close the clamp by hand. It must be tight enough that it requires substantial force to close it. Remember, this is what keeps the front wheel attached to your trike! If it needs to be tighter, open the clamp and tighten the nut on the opposite side.
STEP ELEVEN
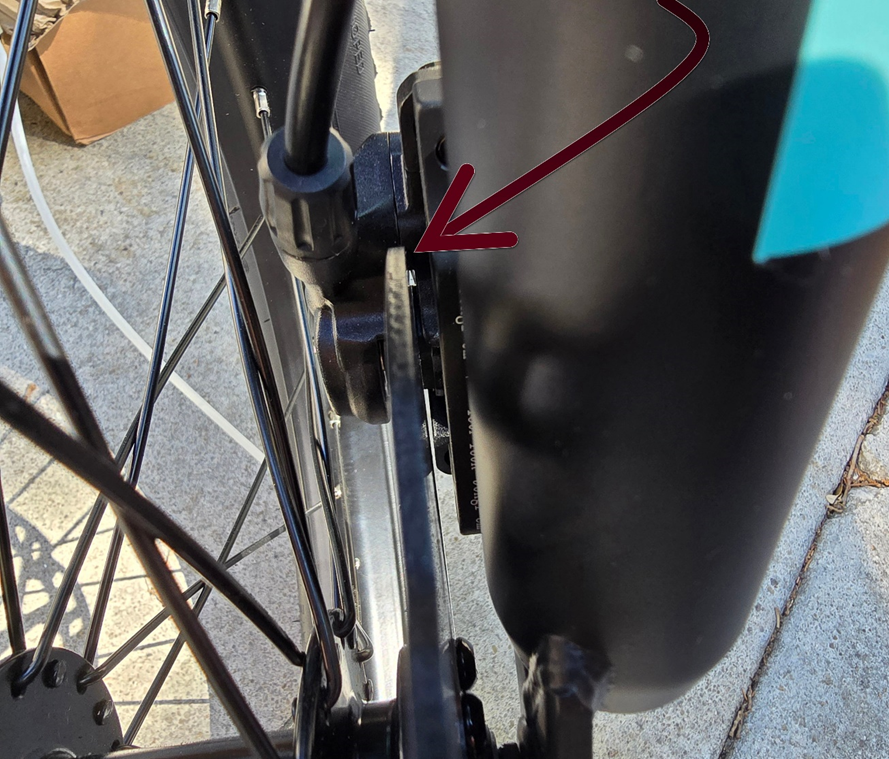
At this point, locate your charger and plug it into the port on the right-hand side of the battery, Then attach the power cord to an outlet or an extension cord. Your battery will soon be partially charged so that you can test your trike when assembly is completed. It is o.k. to ride your trike with a partial charge, and it will likely take 4-6 hours to achieve a full charge. For more battery info, visit www.mooncool.fun and read the article on maintenance.
STEP TWELVE
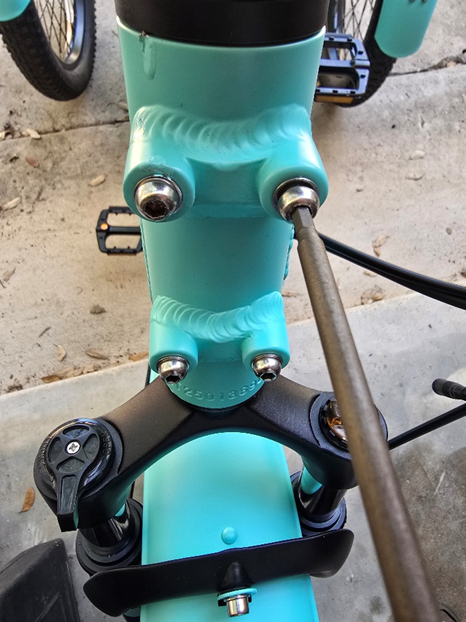
Install the handlebar. Grasp the end of the stem tube and push/pull it outward and upward, then lock it in the upright position using the clamp.
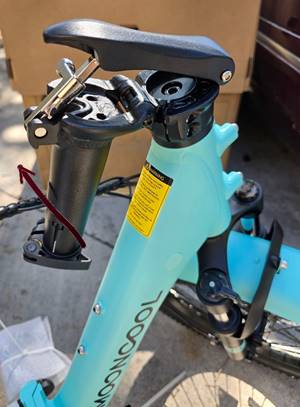
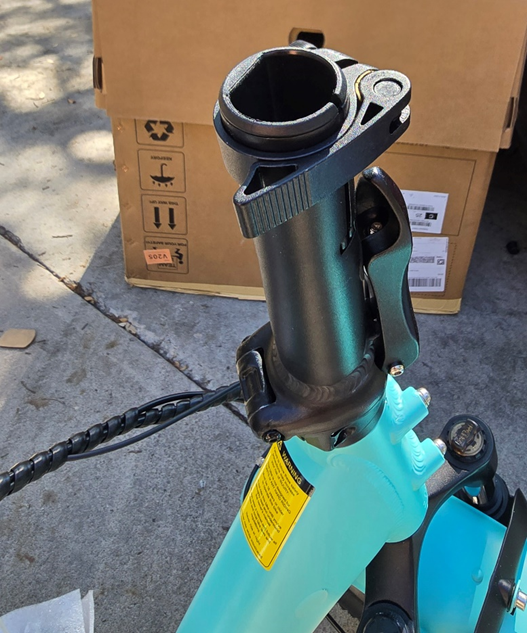
After removing any remaining packing material, release the clamp at the top of the tube and slide the handlebar stem into the tube. For now, just guess on correct height for the handlebar. You can easily fine-tune it later to achieve the best height..
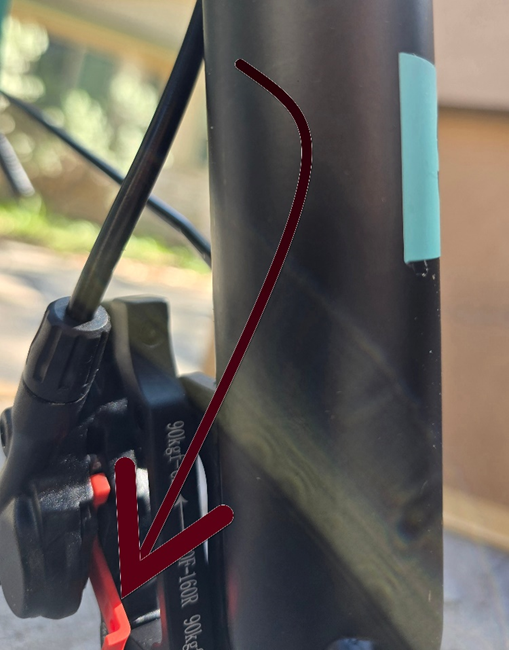
Note that Mooncool designed the tube with a flat side making it impossible to orient the handlebar incorrectly. Do not exceed the maximum height as shown below
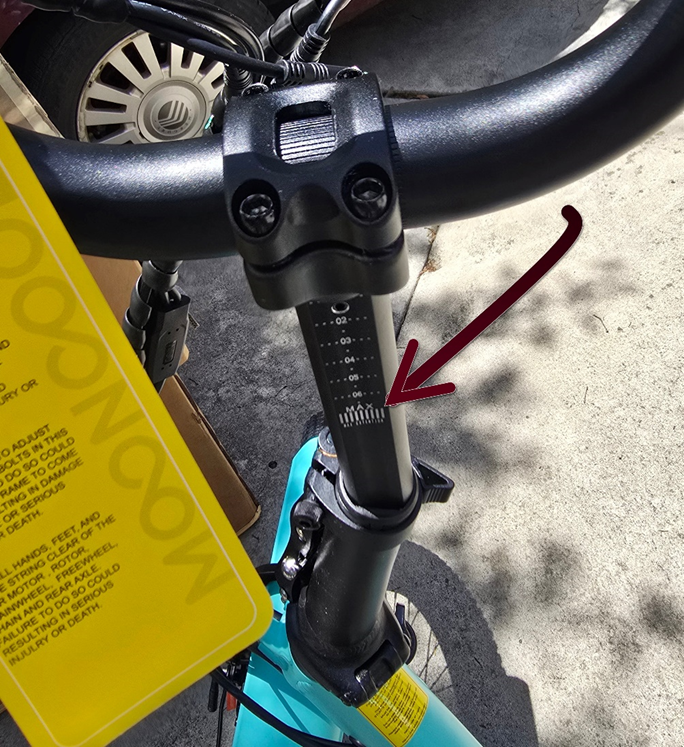
Trace the wires coming from the display and secure any loose connections. Take care to match color and align the small black arrows on each plug, being careful not to bend the pins. If it seems stuck or stubborn, wiggle it slightly from side to side to while pressing a little harder. this encourages the pins to slide into place.

STEP THIRTEEN
Install the rear fenders. To make it easier, some owners like to remove the rear basket and/or wheels. This is fine to do, and may even be the best approach. I don’t like taking time for the removal and re-attachment, so I prefer to work with the basket and wheels in place, using the long-shaft hex wrench.
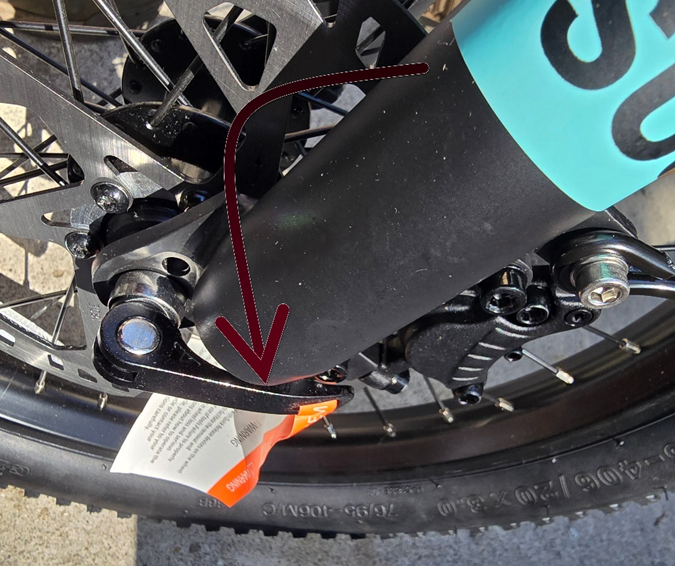
Remove any remaining shipping protection and remove one bolt from each fender clamp. I find it best to remove the bolt on the side that faces the rear of the trike.
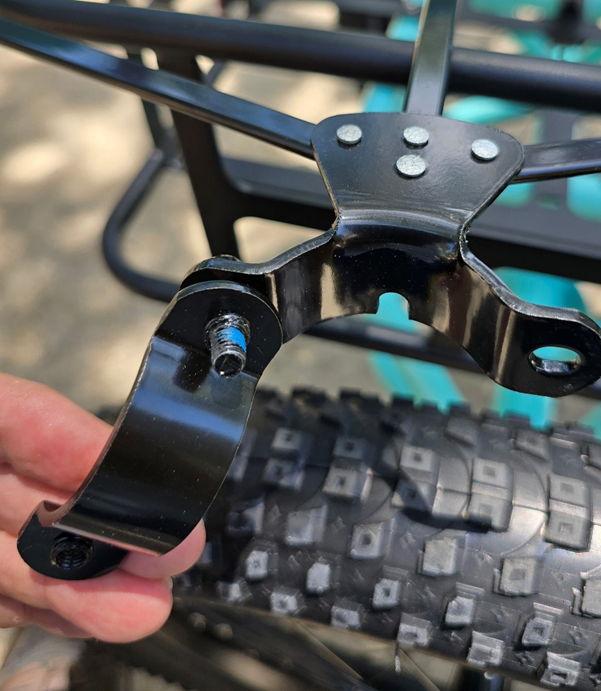
Be sure the tail light is to the rear. With the clamp opened, slide the fender clamp into place. You can gently rotate the fender to the rear to make it easier to get the bottom of the clamp under the axle and into place. See photo below. Take care to keep the taillight wire free from the clamp. Then you can insert the clamp bolt and tighten it.
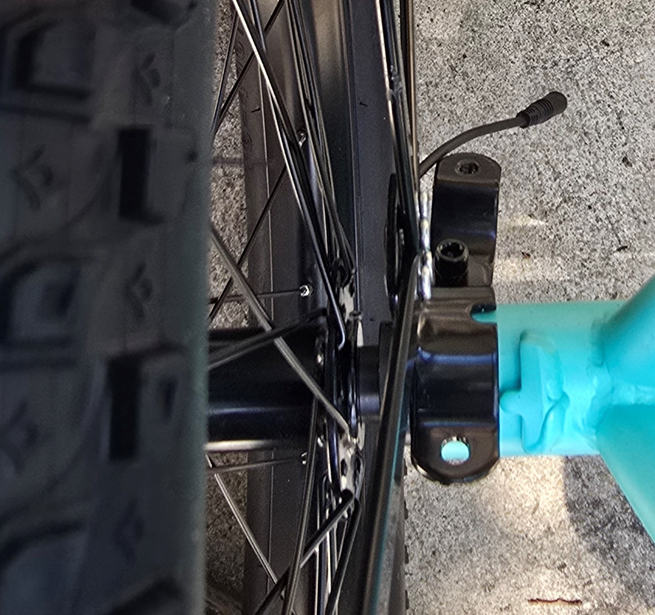
Always get the bolts started by hand, to avoid damaging the threads:
Be sure the clamp is fitted to the notch as closely as possible:
After tightening by hand, use a hex wrench to complete the tightening of the clamp:
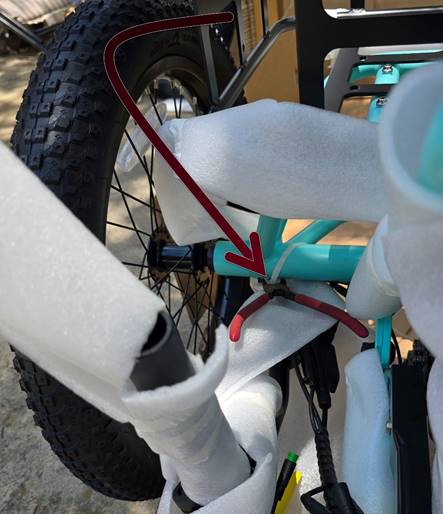
Of course, do the same with the other rear fender. Then, to avoid almost inevitable rattles, center the fender over the tire and use one or more zip ties to hold it in place and prevent rattles as shown below:
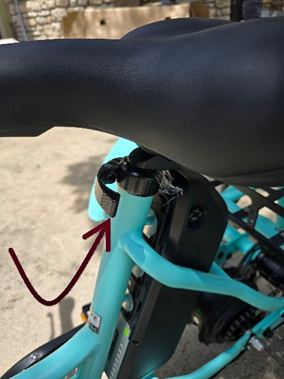
STEP FOURTEEN
Locate the seat post clamp and pull the lever outward to loosen it. Take a guess on the correct height (fine-tune it later). Tighten the clamp, adjusting it as needed…make it very tight.
STEP FIFTEEN
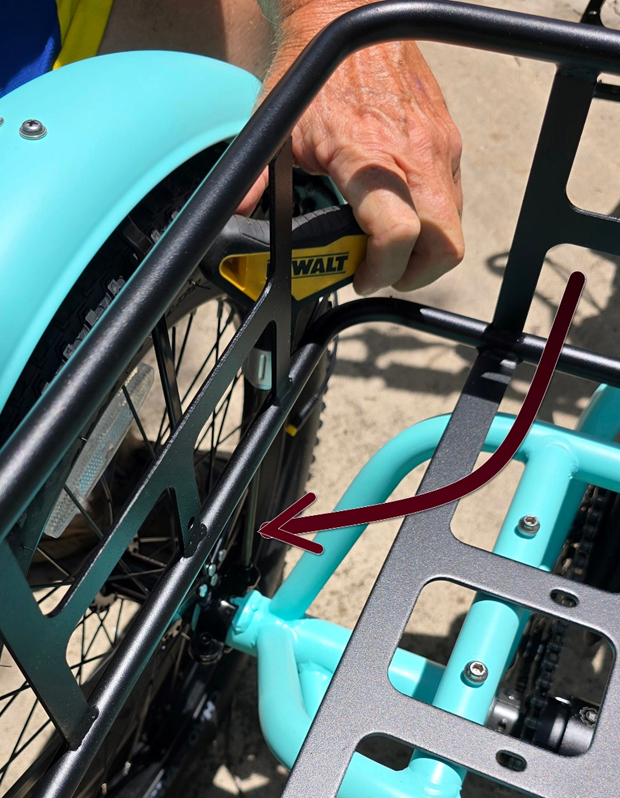
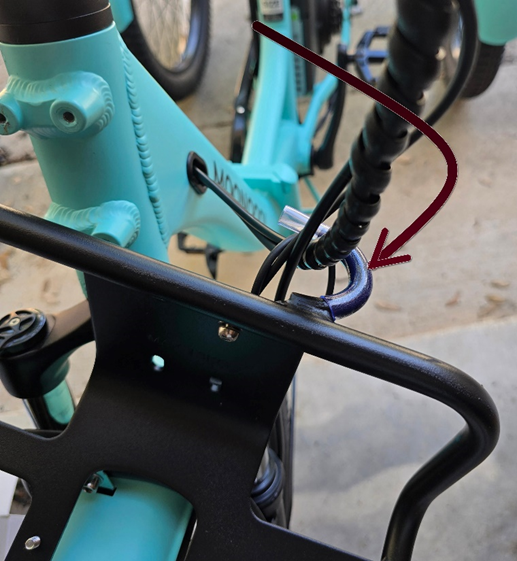
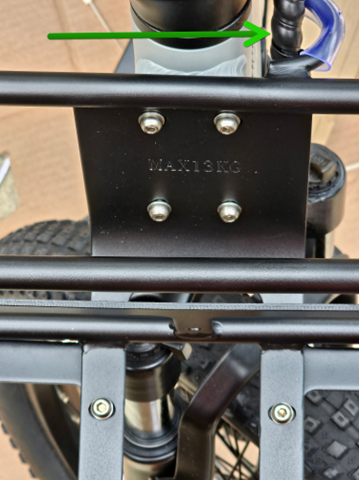
Install the front basket. Use a hex wrench to remove the four bolts from the front of your trike:
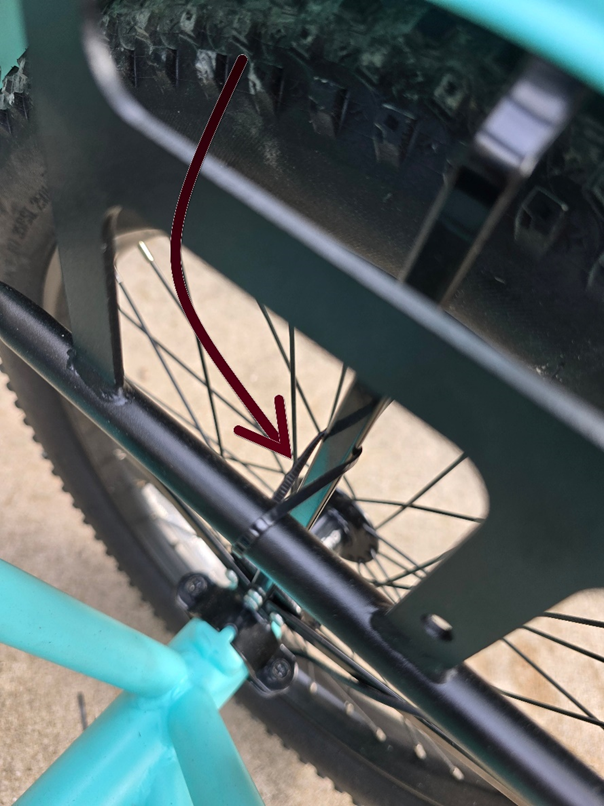
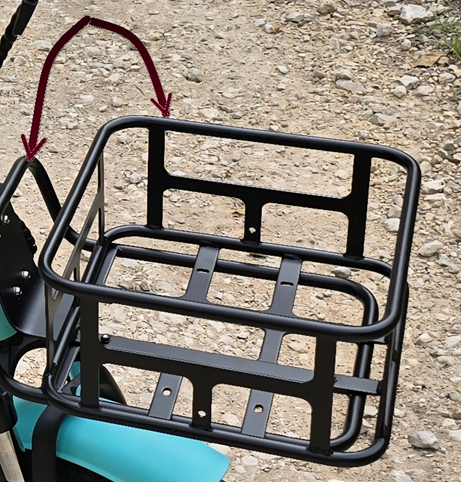
For extra sturdiness and increased load capacity, Mooncool uses a rack support under the front basketl Of course, the rack must be installed first, using the four bolts you just removed. Before you get started on the first bolt, tuck the wiring harness into the retaining hook as shown below:
After installing the rack support, place the front basket on the rack and locate the nuts used to secure it to the support rack:
STEP SIXTEEN
Install the headlight on the front basket. Secure it tightly, as it must endure a lot of vibration when riding.
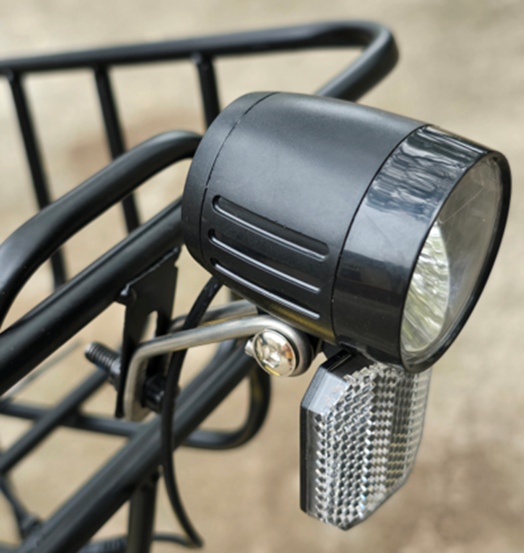
Locate the headlight wire coming from the frame and connect it to the wire coming from the headlight. Connect the two wires, being sure to orient the plug pins properly…align the arrows!
BEFORE YOU RIDE
Make a thorough visual check of the assembled trike, just to be sure you haven’t missed anything.
Push the trike while walking alongside and activate the brake levers, one at a time. Both levers should stop the trike abruptly.
Then check the operation of the headlight, taillights, turn signals, and horn (consult user manual). Enjoy the ride, and be safe!
CLICK HERE to read Get Ready for Your First Ride.