
Unboxing the Mooncool TK1 Fat Tire E-trike
NOTE: This unboxing article was written before Mooncool upgraded the TK! Fat Tire e-trike. Not everything will apply, but nevertheless, it may be helpful to read through it before assembling your new trike.
You did the research and selected Mooncool as your e-trike brand of choice! You selected the TK1 Fat Tire in the color of your choice. Then comes the wait for arrival. It’s a long way to the US from China, Sometimes your trike is already in the US, and other times it is traveling by ship. No worries…it’s definitely worth the wait.
If you have already ordered, while you wait you can prepare and be ready to do a great job of unboxing your Mooncool TK1 and getting it ready to ride! Your new ride will be delivered soon in a big box…here’s a look at my delivery…

This article is not a substitute for the Mooncool instructions. Be sure to locate and read the included user instruction booklet.
NOTE: The steps in the guide below differ in sequence from the Mooncool instructions.
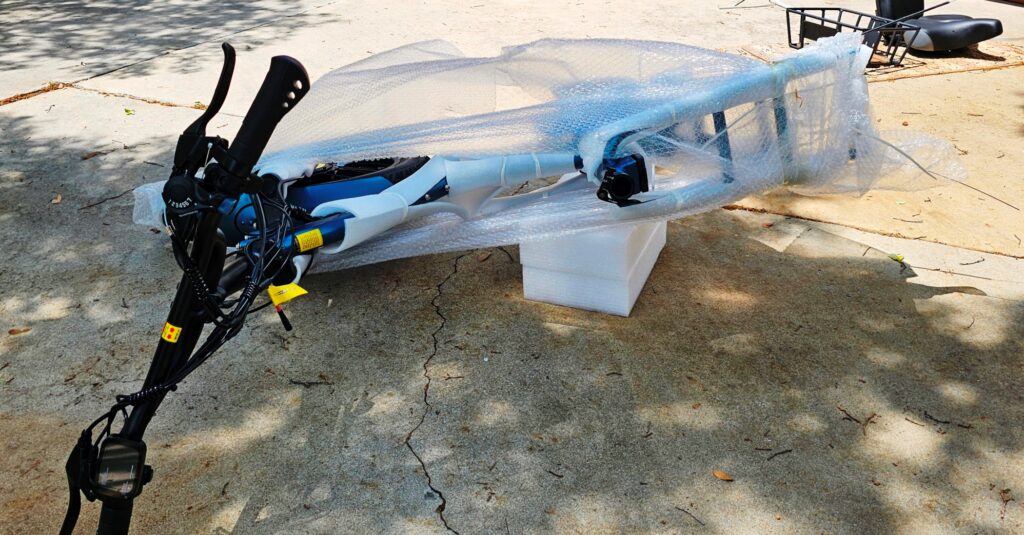
If you have ever had an e-bike shipped, you can see why I thought Mooncool had mistakenly shipped an e-bike to me. This box looks more like an e-bike box than an e-trike box. That’s because Mooncool has designed a space-conserving method of packing the Fat Tire e-trike. This saves you shipping dollars!
STEP ONE
Gather the needed tools. Mooncool provides tools needed for assembling the e-trike, or you can opt to use your own. All you need right now is a pair of snips to remove the straps around the box. Consider also purchasing the tool recommended in Step Sixteen.
STEP TWO
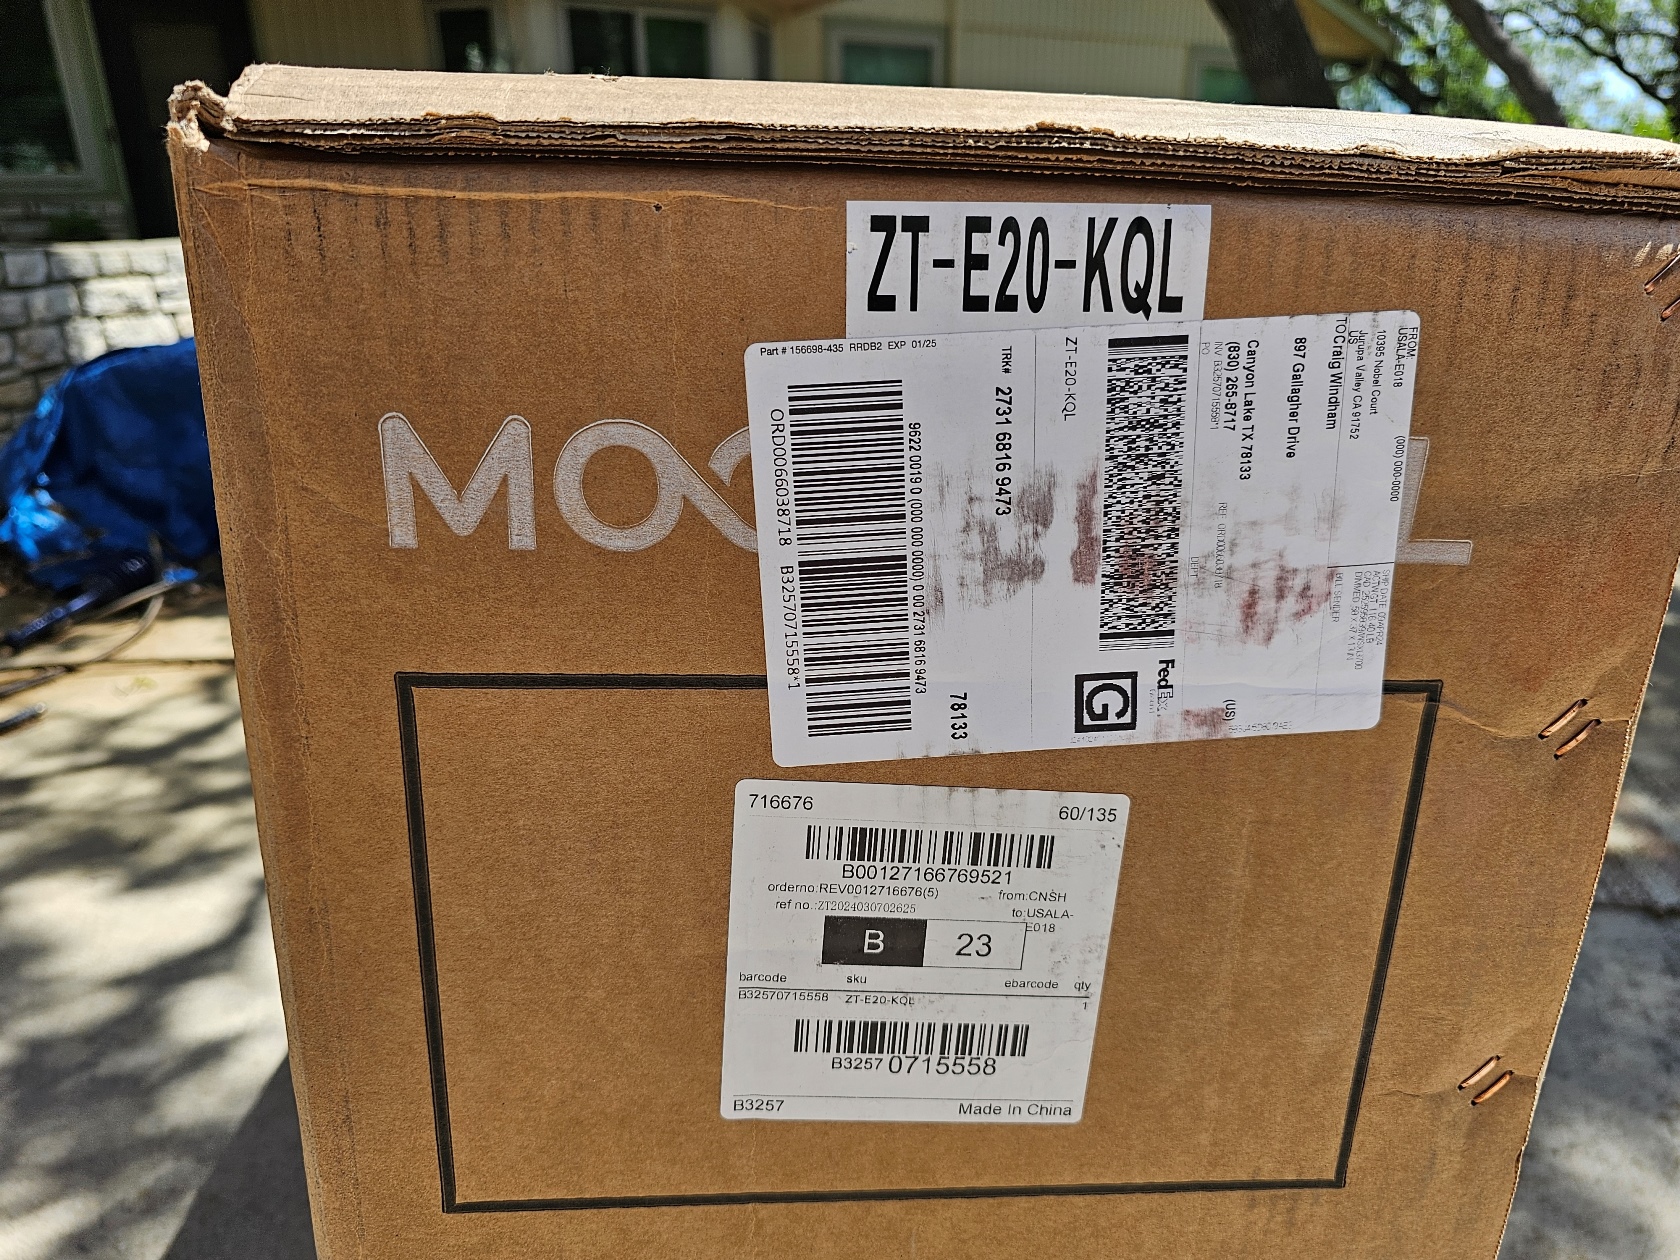
It’s important to take a couple of minutes to photograph your unopened shipping box. Be sure to include any damage to the shipping box and all labels on the box.
STEP THREE
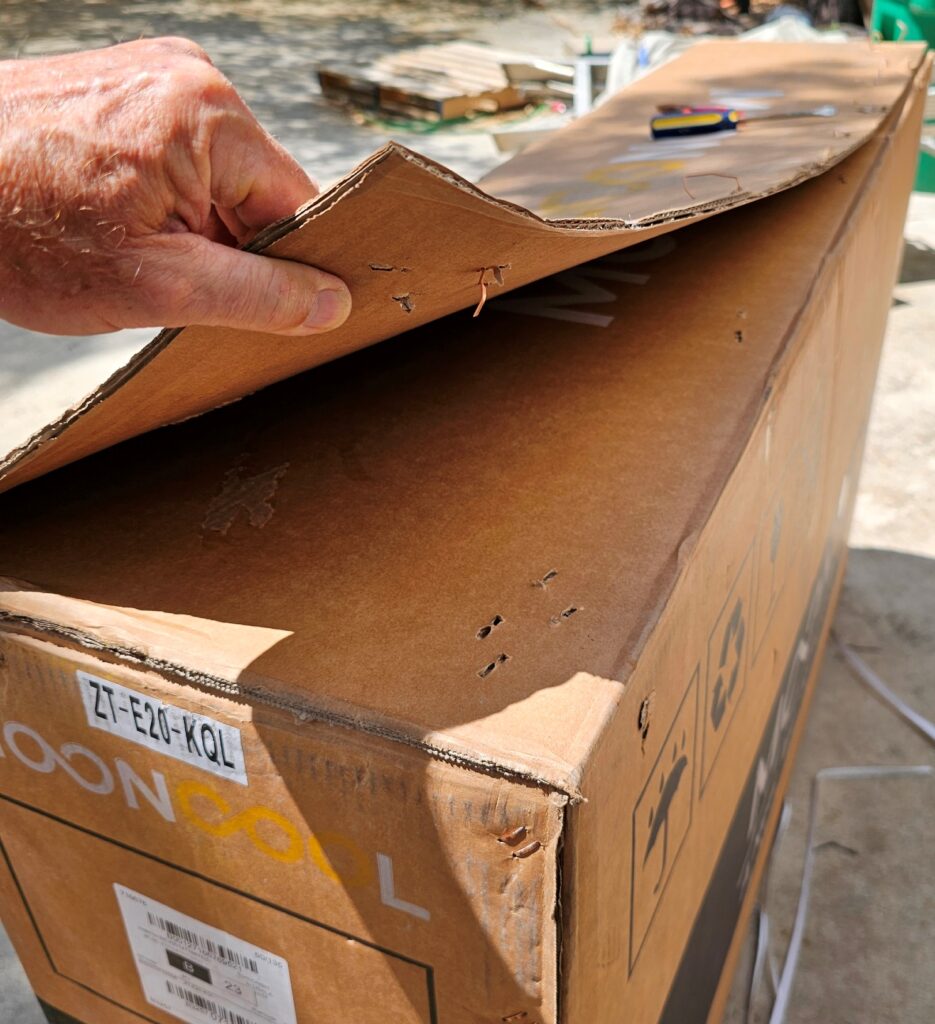
Remove the staples from the shipping box. Preserve the integrithy of the lid in case of the very unlikely event of needing to return the e-trike. Note that in addition to the staples, the lid flap is secured with glue. In the photo below you can see that the glue is holding down the flap even though all the staples are removed.
Carefully pull the flap upward, trying not to tear it.
STEP FOUR
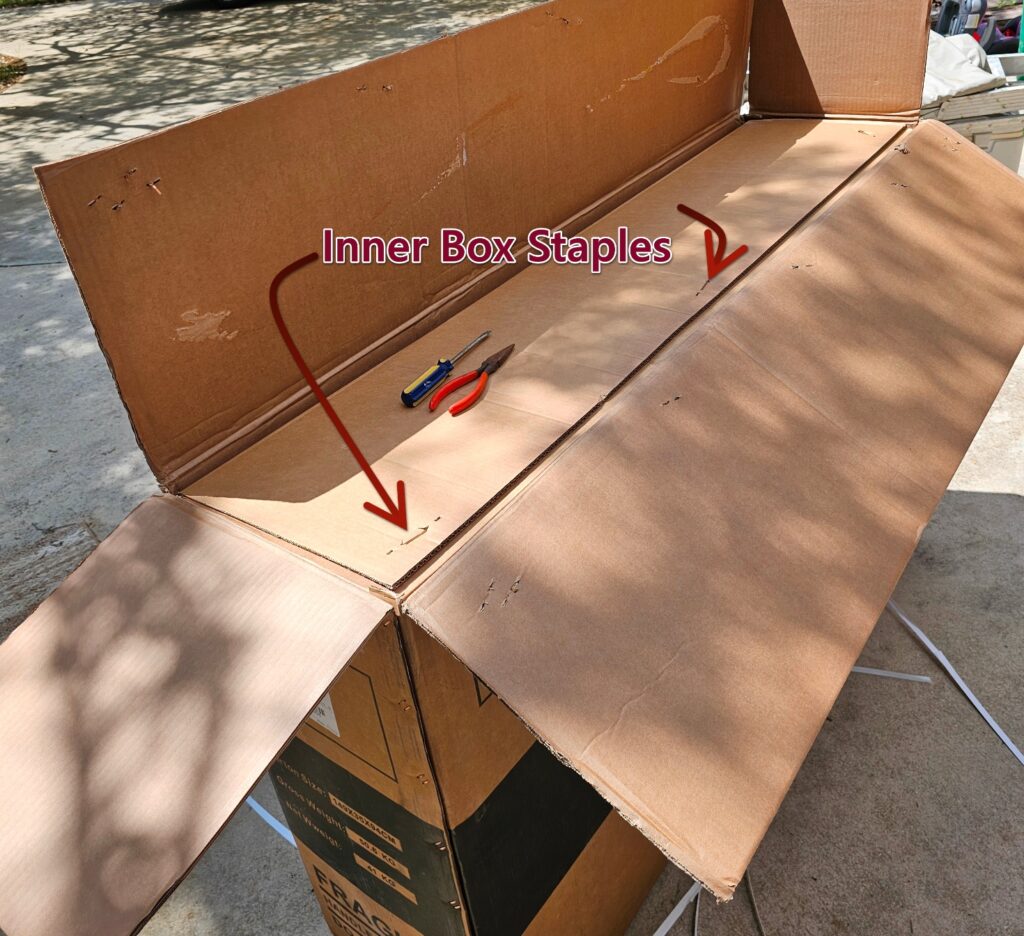
Note that Mooncool has provided extra protection by double-boxing. Open the inner box, and see the care the Moooncool has taken to protect your trike from shipping damage.
STEP FIVE
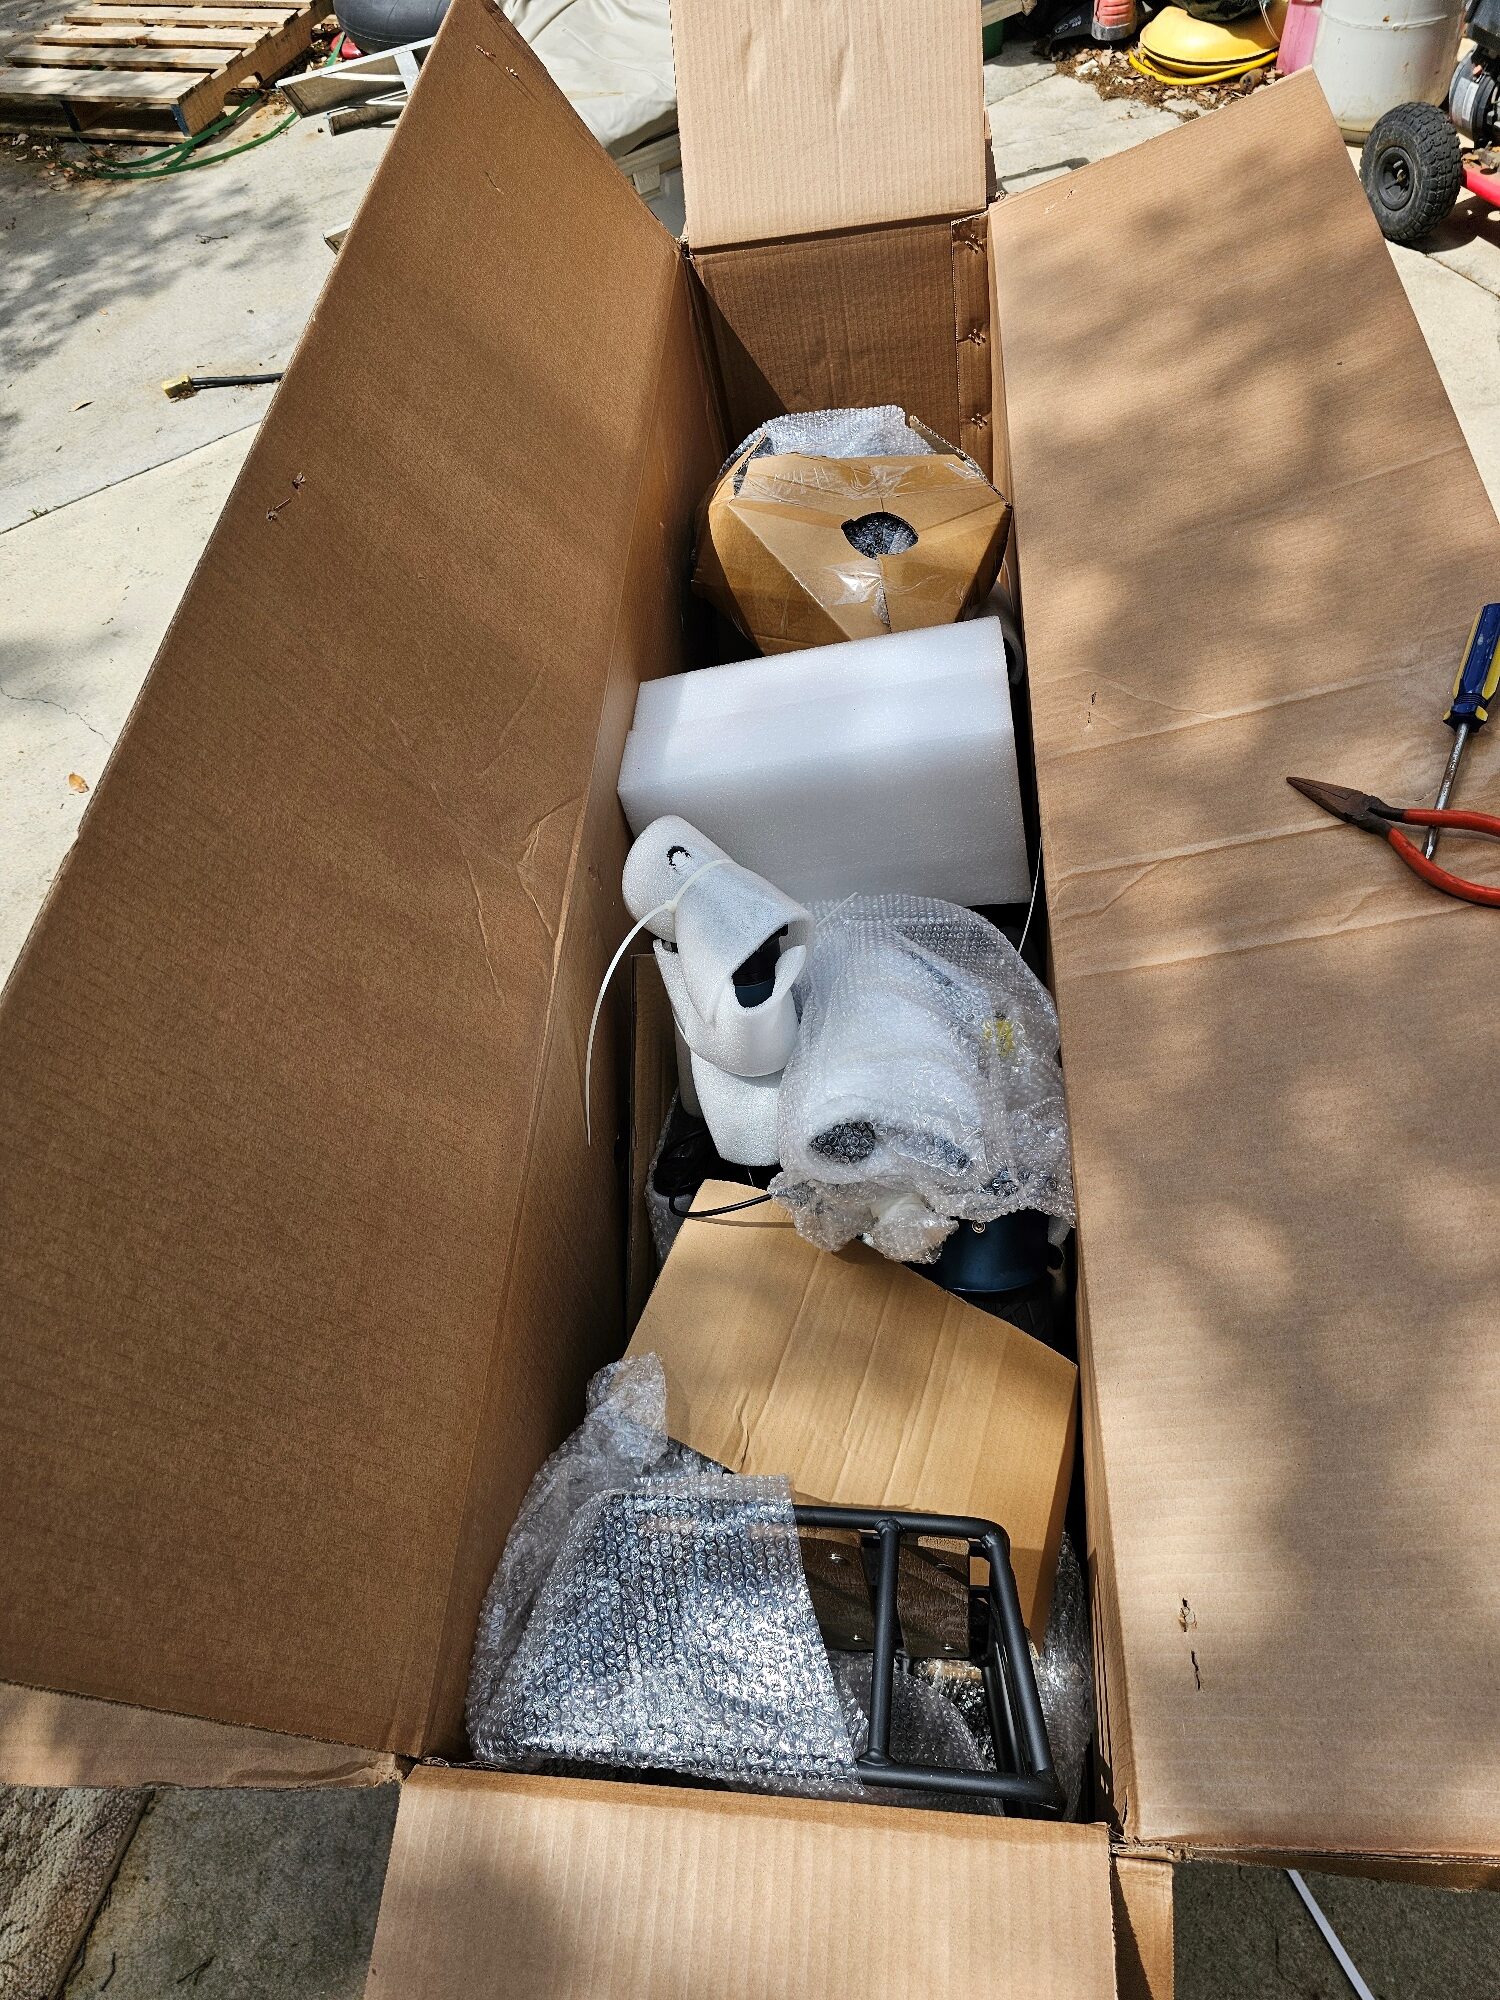
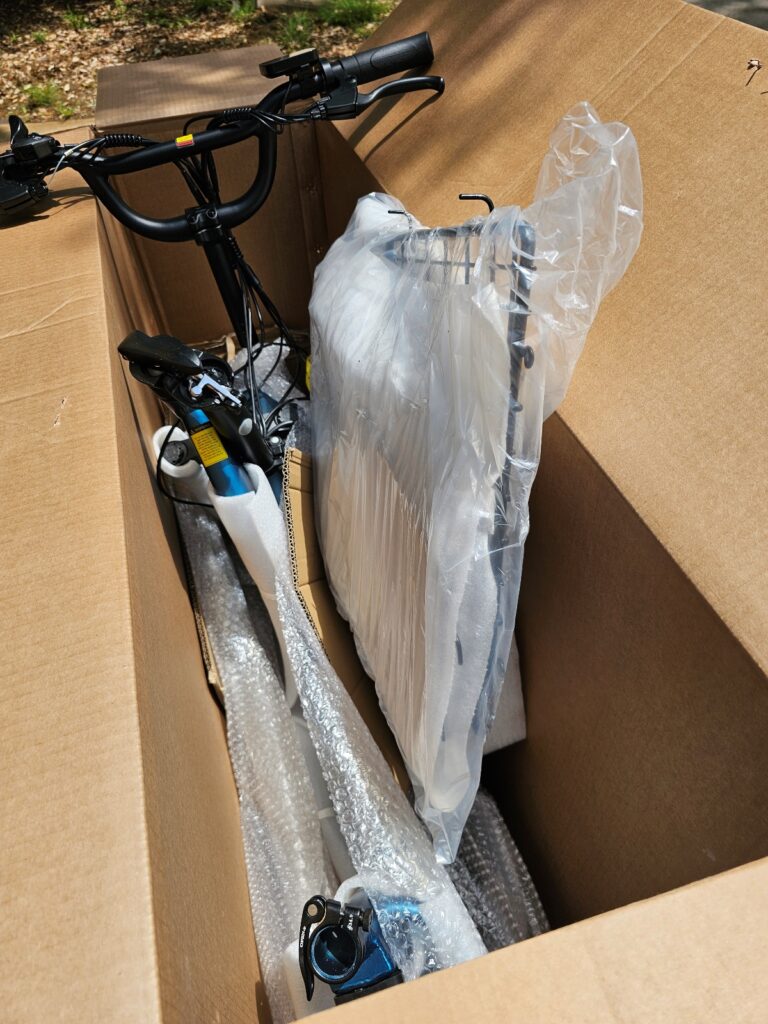
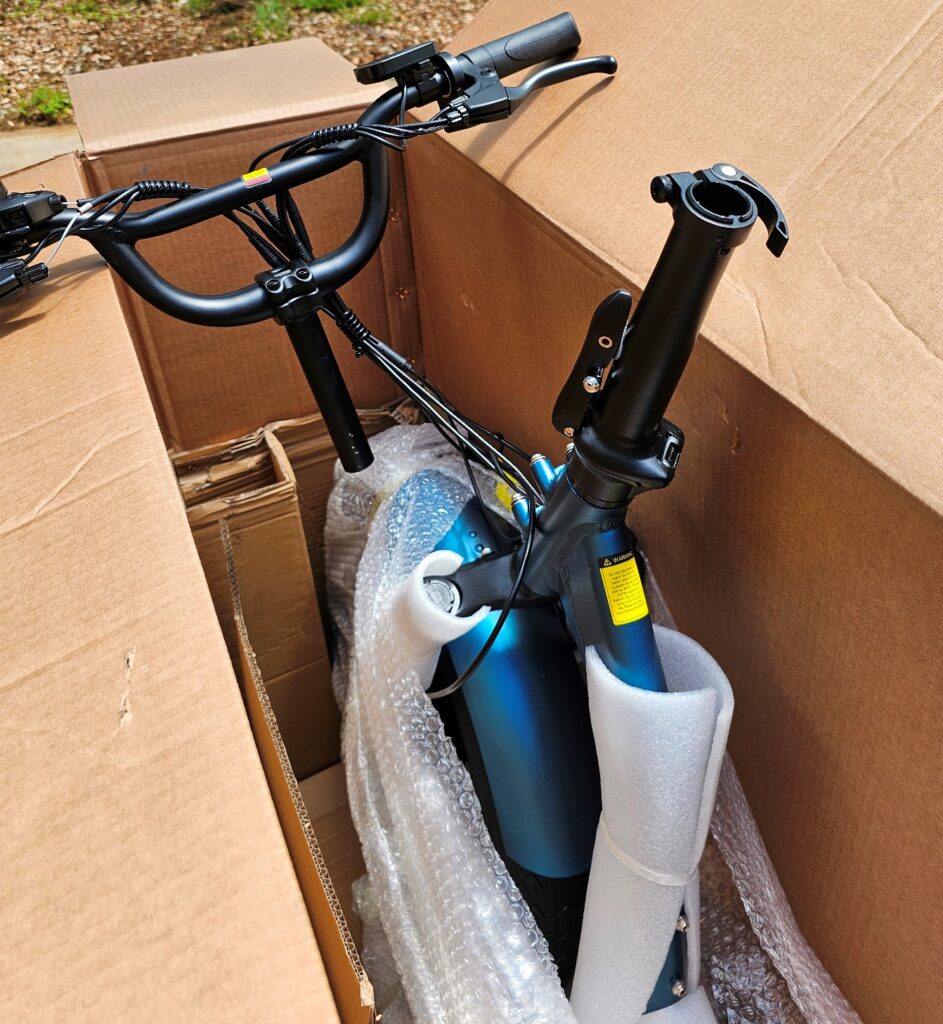
Begin carefully unpacking the box. Set the various parts aside in such a way that they will not be damaged. Some people like to cut the box open, but I prefer to leave the box intact and remove items one at a time. Here’s a look at the opened box and the excellent shipping protection.
STEP SIX
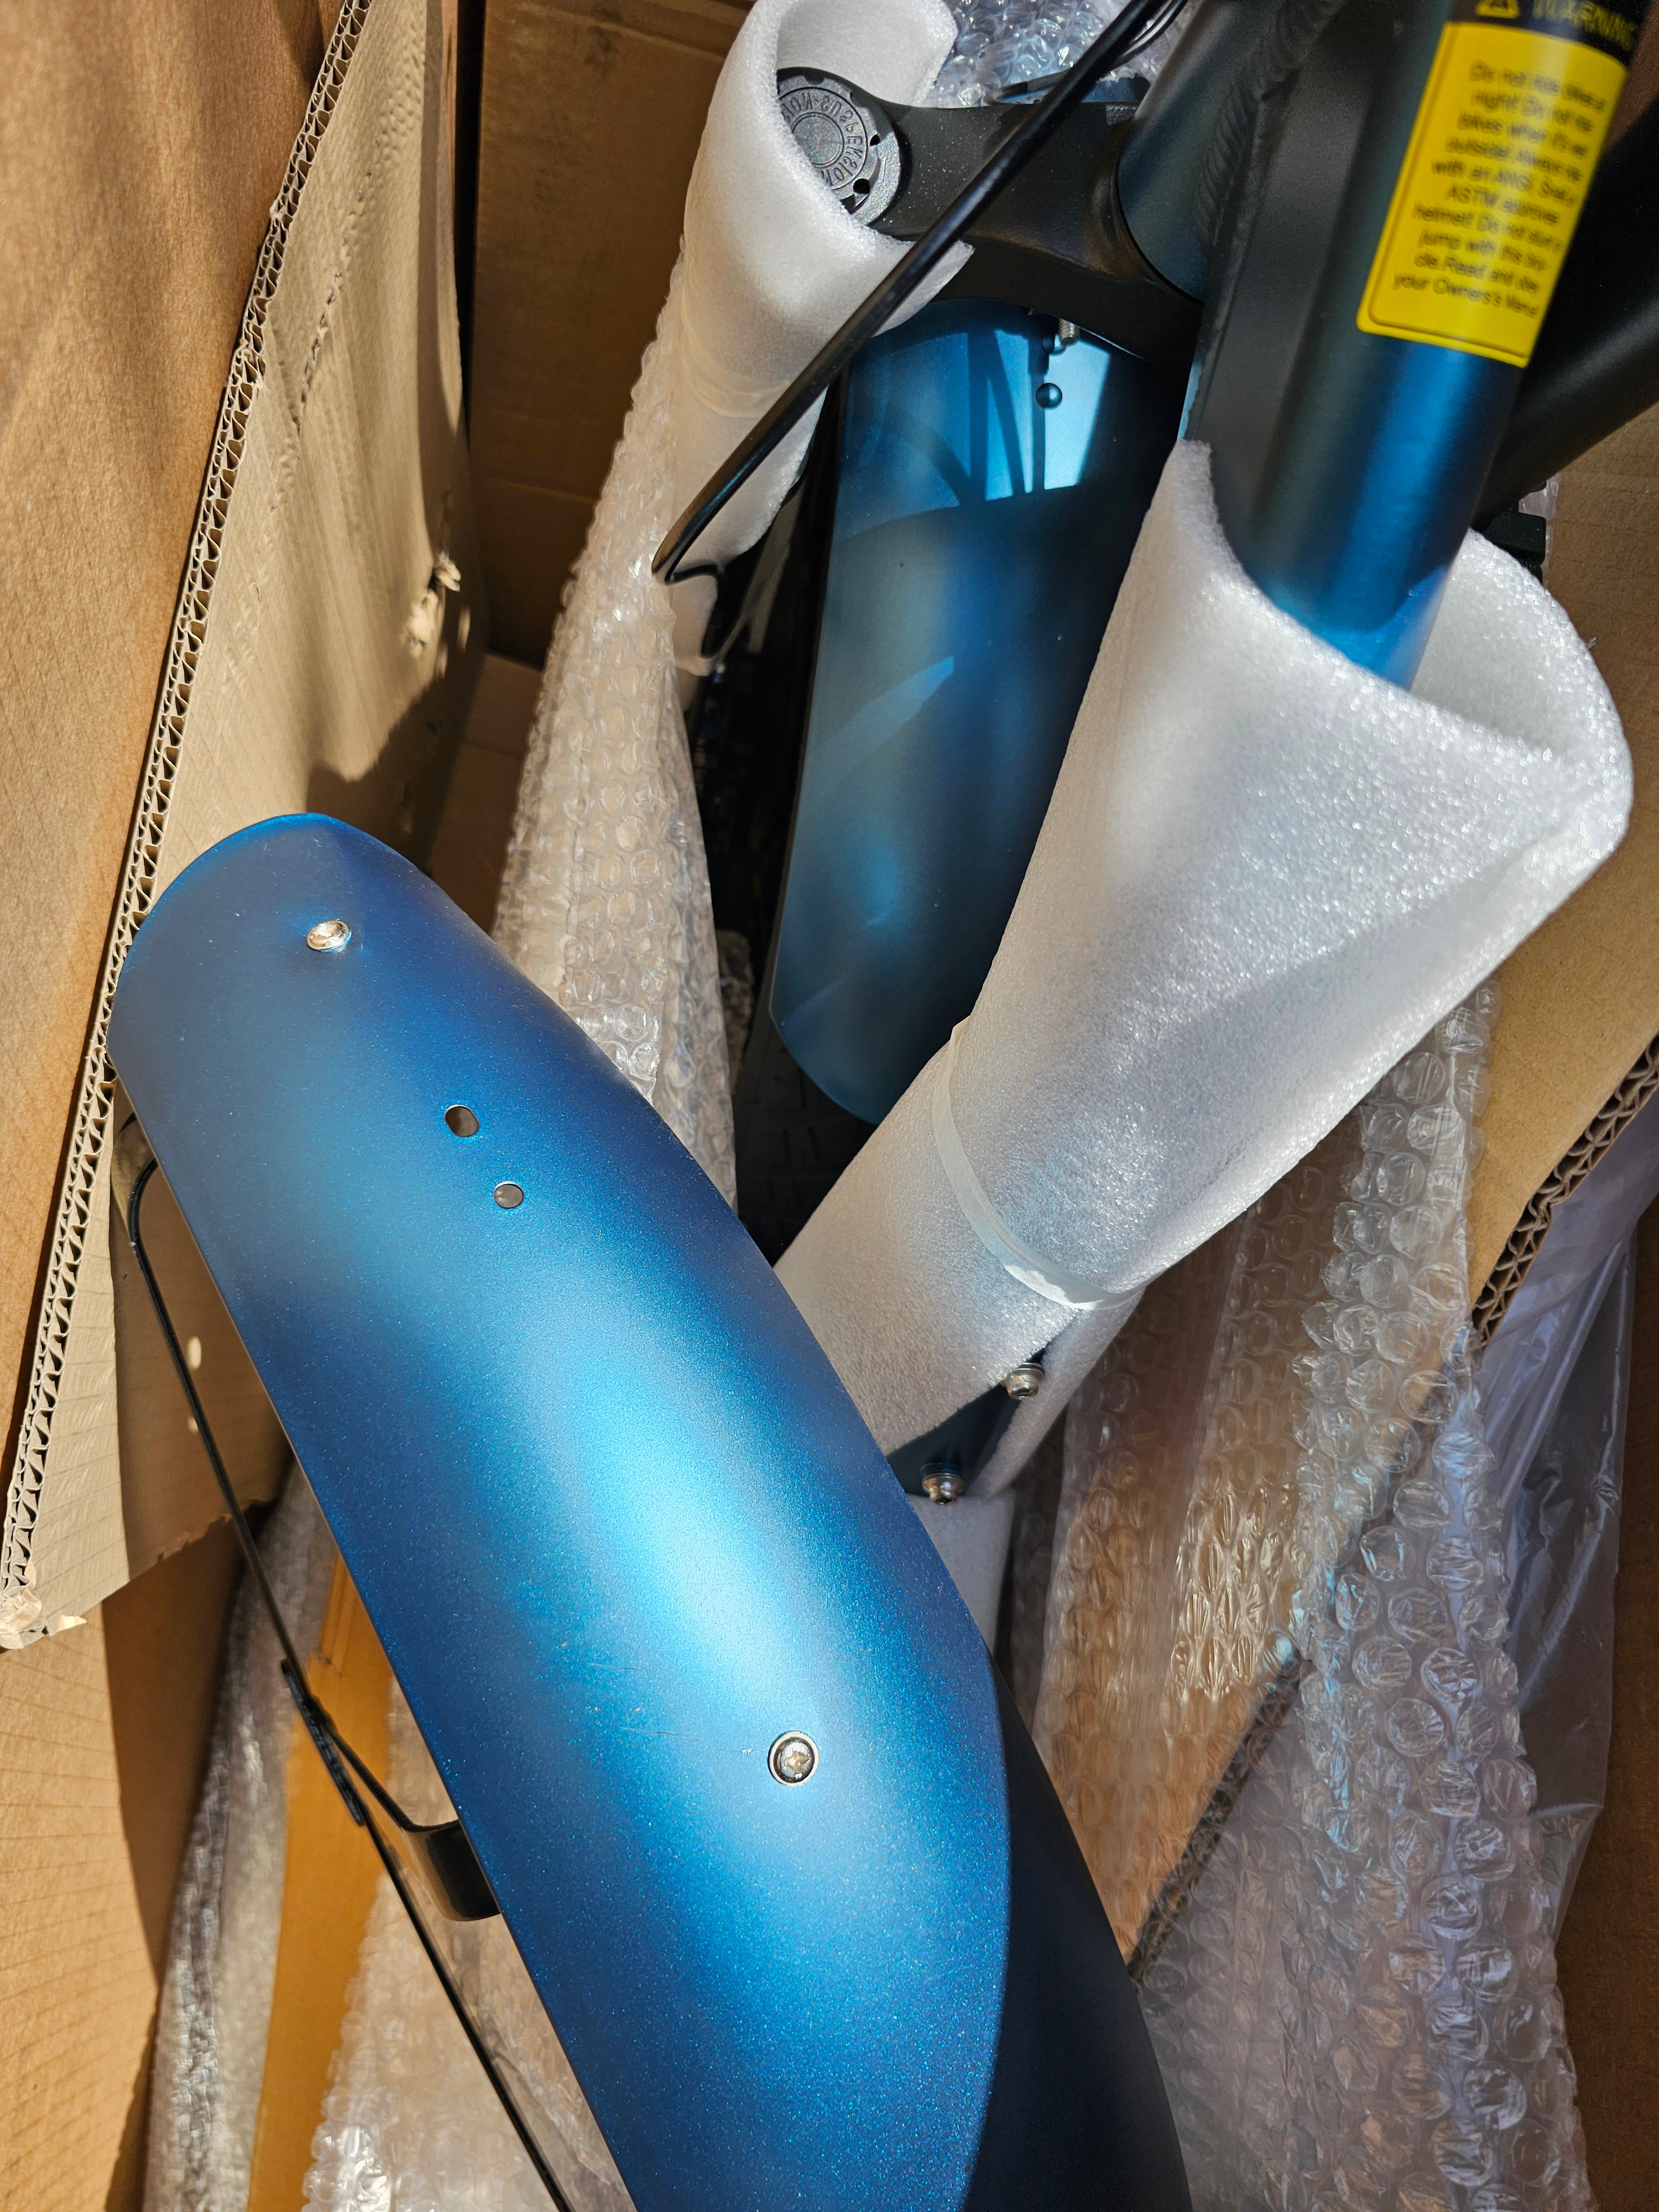
The removal of the trike parts and protective packing materials requires care. When you can see the rear wheels located in the box corner at the rearn of the trike, remove it from the box – note that the fenders are packed with the wheels, but they are not attached, so don’t let them fall. You can unpack the other wheel and fender later.

STEP SEVEN
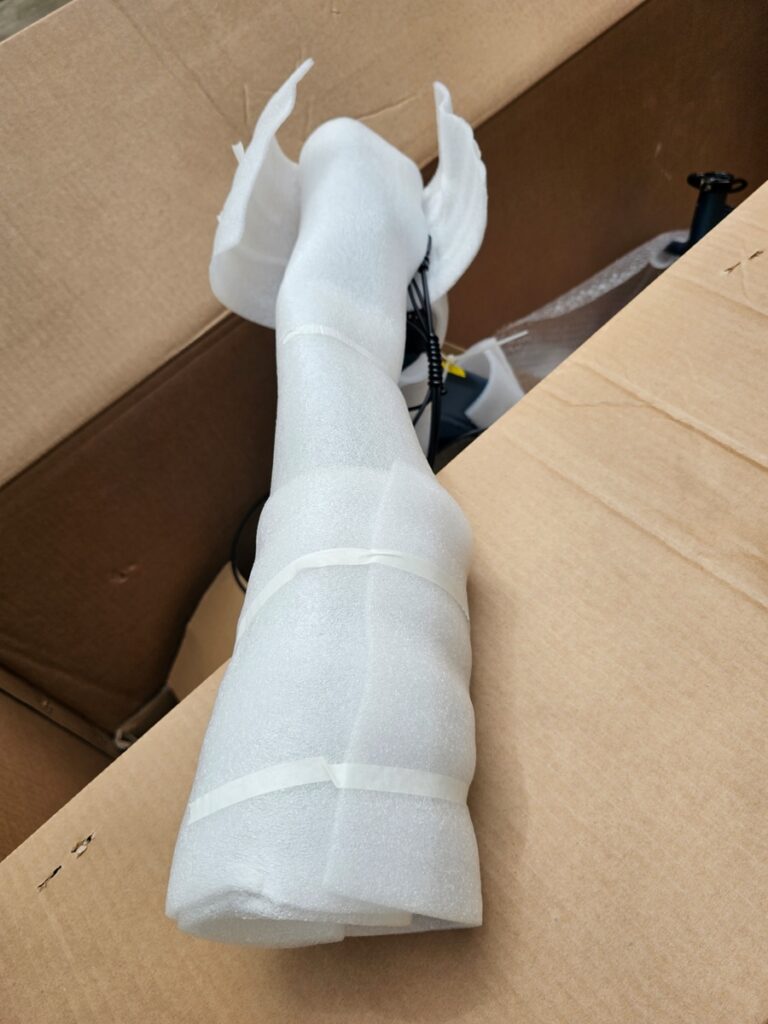
When you can get to the handlebar, pull it gently, working it back and forth until you can slide it out.
Then place it across the box where you can easily remove the handlebar wrapping:
STEP EIGHT
After unwrapping the handlebar, unpack the remaining rear wheel and fender…also the disassembled rear wire basket. Place there items aside for later assembly.
STEP NINE
Now you are ready to put the handlebar on the trike. First, raise and secure the handlebar tube…
and slide the handlebar stem into the tube. For now, just lock it in place. You can adjust it later.
STEP TEN
This step can be accomplished by yourself, as I did. However, it is easier with an assistant. Lift the trike frame up and out of the box. Place it carefully, using protective materials of your choice. I used the large styrofoam block from the shipping box.
STEP ELEVEN
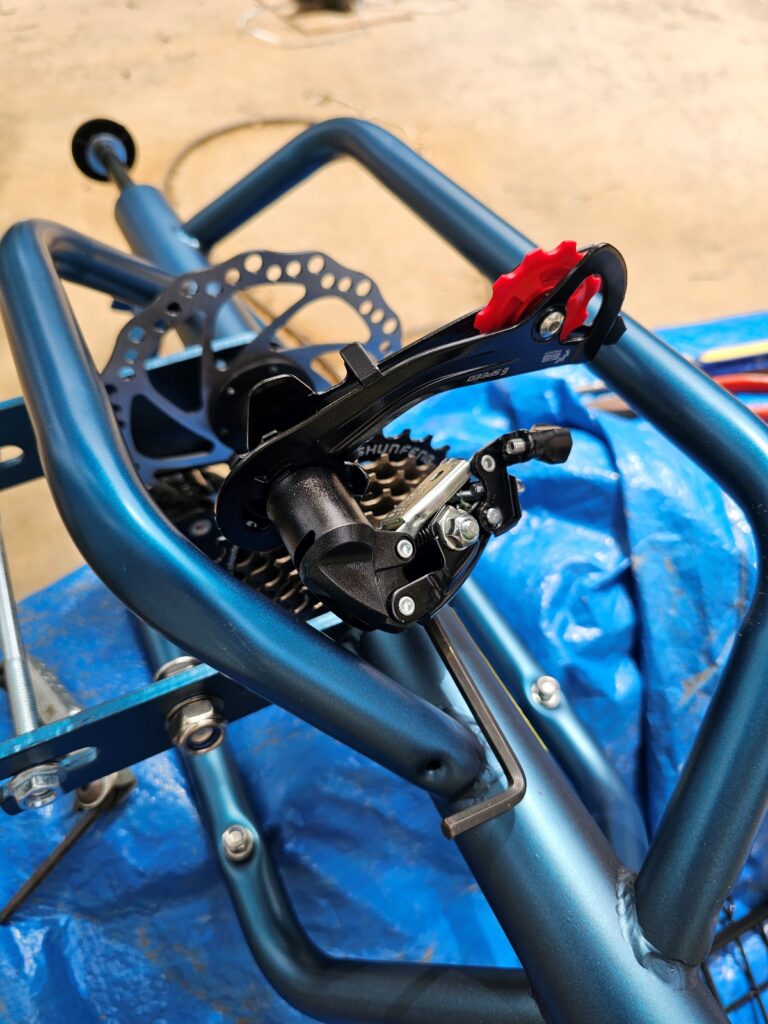
Locate the derailleur and install it on the rear carriage using the provided bolt.
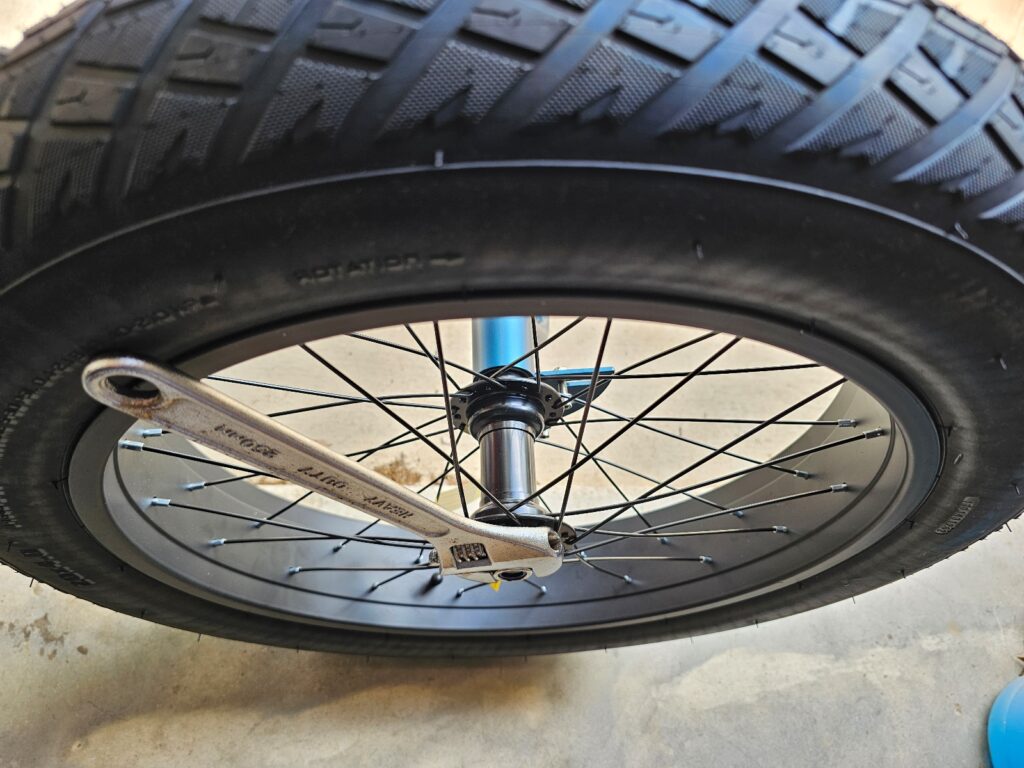
STEP TWELVE
Notice that the left side of the rear axle has a metal spacer…take care to not misplace it. Remove the nut cap from both sides of the axle and put them asisde nearby. You may need to pry and tap to get the caps removed. Don’t damage them – they are protective as well as decorative.
STEP Thirteen
Remove the nut and washer at either side of the rear axle. Slide the rear wheels onto the axle. Be sure to place the correct wheel as shown below. The red arrow is pointing out a small ticker with the letter “L” on it, indicating the wheel that goes on the left side:
Remember, the right end of the rear axle has no metal spacer…
Check to be certain you have placed the wheels correctly, and then tighten the nuts securely. You might want to use a wrench that provides better leverage rather than the Mooncool tool.
STEP Fourteen
Now you are ready to attach the rear axle to your trike frame. This can be accomplished by one person, but it is easier if you have an assistant.
Line up the frame with the rear axle as shown below:
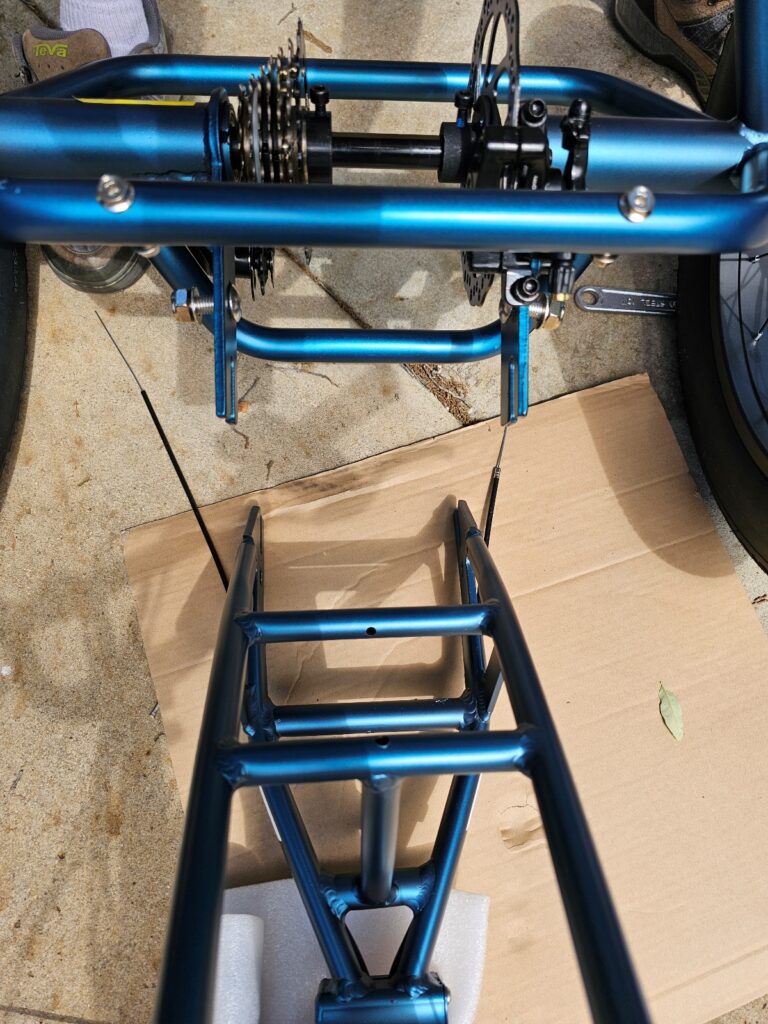
The rear axle is joined to the frame with four bolts. With one bolt in hand, lift the frame until you can slide it into place and insert the bolt. This will keep it lined up while you insert the remaining bolts.
Here is a view of how mine looks with alll 4 bolts in place and tightened:

STEP Fifteen
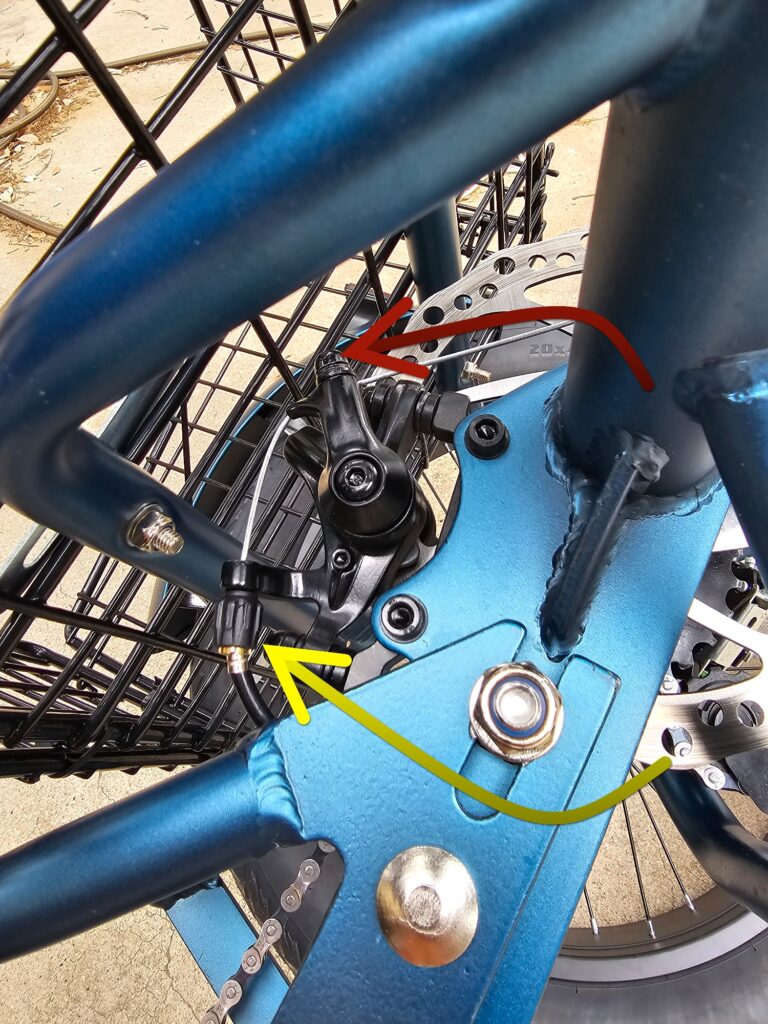
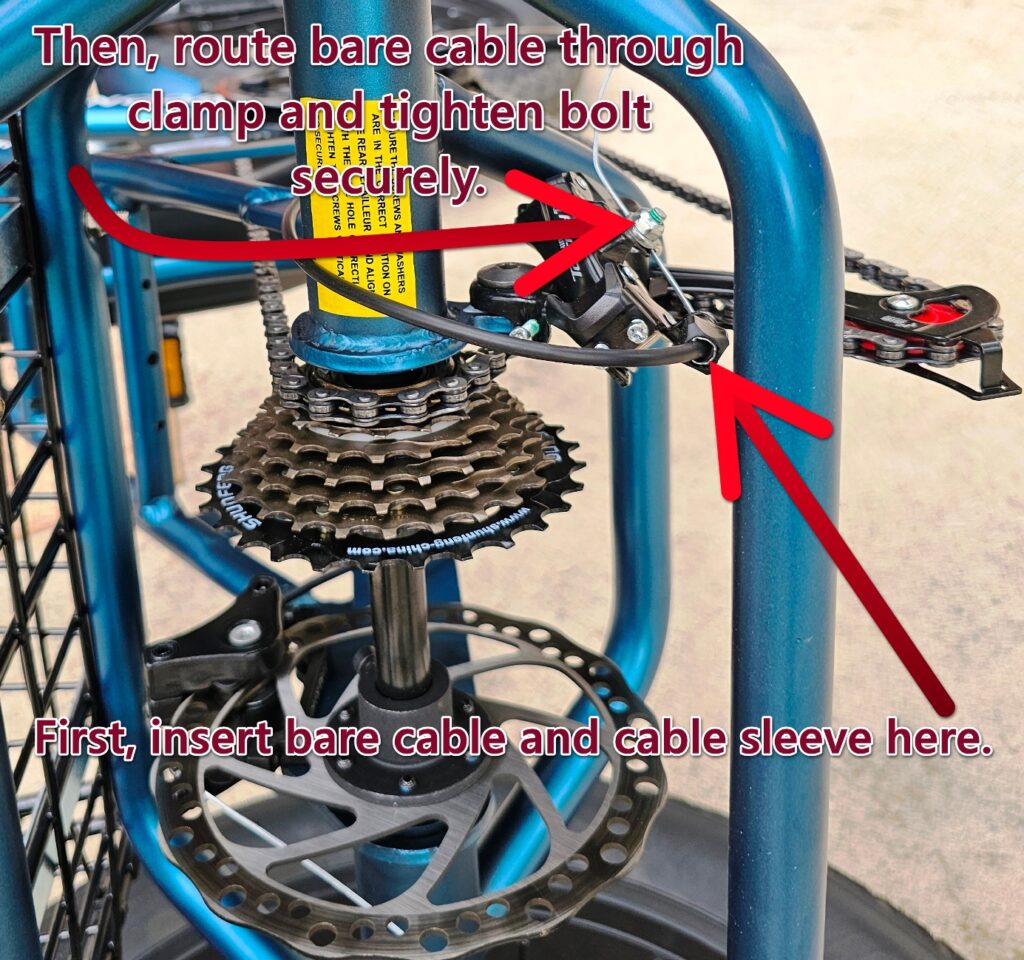
Attach the rear brake cable.
Squeeze the brake lever on the righthand end of the handlebar. Visually inspect to ensure the cable is correctly attached. Then locate the other end of the cable and route it as shown. Insert the cable wire as indicated by the yellow arrow and through the clamp indicated by the red arrow. Tighten the clamp firmly.
STEP Sixteen
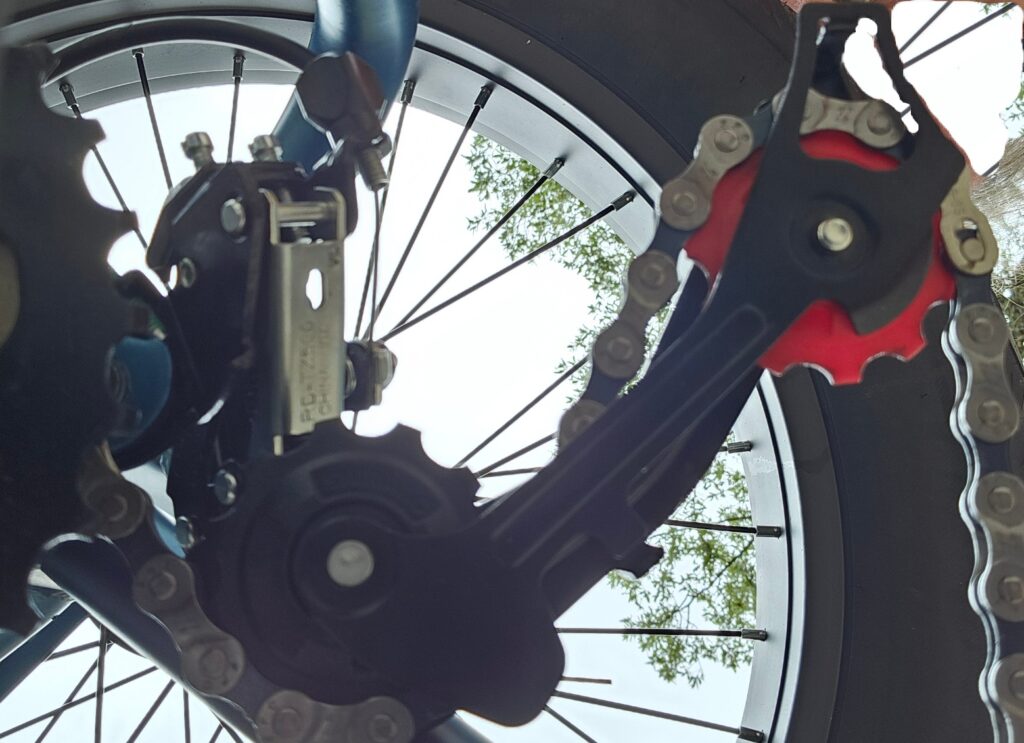
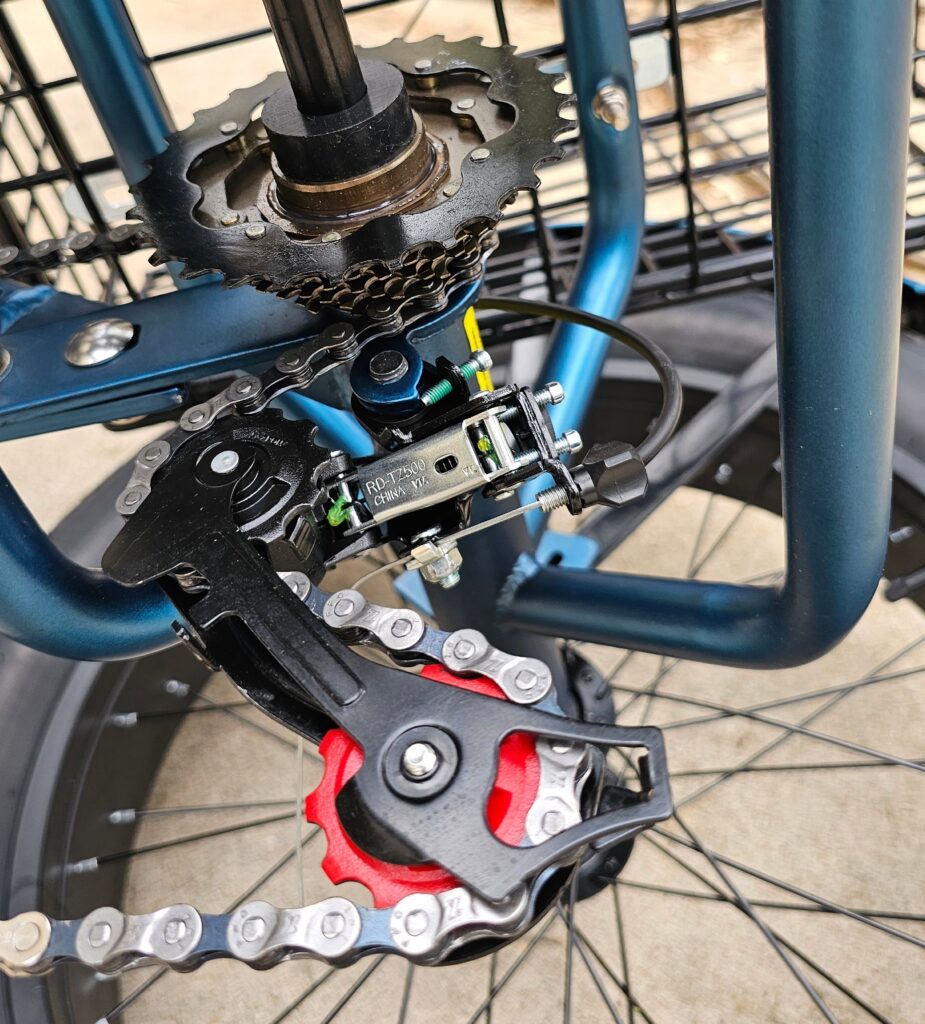
At the handlebar, move the shifter to 7. Locate the chain and prepare to install it. You might want to wear lightweight gloves or vinyl gloves to avoid the chain lubrication. Route the chain across the front chainring and back to the smallest ring above the derailuere (7th gear) with enough slack to continue routing the chain through the deraileure.
Note how the chain is threaded through the derailuere. For those not familiar with this process, here are 3 photos that will help you get it right the first time:
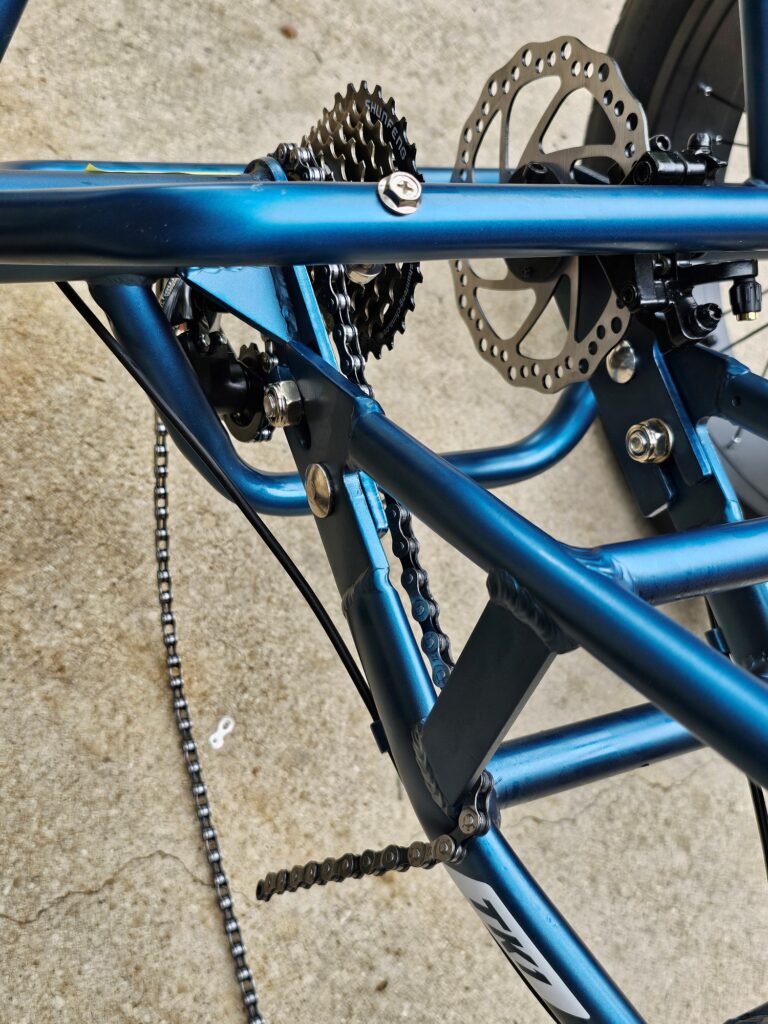
Now more-or-less center the two ends of the chain for easy access to joining. To have plenty of slack in the chain, temporarily lift it off the front chainring and let it drape right beside the chainring where you can easily lift it back into place.
Locate the “magic buckle” provided with your chain. It is much easier to install the buckle with the tool pictured below, and directly below the tool you can see how the buckle joins the chain:
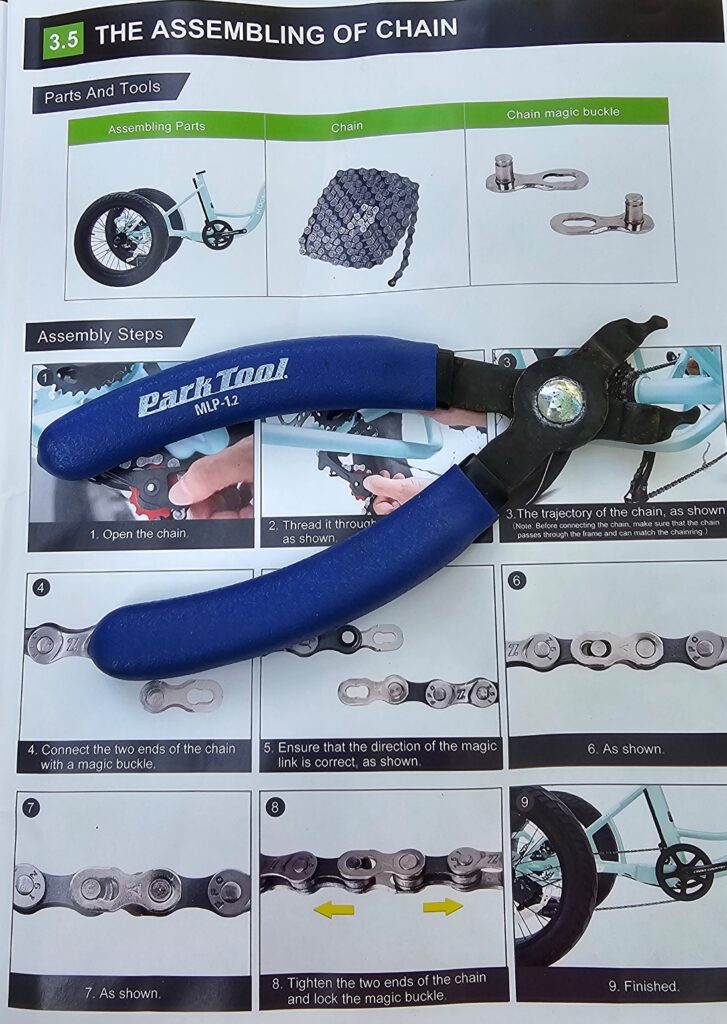
Ensure the buckle is firmly snapped into place, securely joining the two ends of the chain.
Now place the chain onto the chainring.
STEP Seventeen
Attach the shifter cable. Like the rear brake cable, the shifter cable is already on your trike frame. Locate it and route the cable as shown.

STEP Eighteen
Install the front basket and headlight. If you decide later that you don’t want it, the basket is easy to remove. Remove the four bolts and use them to mount the front basket. Insert and tighten one bolt just enough to hold the basket in place while you insert and tighten the others. Then tighten the upper righthand bolt securely, followed by the lower left, the upper left, and the lower right. Attempt to shake the basket with your hand…it should not move or rattle. If it does, check the tightness of all 4 bolts.
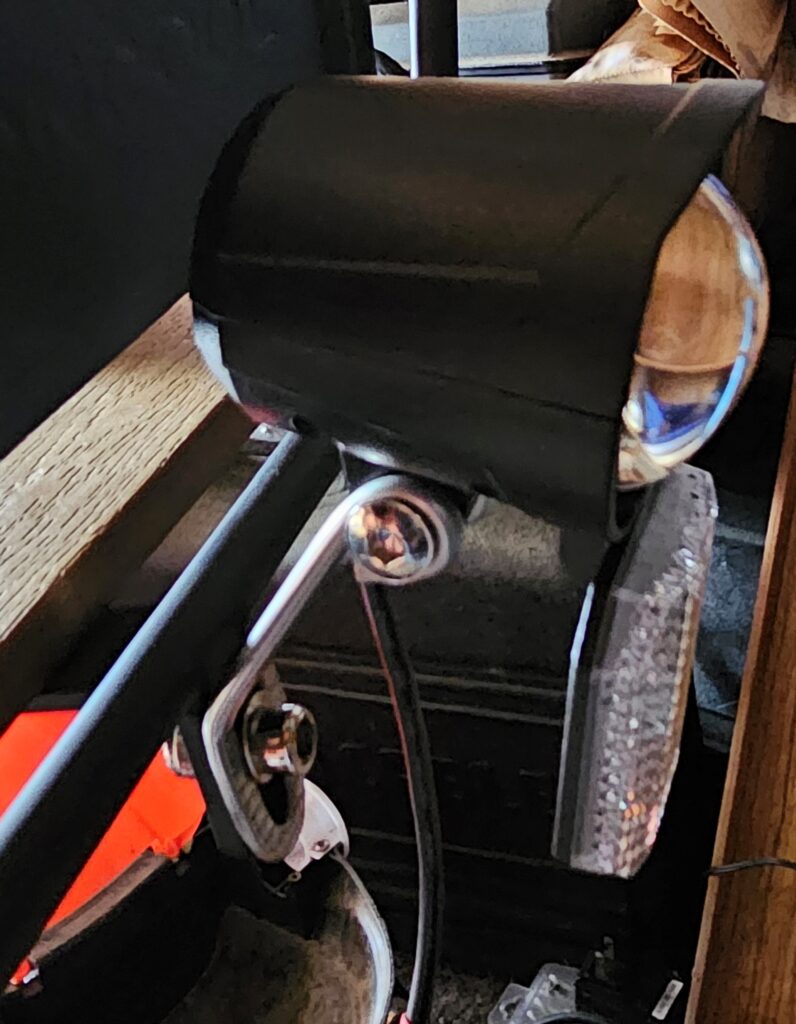
Now mount the headlight to the front of the basket. Connect the headlight to power. You will see loose wire near the handlebar tube. Connect the plug on that wire to the plug on the wire coming from the headlight. Take care to properly align the plugs before pushing them together.
To turn on the headlight, first power the trike on so that the display is active. Then press the “+” button on the display for 2 seconds. Do the same to turn it off.
STEP Nineteen
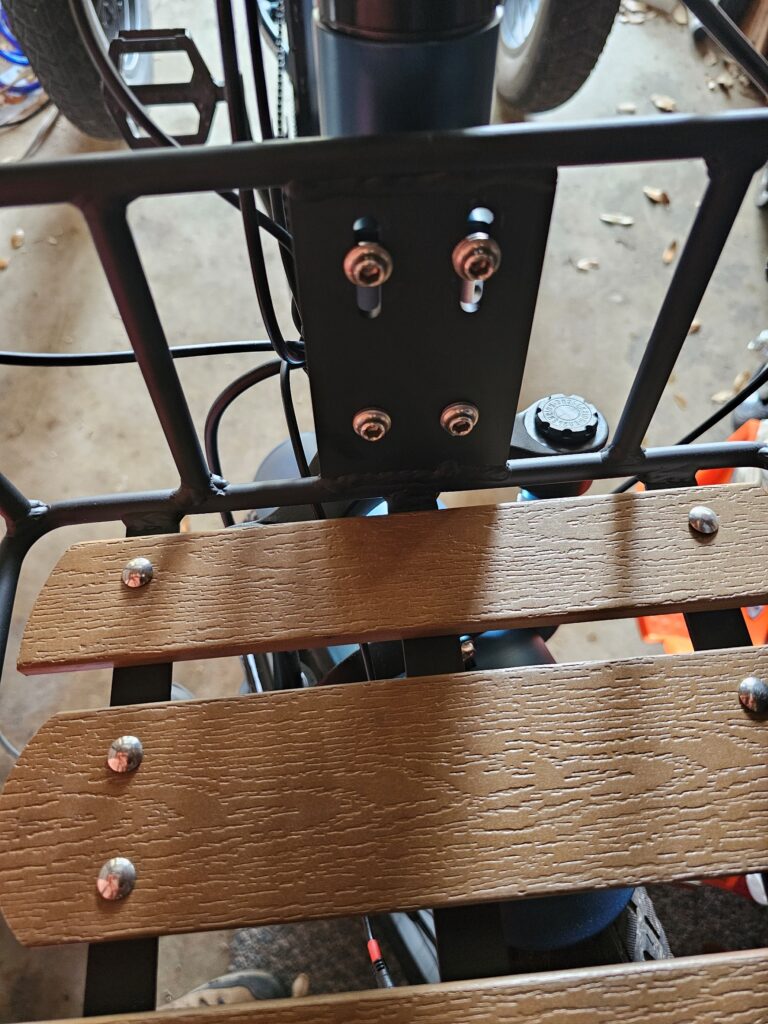
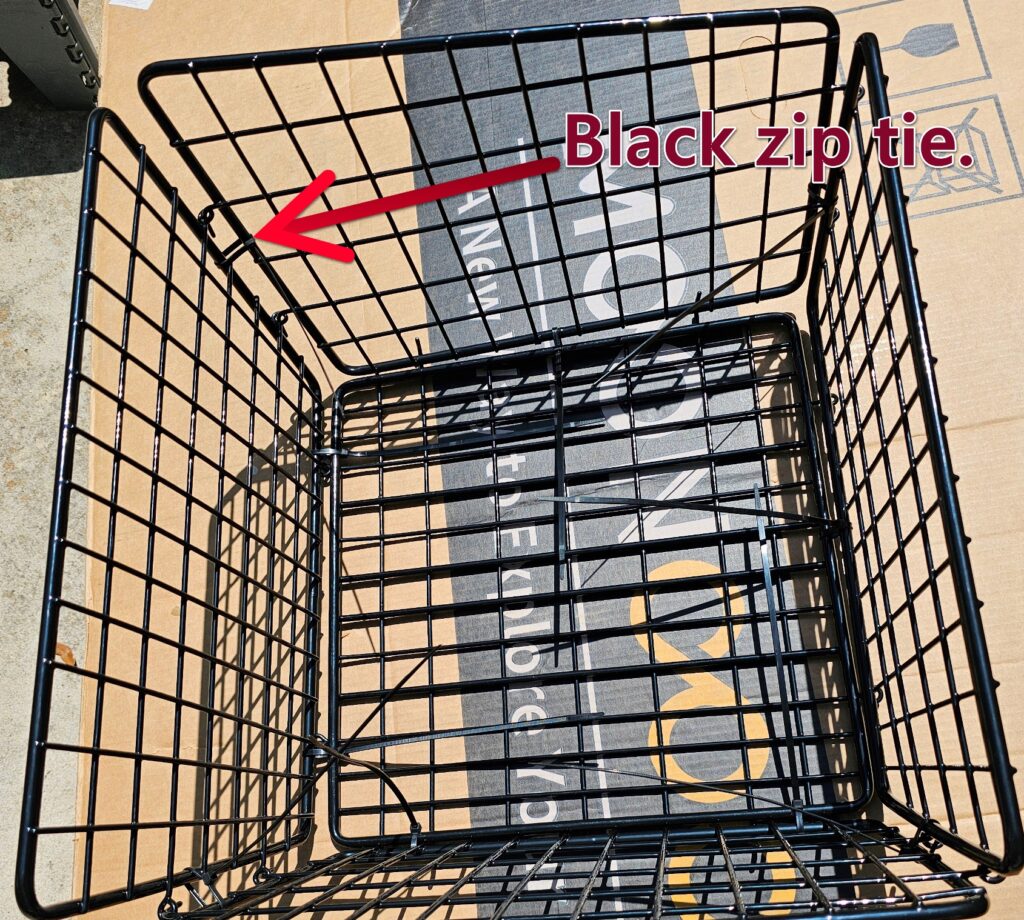
Assemble and mount the rear basket. I chose to use black zip ties. They look better than the metal clamps and easily prevent rattles. Use the two long metal straps to mount it to the rear of your trike. Tighten all bolts securely.
STEP Twenty
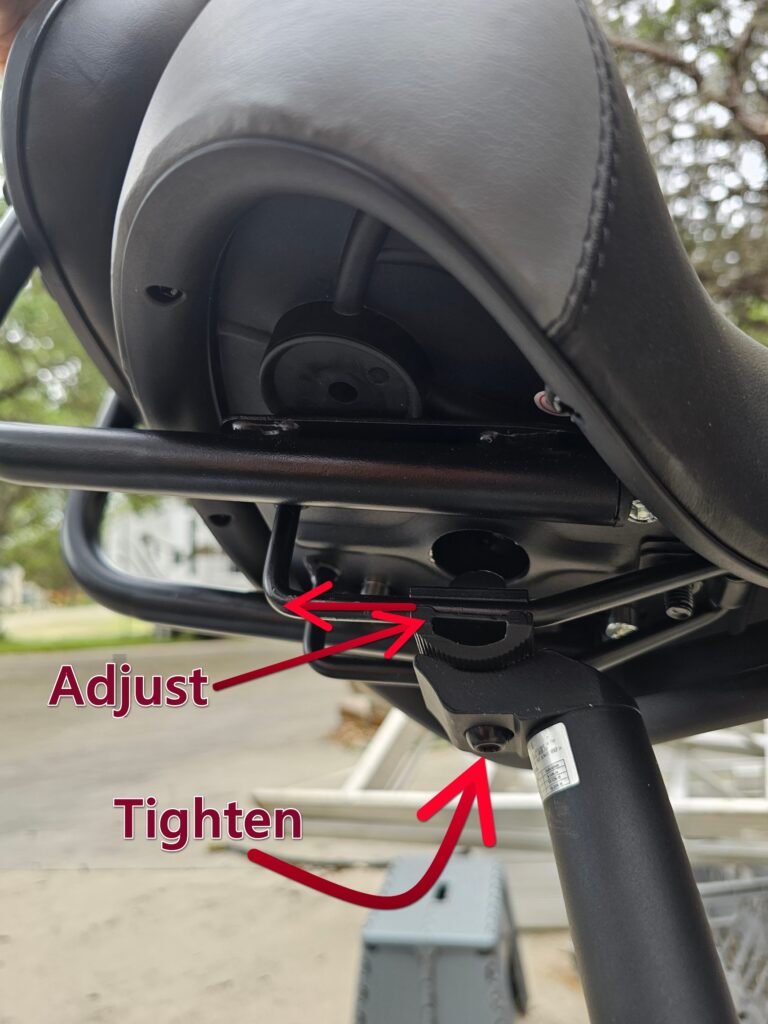
Mount the saddle onto the seat post. Tighten the bolt securely. You can move the saddle slightly toward the front or rear as preferred. Insert the seat post into the seat post tube and clamp it in place securely. You can adjust it later for height.
STEP Twenty-one
Have you had your battery on the charger while doing the assembly work? If not, no worries…you can connect the charger after the battery is on the trike. Slide the battery into place directly behind the seat post tube. Turn the key to the right to lock the battery in place. You can charge your battery either on or off the trike.
STEP Twenty-two
Inflate all 3 tires. I recommend beginning with 20 lbs and then adjusting later to your preference. Do not exceed the maximum pressure as stated on the tire.
STEP Twenty-three
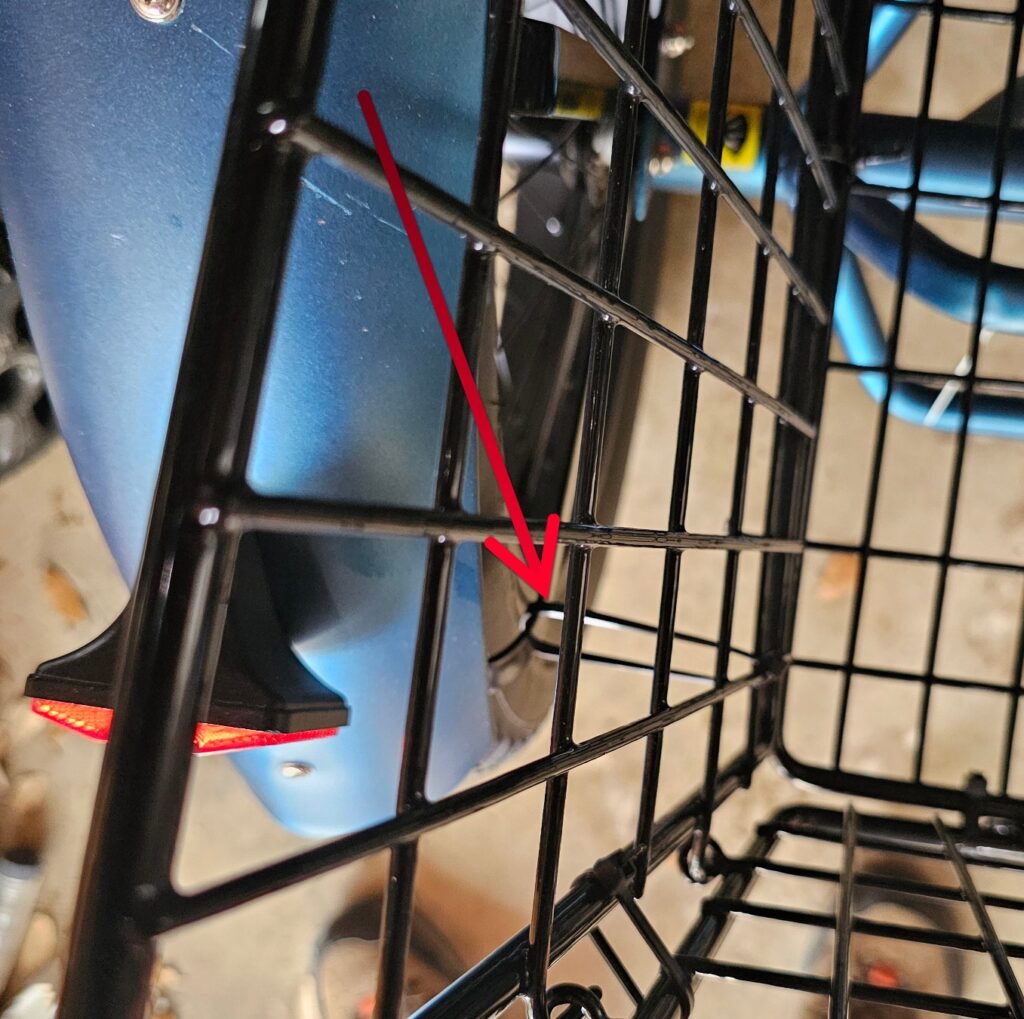
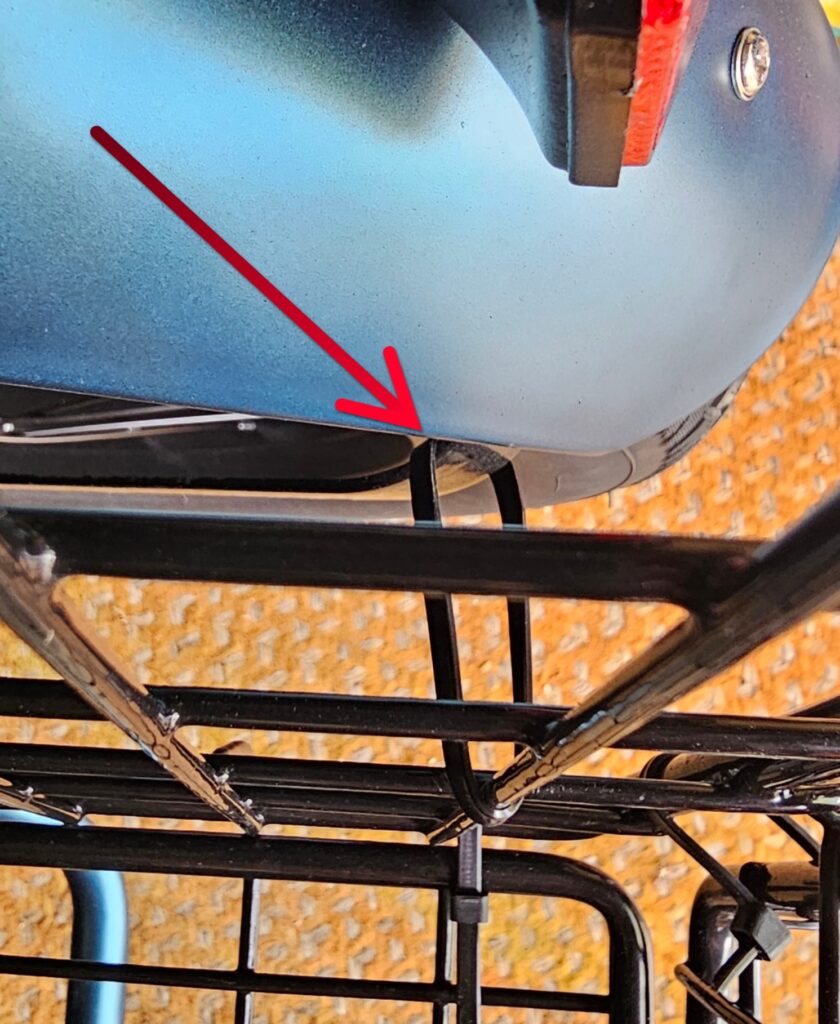
Attach the rear fenders. Tighten securely. After tightening the bolts, I recommend using black zip ties as shown below to hold the fenders exactly as you want them and to prevent rattles.
STEP Twenty-four
Install the pedals. On the righthand side, turn the bolt clockwise. On the lefthand side, counter-clockwise. Use a sturdy wrench to tighten very securely.
BEFORE YOU RIDE
Make an intensive visual check of the assembled trike, just to be sure you haven’t missed anything. Push the trike while walking alongside and activate the brake levers, one at a time. Both levers should stop the trike abruptly. Then check operation of the headlight, taillights, turn signals, and horn (consult user manual). Enjoy the ride, and be safe!