NOTE: This unboxing article was written before Mooncool upgraded the TK! Folding e-trike. Not everything will apply, but still, it may be helpful to read through it before assembling your new trike.
———————-
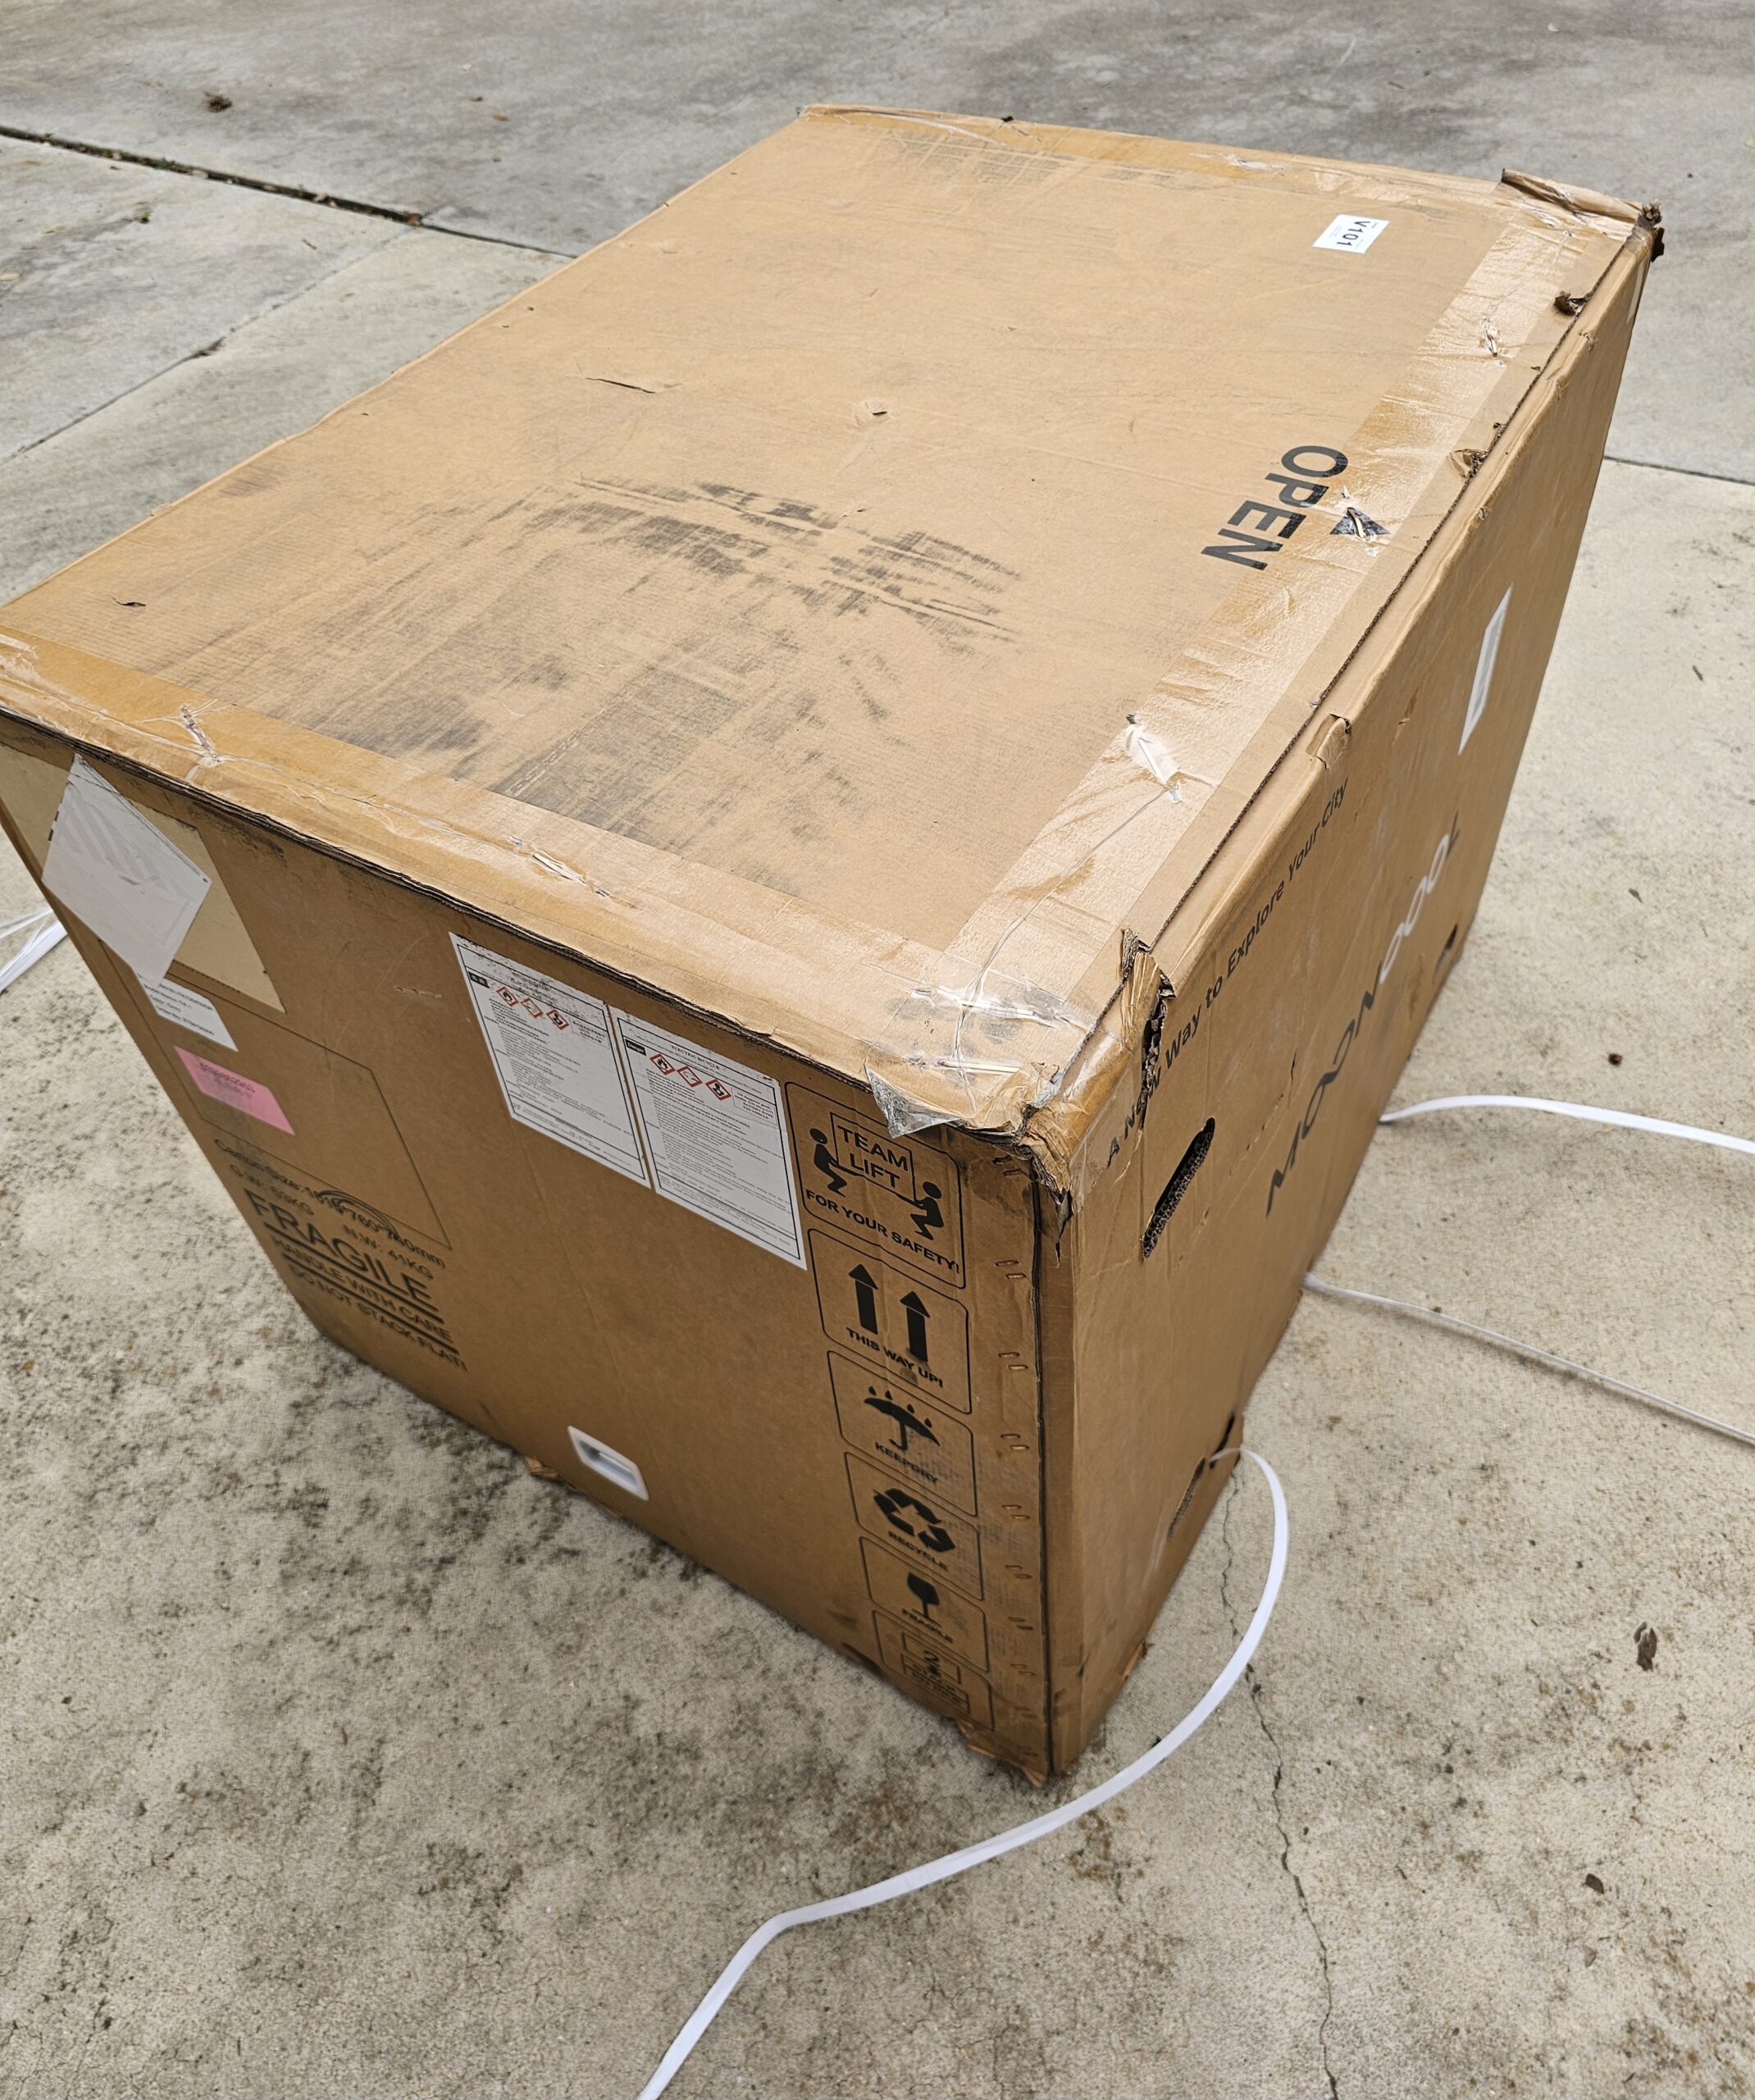
The big day has finally arrived! Mooncool works diligently to be prompt with the shipping. Shipping time naturally varies according to your location. In my case, the Mooncool arrived just 7 days after the order was placed. If you have already ordered, while you wait you can prepare and be ready to do a great job of unboxing your Mooncool and getting it ready to ride! Your new ride will be delivered soon in a big box…here’s a look at what arrived at my house…
This article is not a substitute for the Mooncool instructions. Be sure to locate and read the included user instruction booklet. I make no representation that my methods are better or more safe than those in the Mooncool manual. I accept no responsibility for damage to your trike as a result of anything I have written. I recommend reading this article in its entirety before you begin unboxing your trike.
STEP ONE
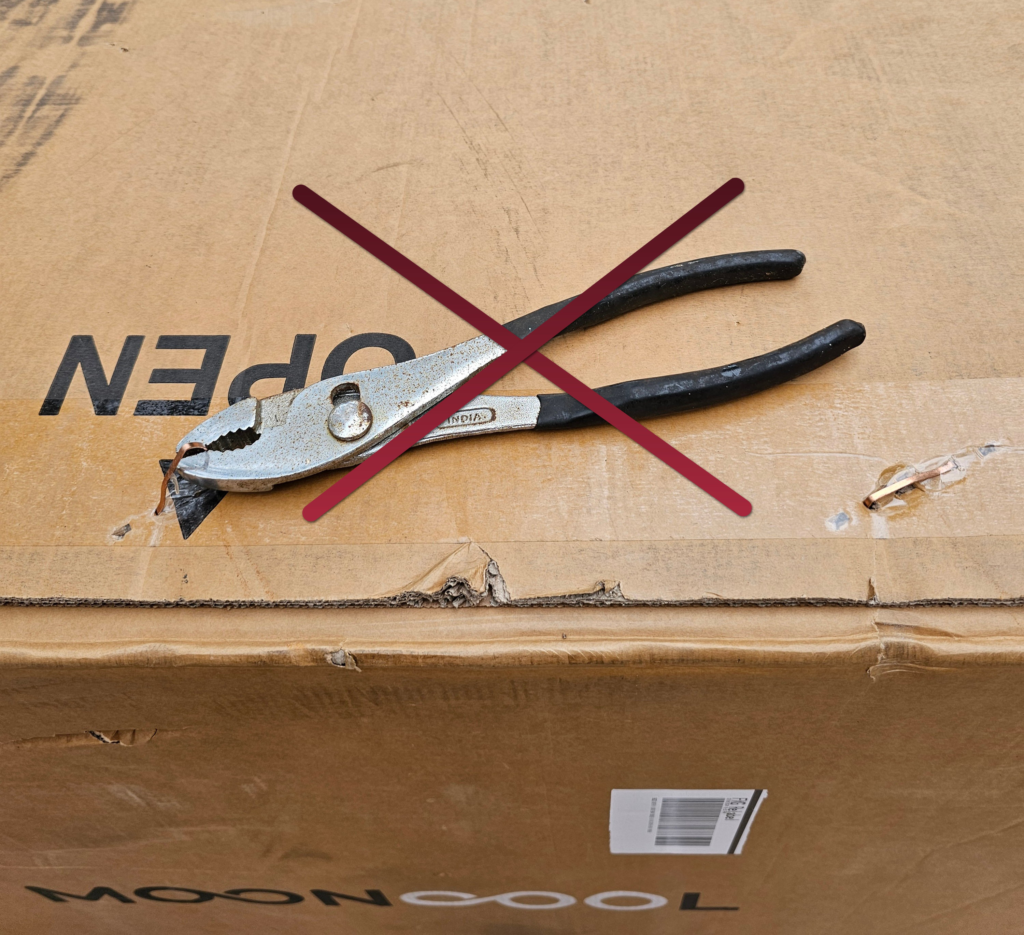
Gather the needed tools. Mooncool provides tools needed for assembling the e-trike, or you can opt to use your own. All you need right now is a pair of snips to remove the straps around the box and the zip ties you will find inside the box. Yes, you could use a knife, but that’s much riskier to both you and your Mooncool trike!
STEP TWO
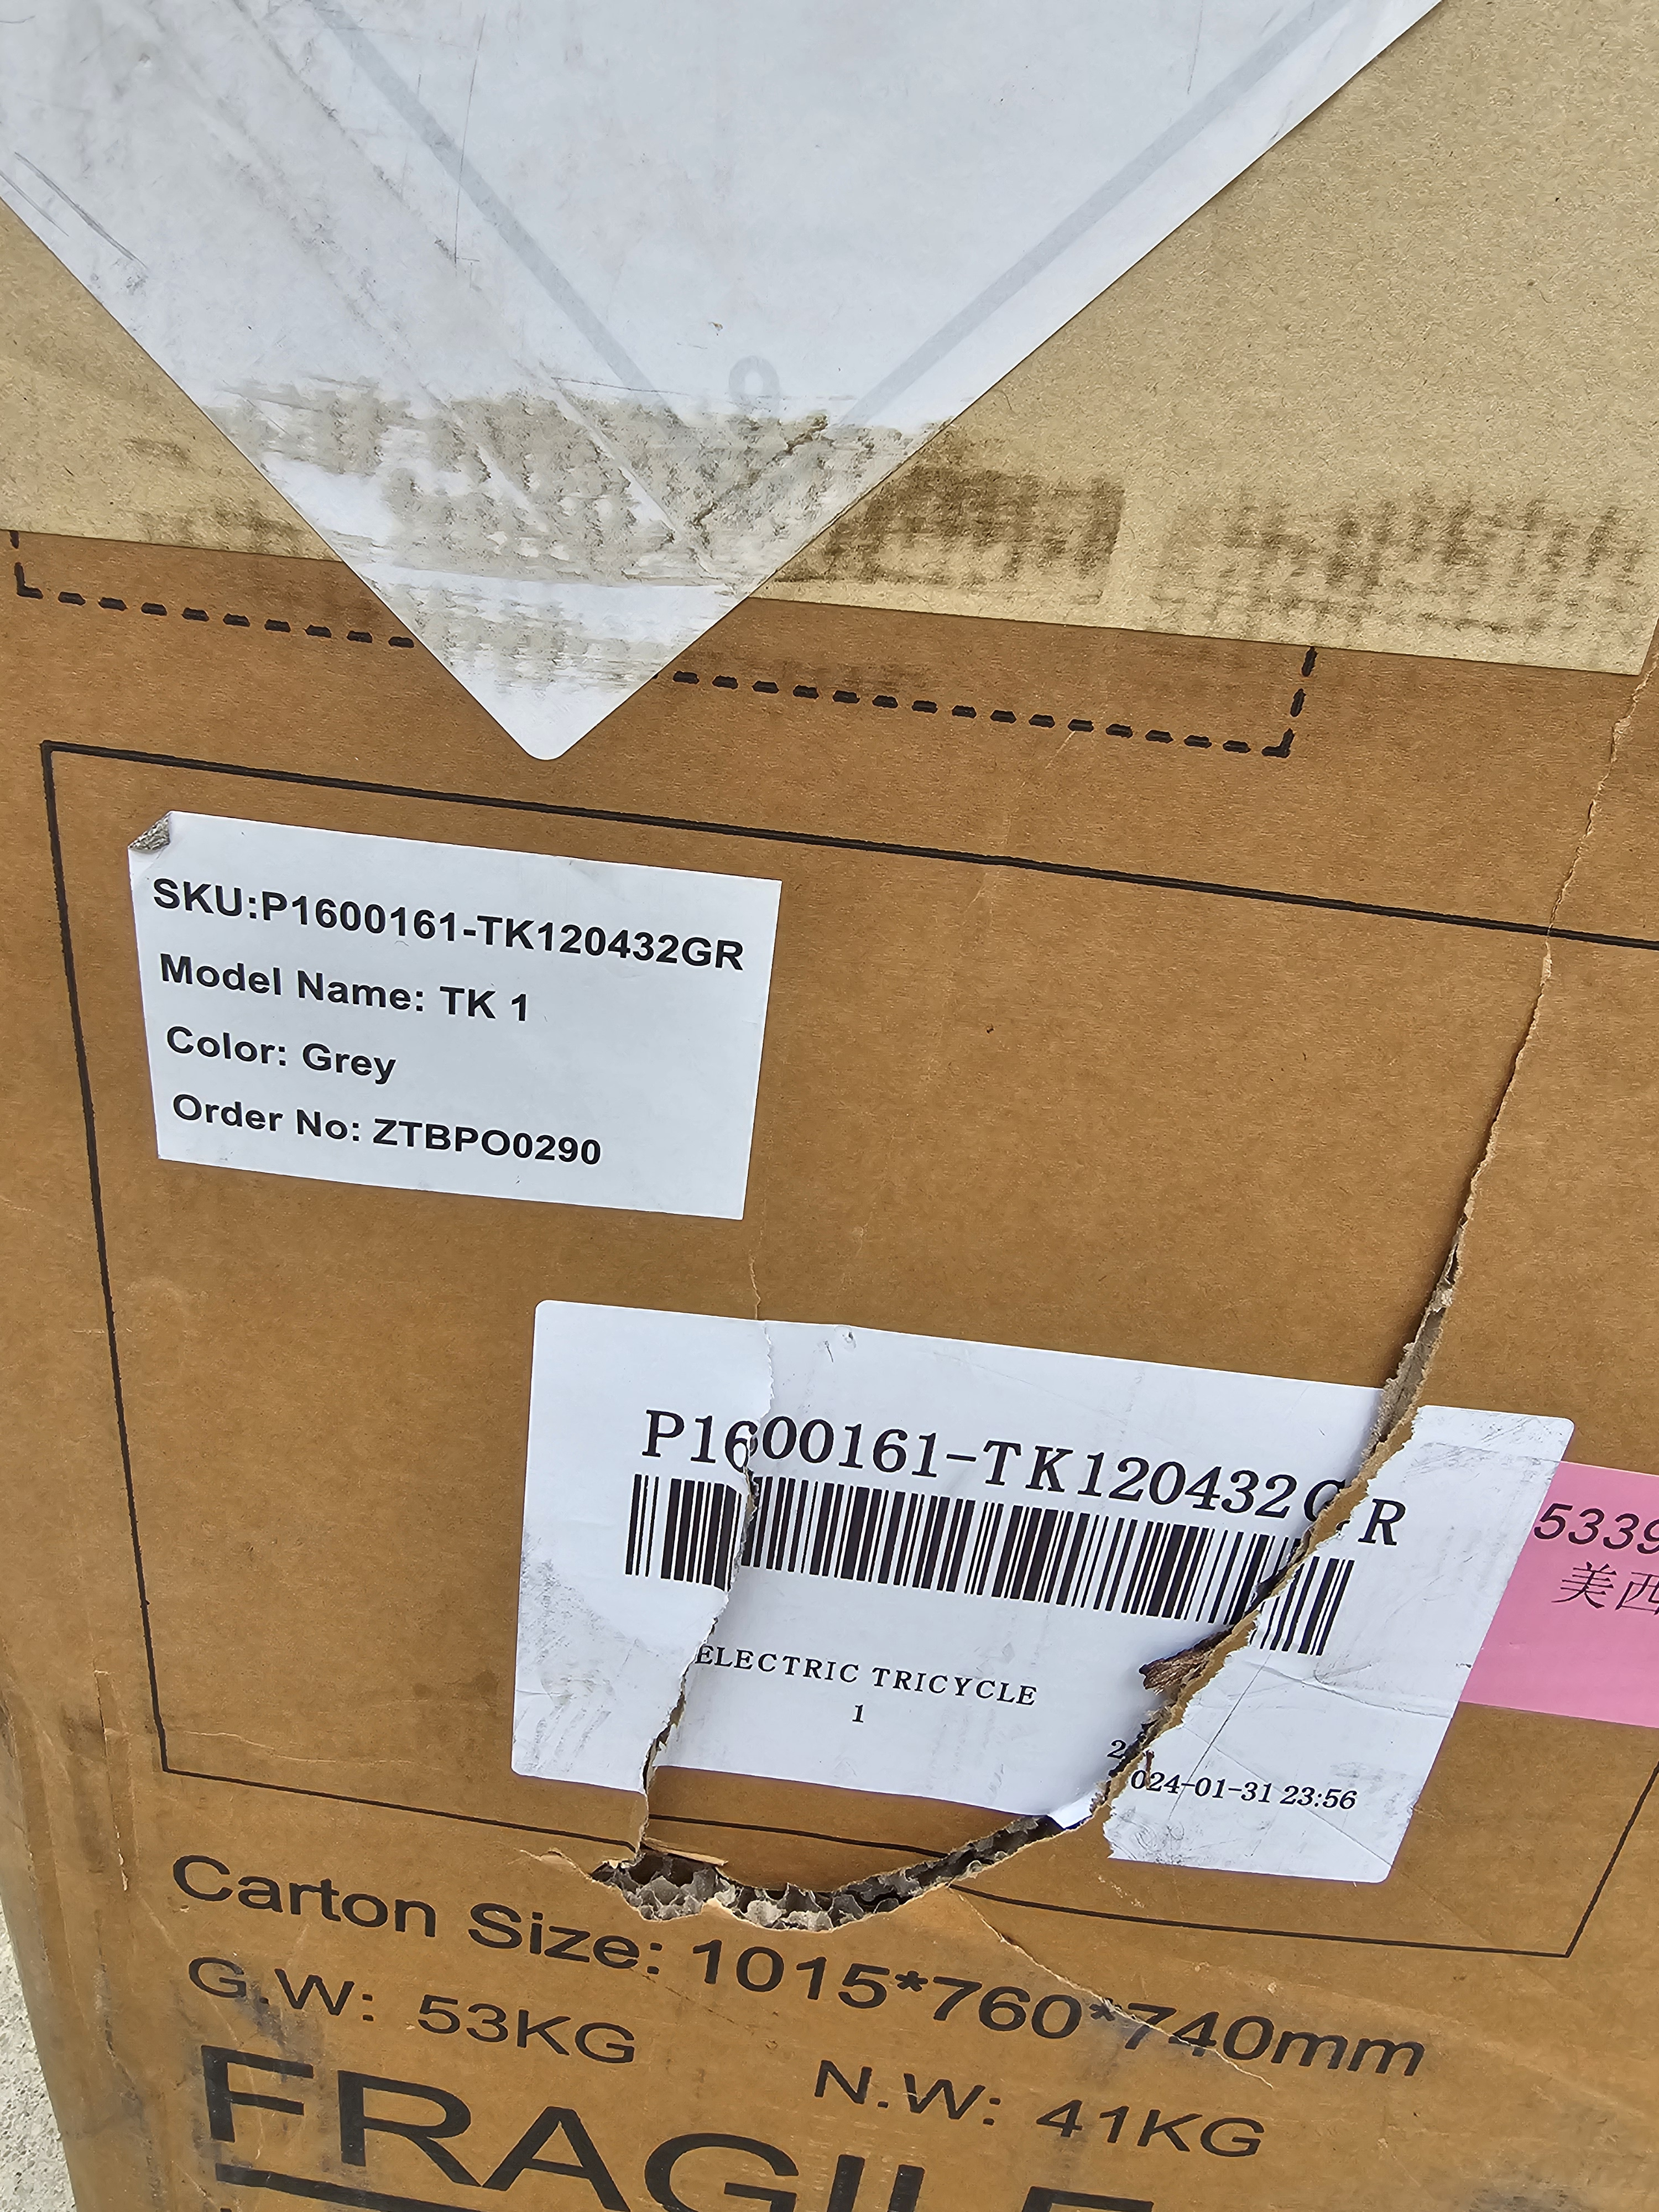
It’s important to take a couple of minutes to photograph your shipment. Be sure to include any damage to the shipping box and all labels on the box.
STEP THREE
The Mooncool shipping box has some very nice and convenient features. The first special feature to notice is that you do not need to remove any of the staples. You will see several staples along the top of the box, but don’t take time to remove them – that’s a waste of time and effort. Read on to see why!
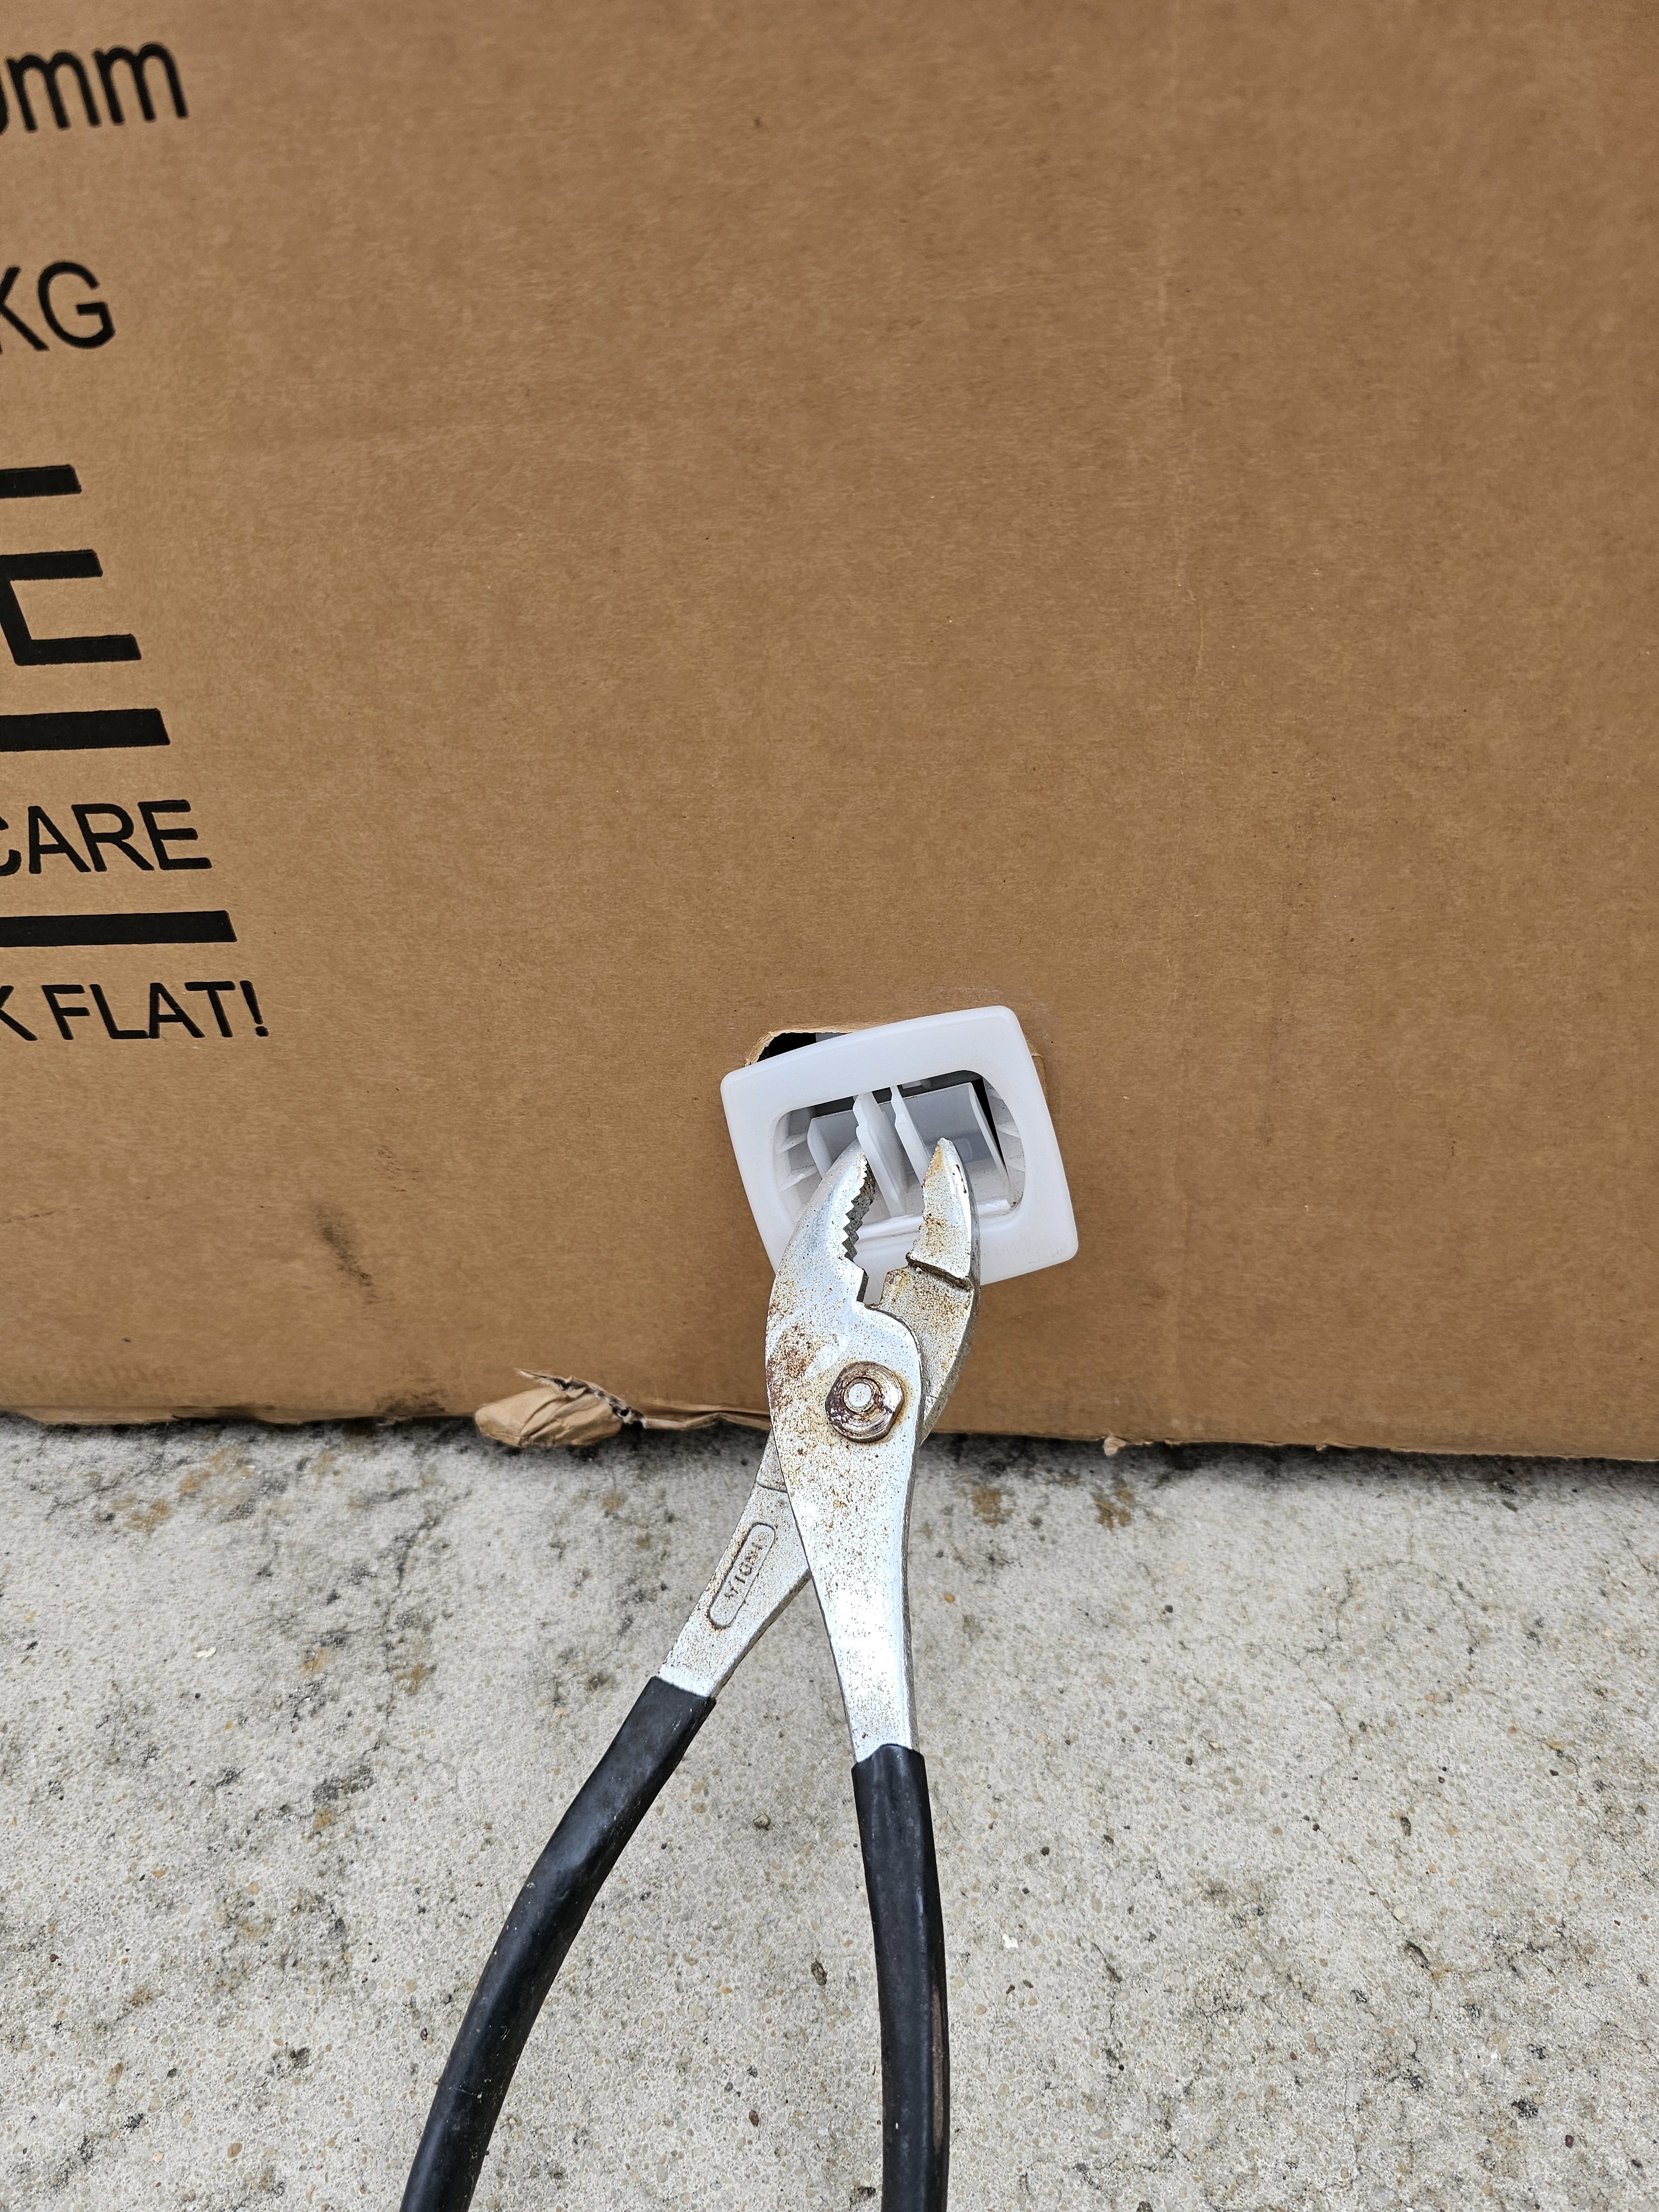
The second special feature of the shipping box is the several retaining clips near the bottom edge. These can be removed by hand, but a pair of pliers makes it easy.
STEP FOUR
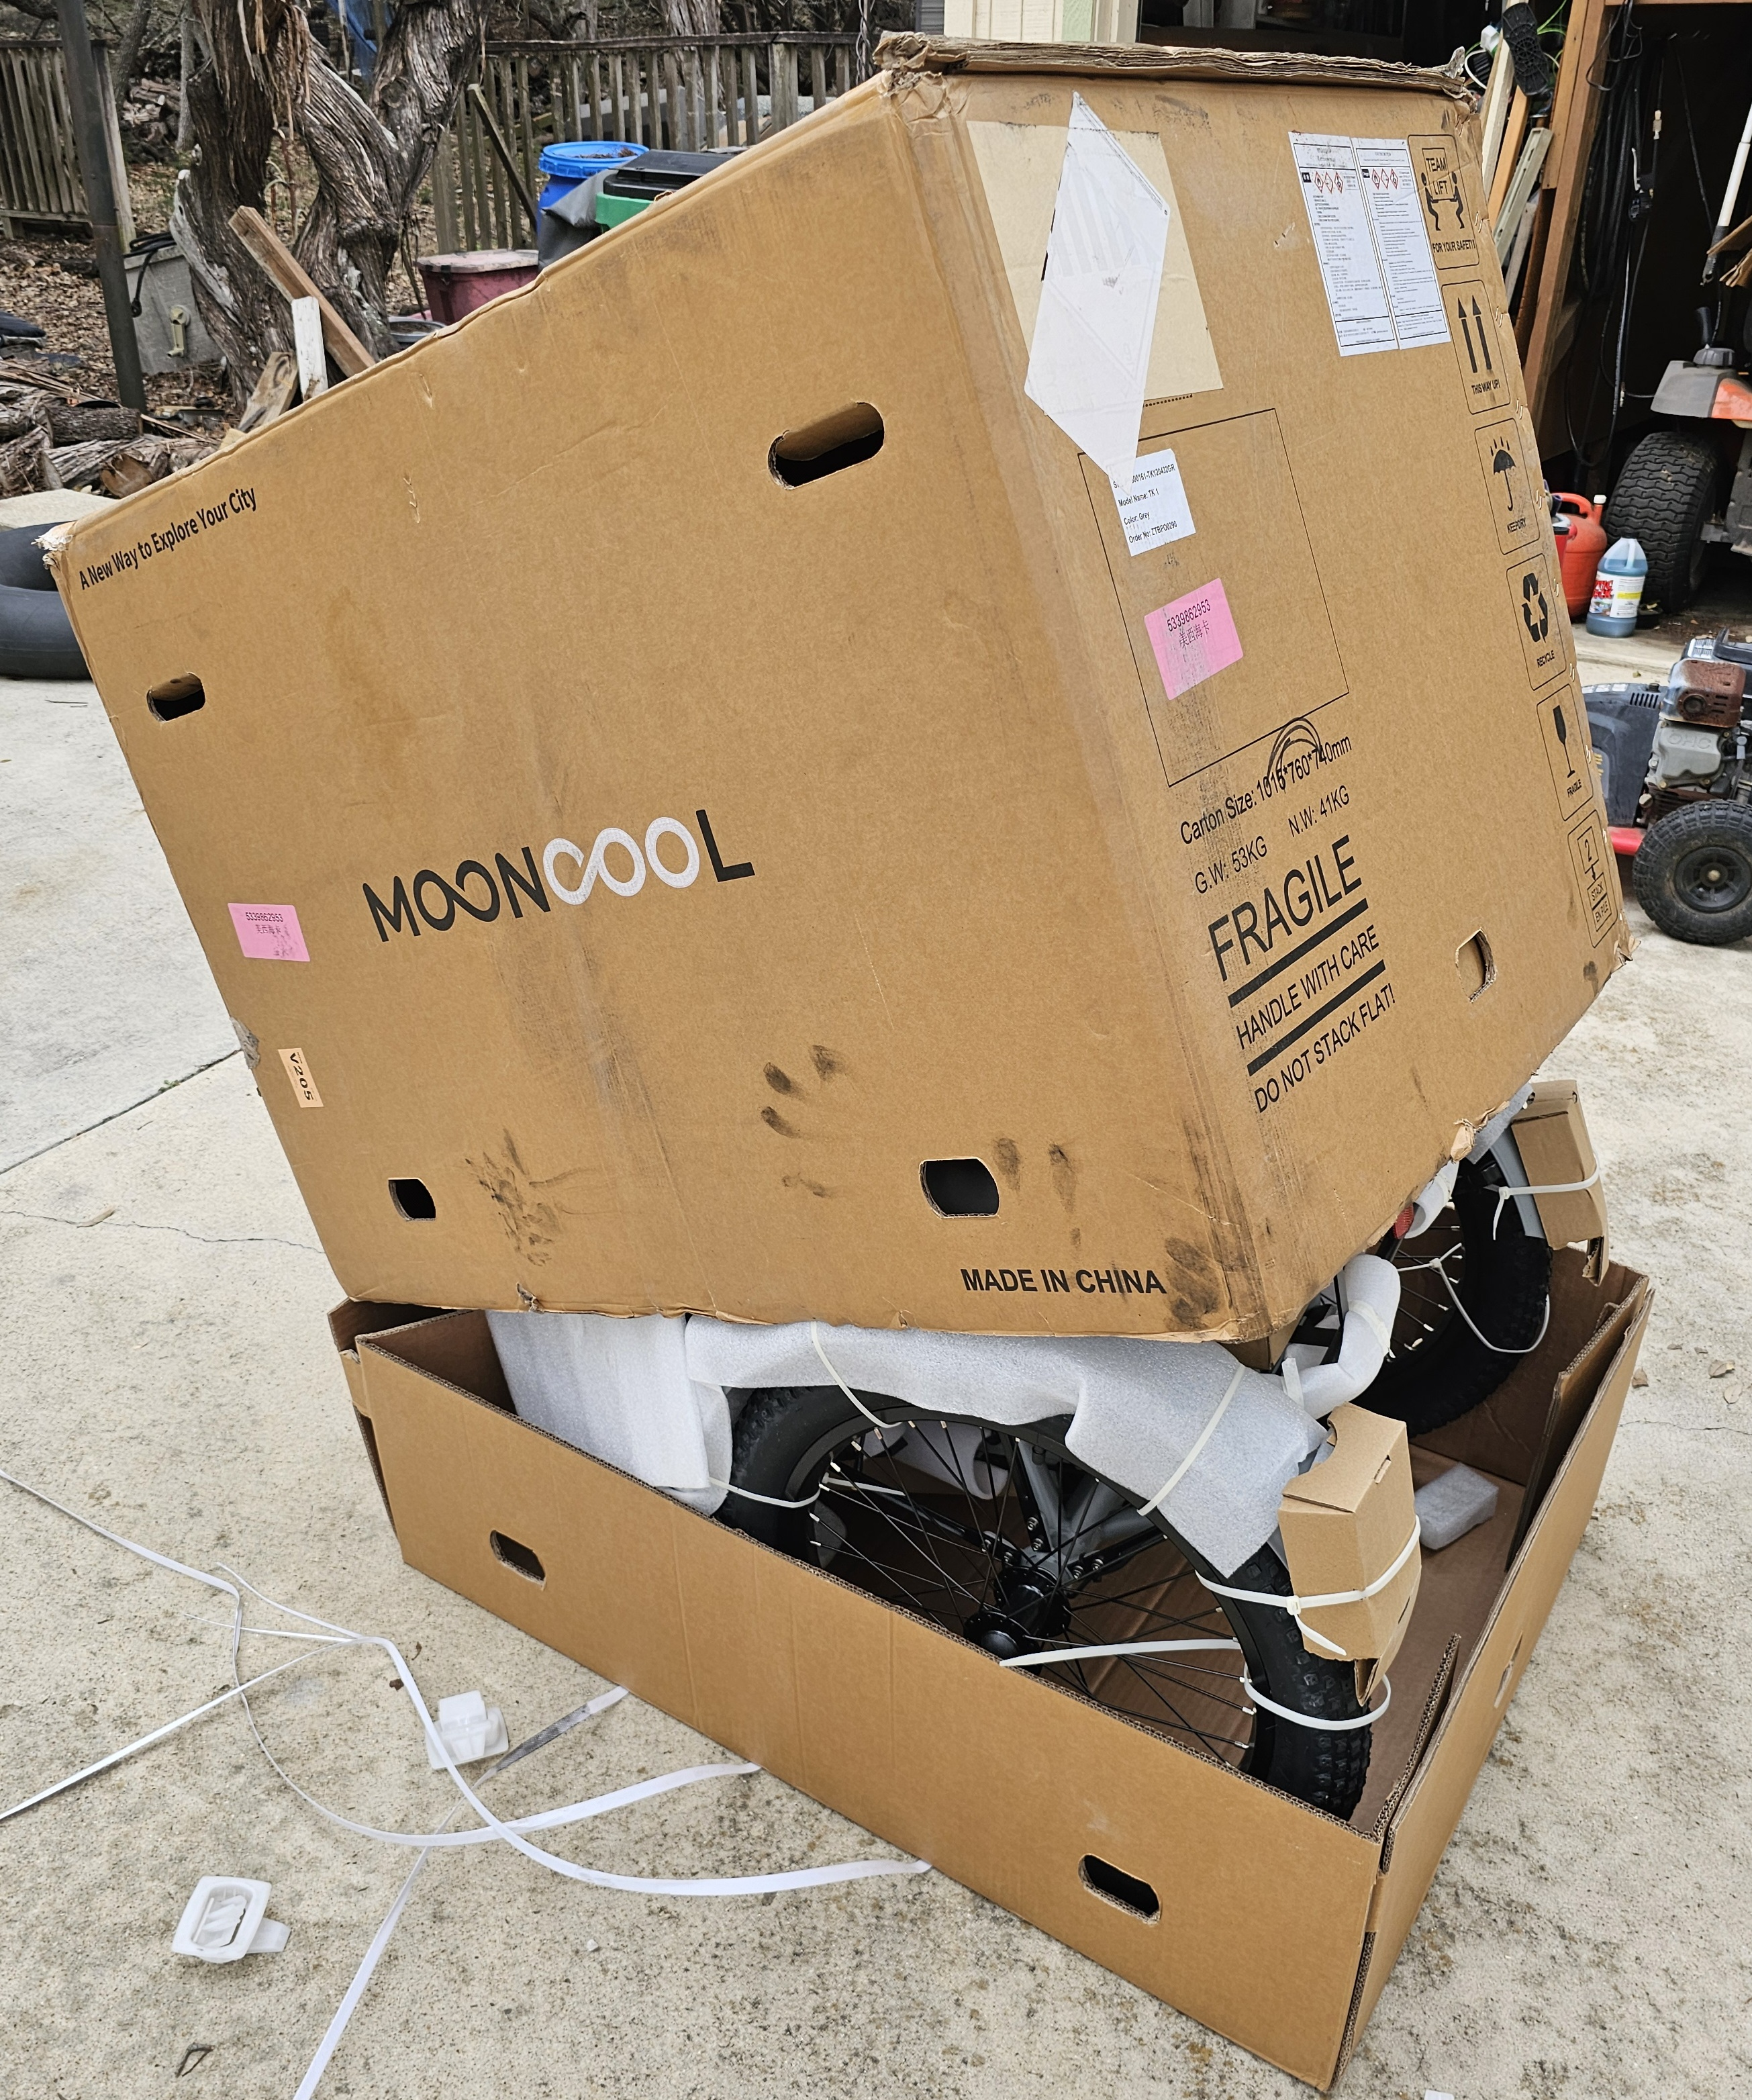
Now you are ready to open the shipping box. With the retaining clips removed, the box easily slides upward and off.
STEP FIVE
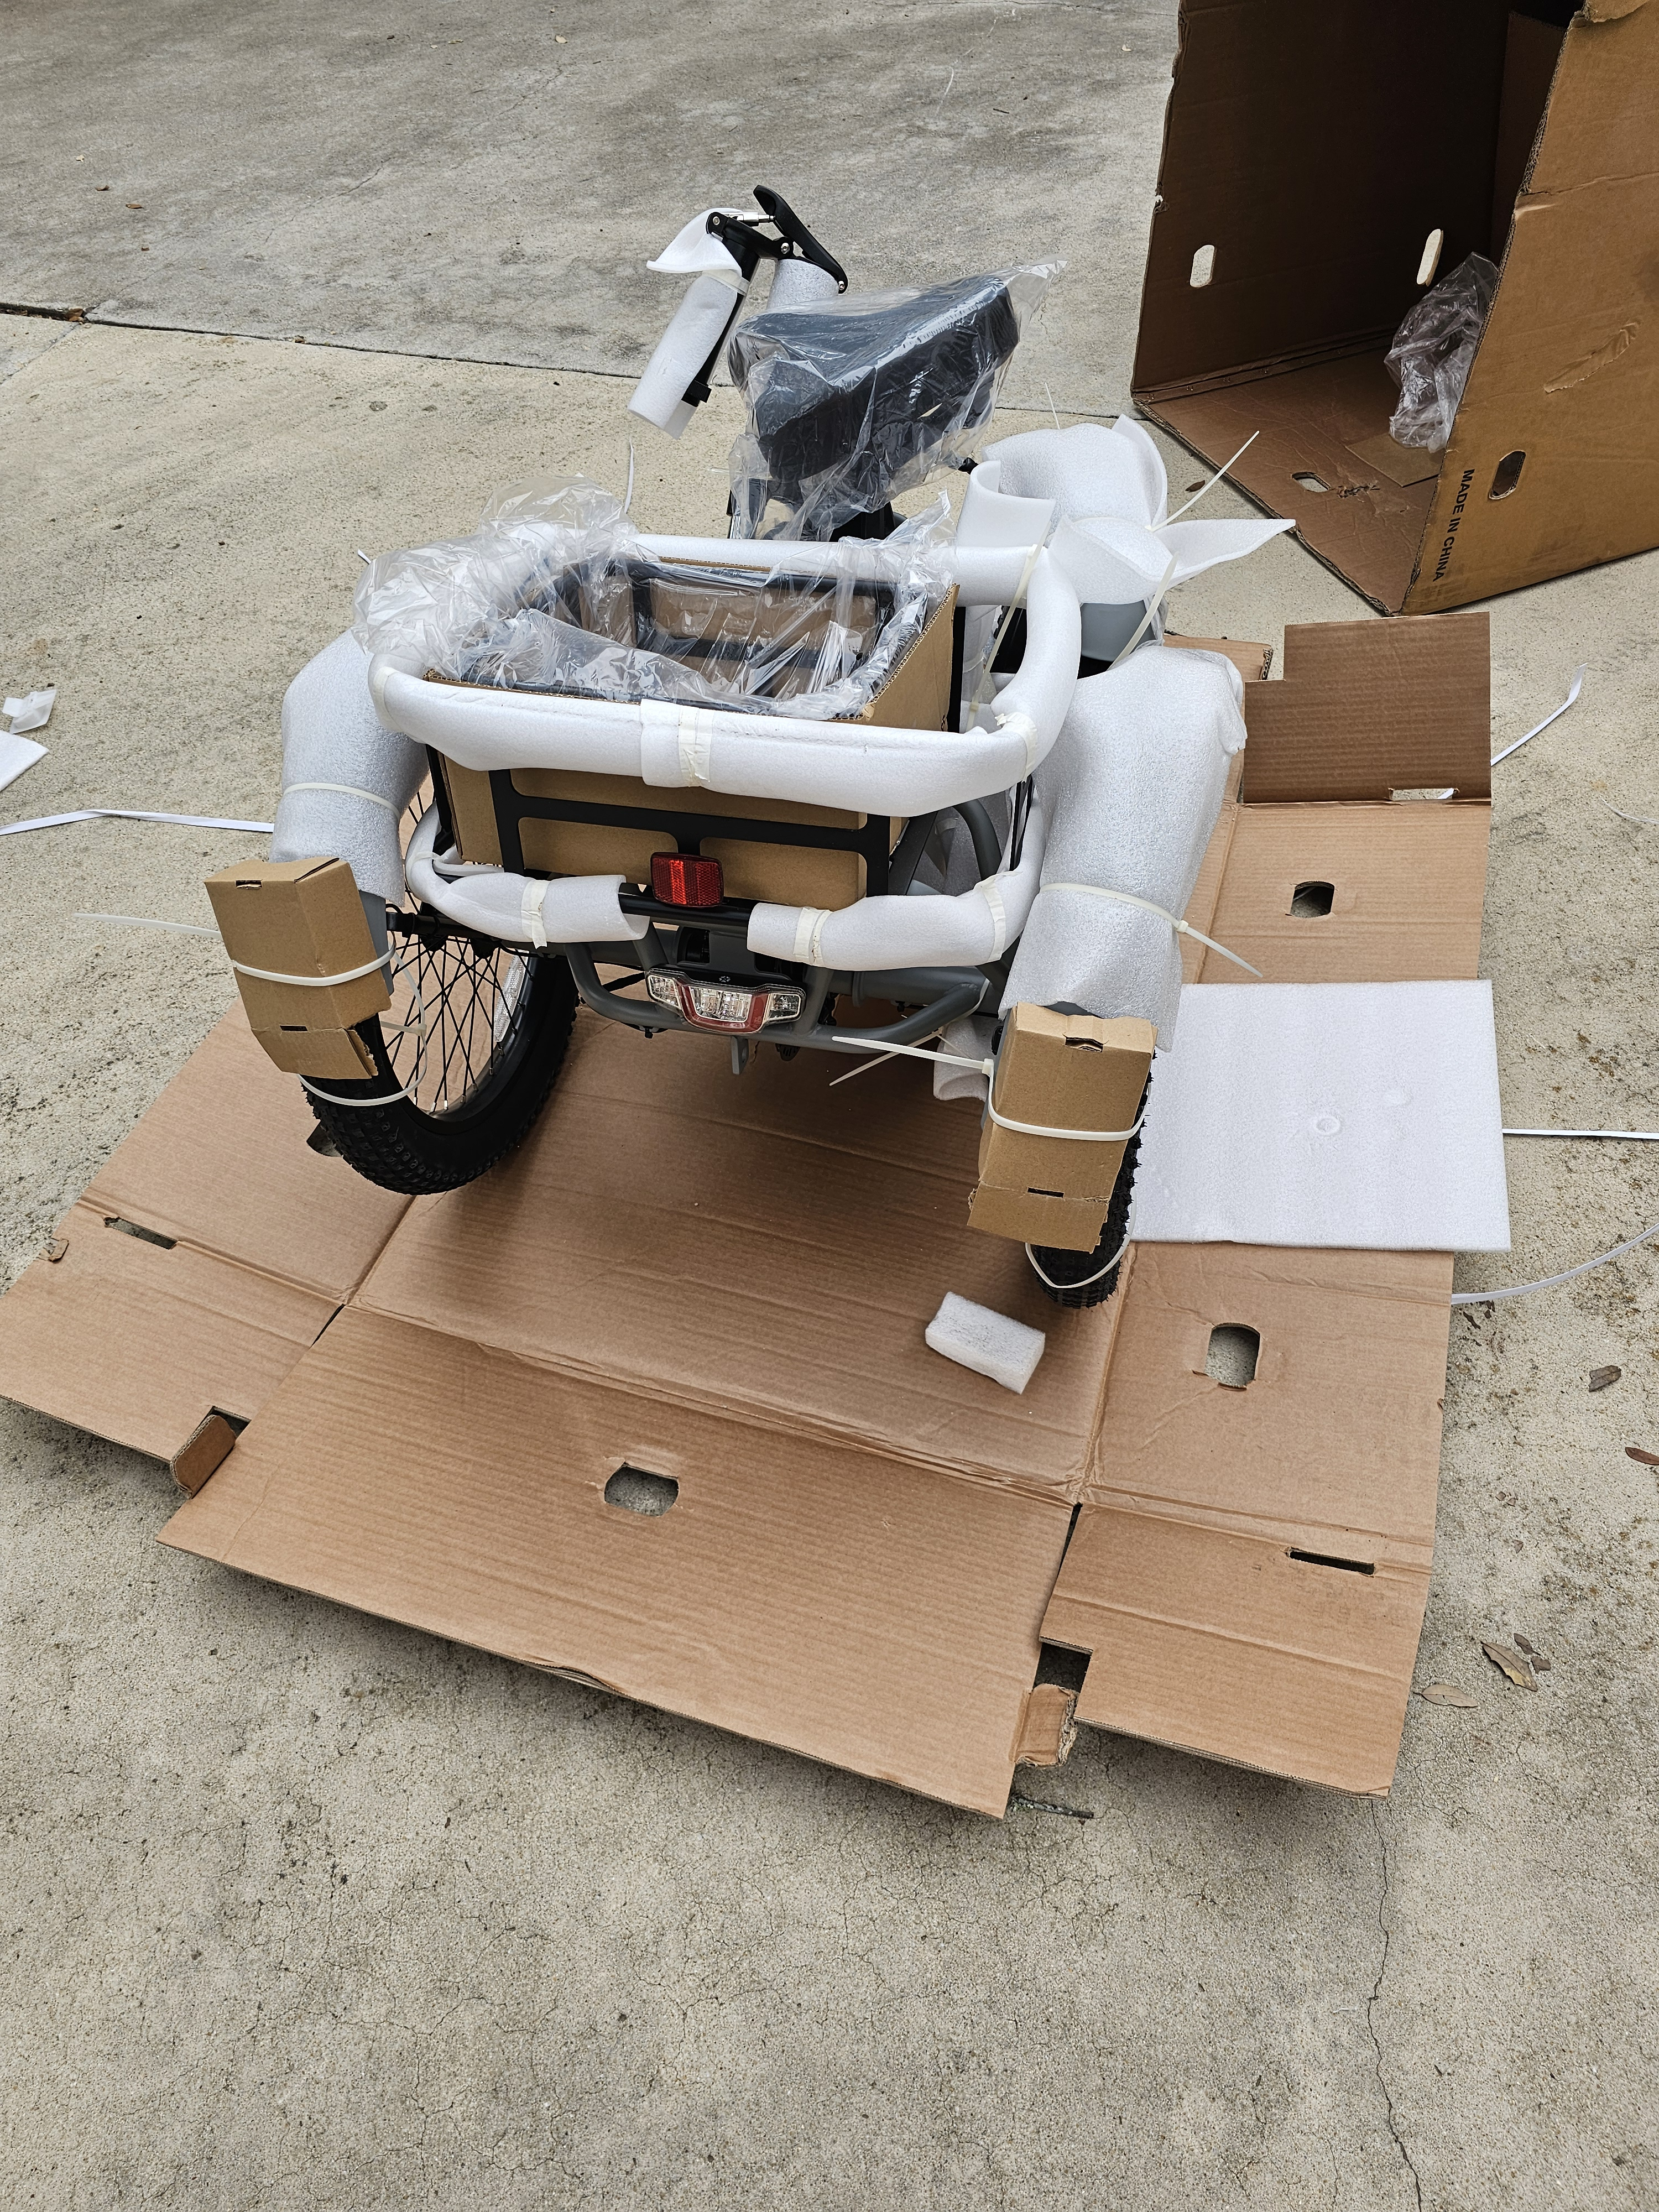
After removal, it’s a good idea to turn it upside down and use the box it for a place to collect the packing materials you are about to remove. Now you can fold down the remaining sides of the box, completely revealing the shipping protection provided by Mooncool.
STEP SIX
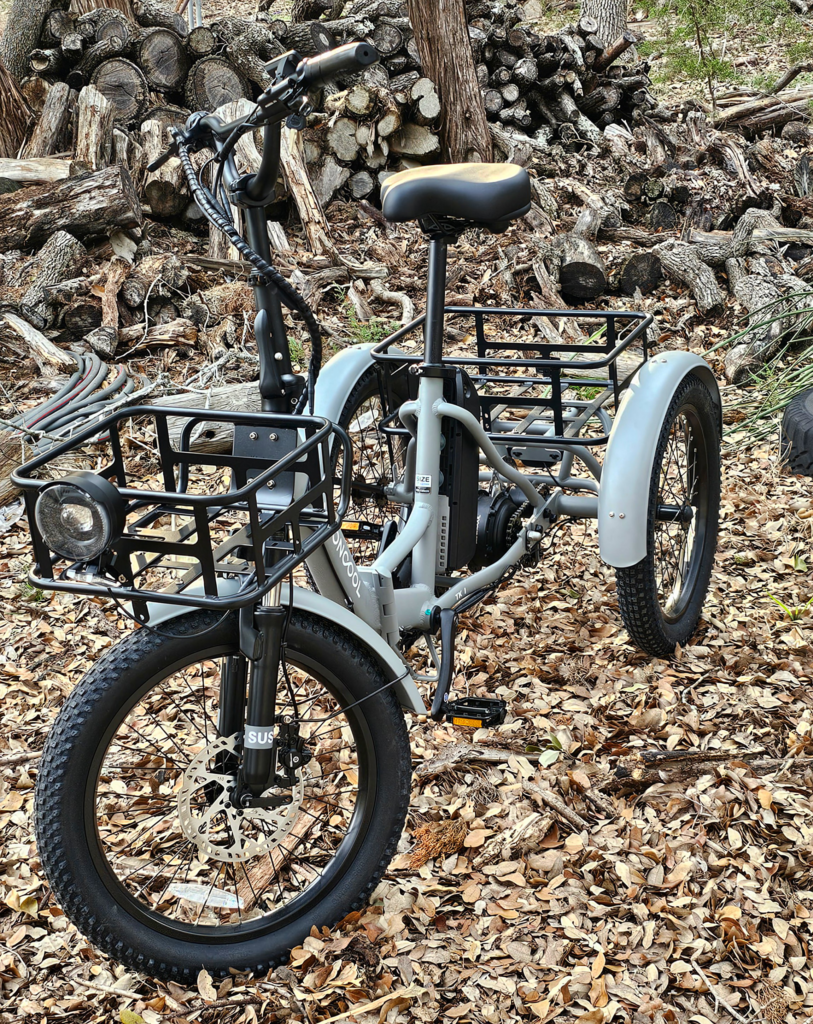
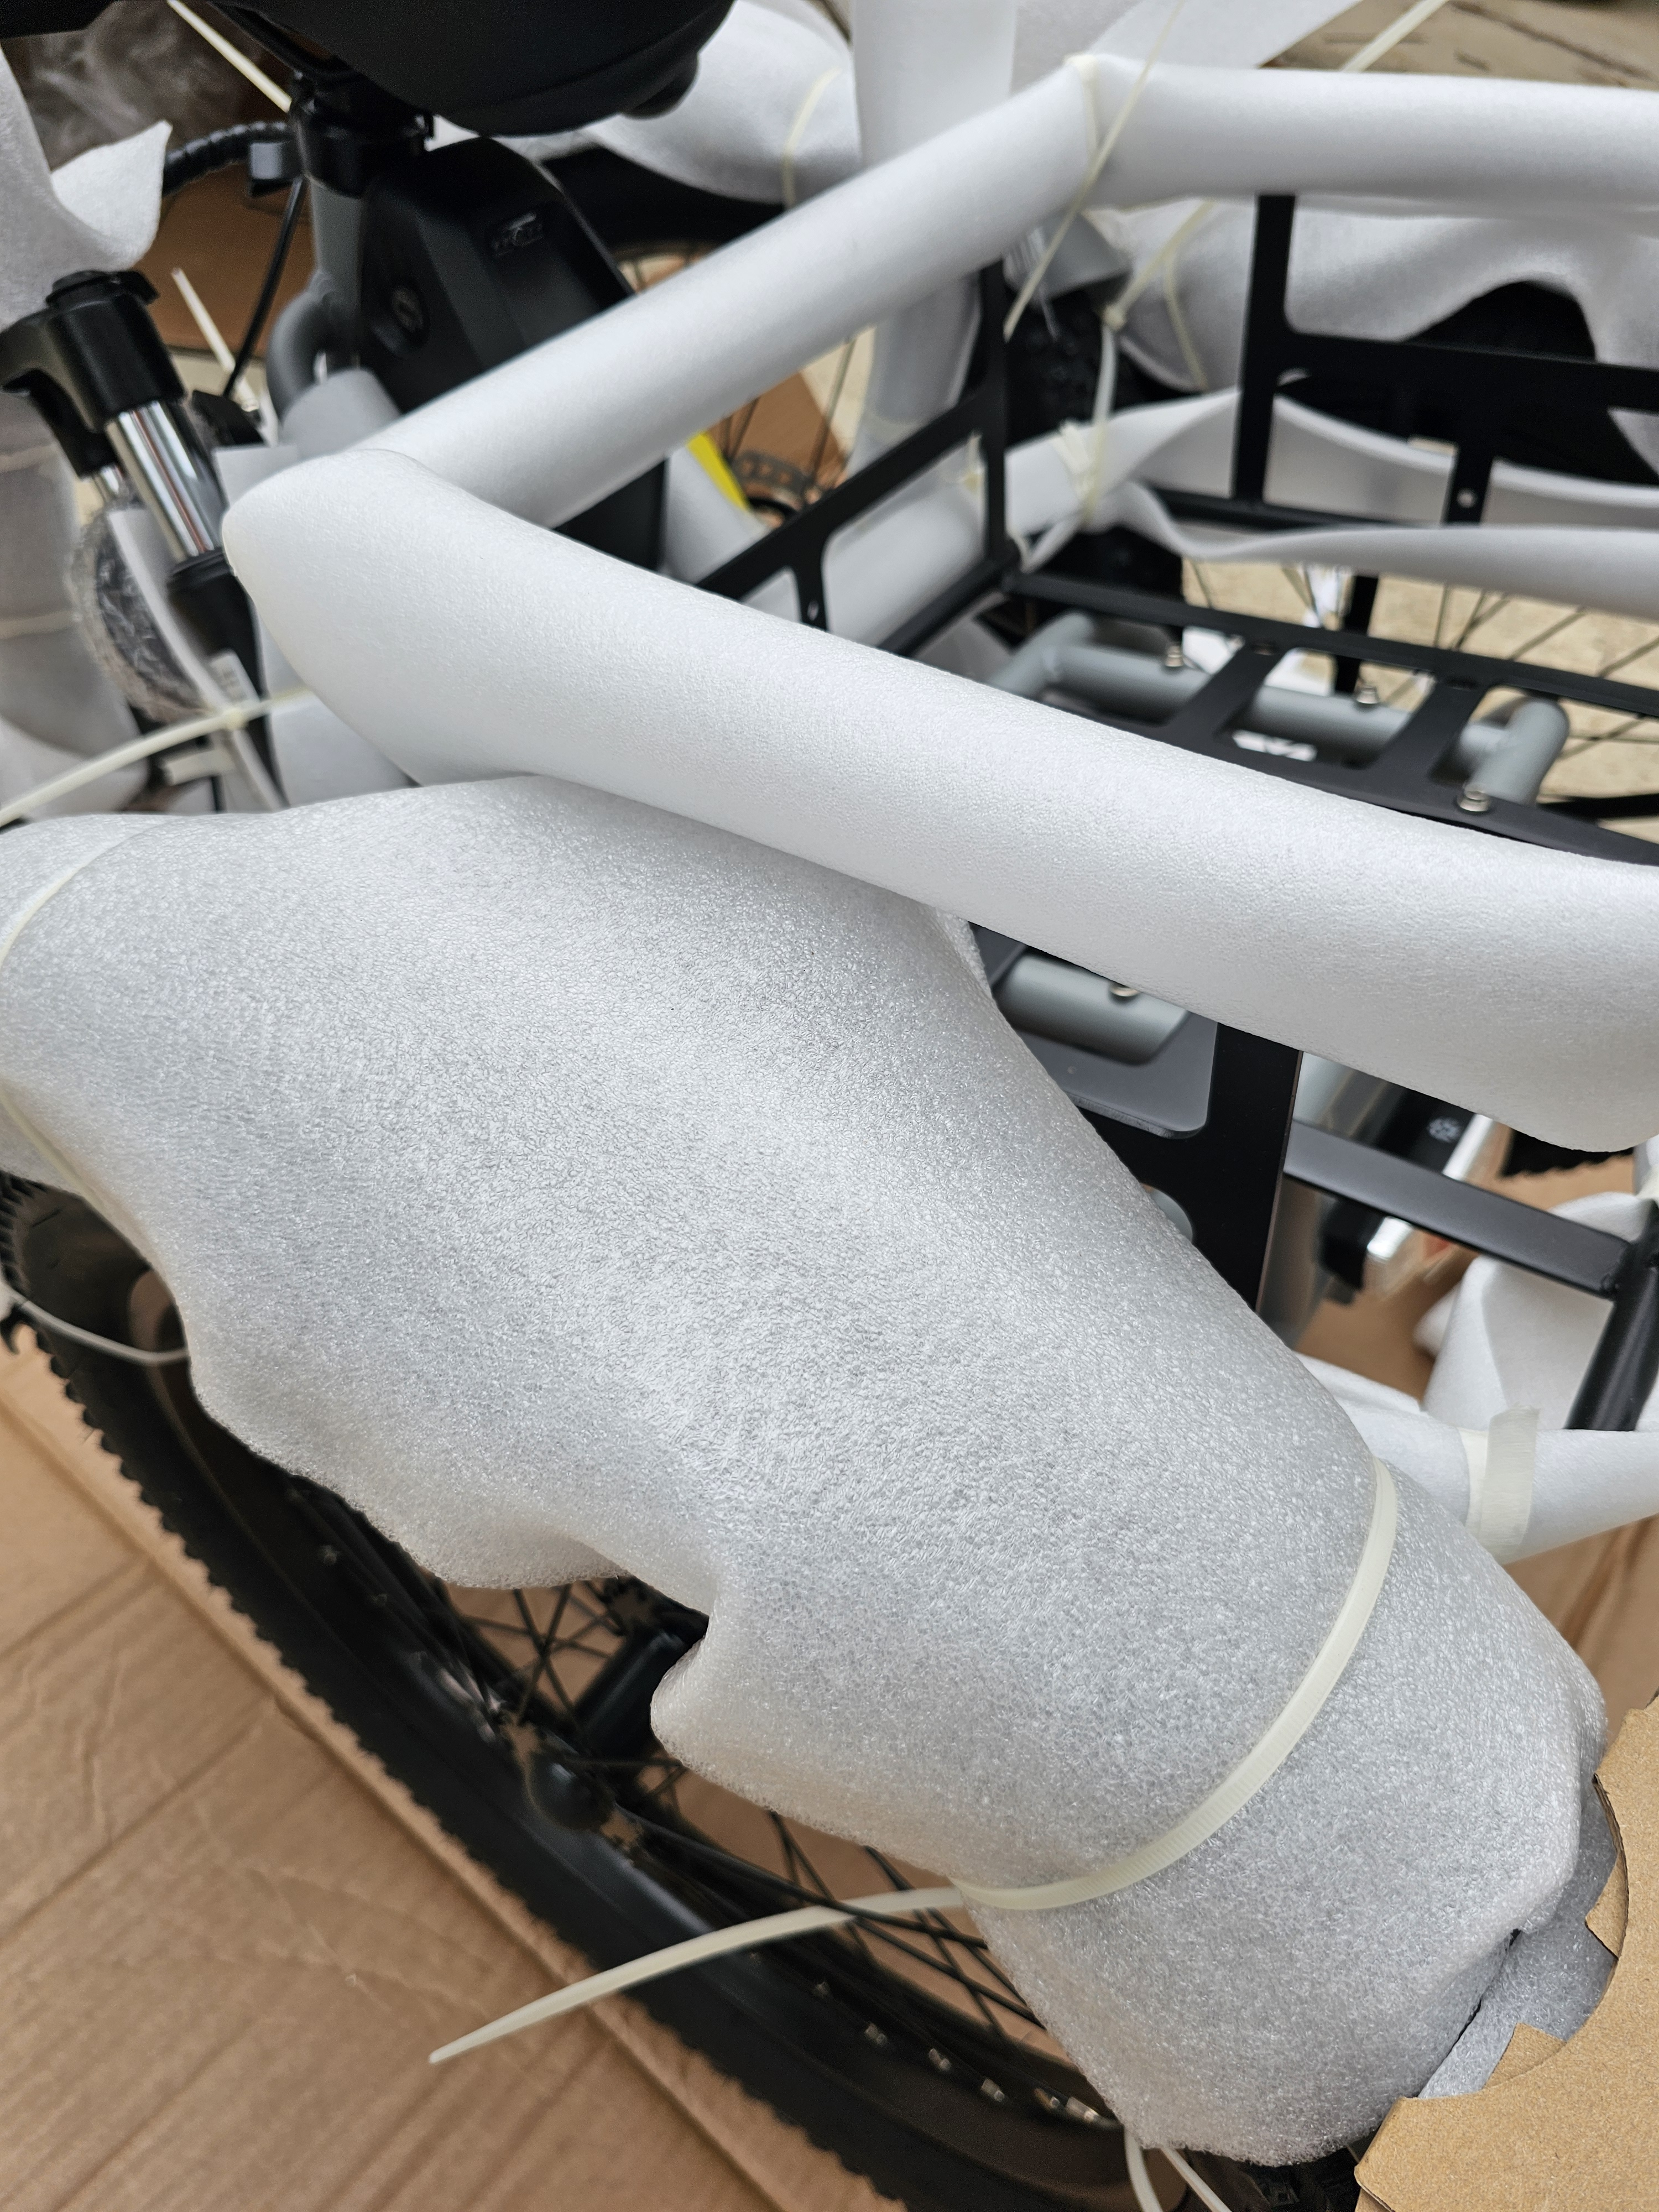
The removal of the protective packing materials requires care. A knife will do the job, but it is best to use snips so that injury to yourself or the trike is avoided. Don’t be in a hurry – work cautiously. Notice how the Mooncool TK1 is very carefully and thoroughly protected. Although the shipping box had obviously been handled roughly by the shipping company, my Mooncool TK1 arrived in perfect condition. I carefully inspected the beautiful Slate Gray paint and could not find even one scratch.
STEP SEVEN
Carefully unpack the handlebar and then unpack the front wheel. Be sure to unpack the handlebar before attempting to get the front wheel. With the handlebar out of the way, now unpack the front wheel and set it aside.
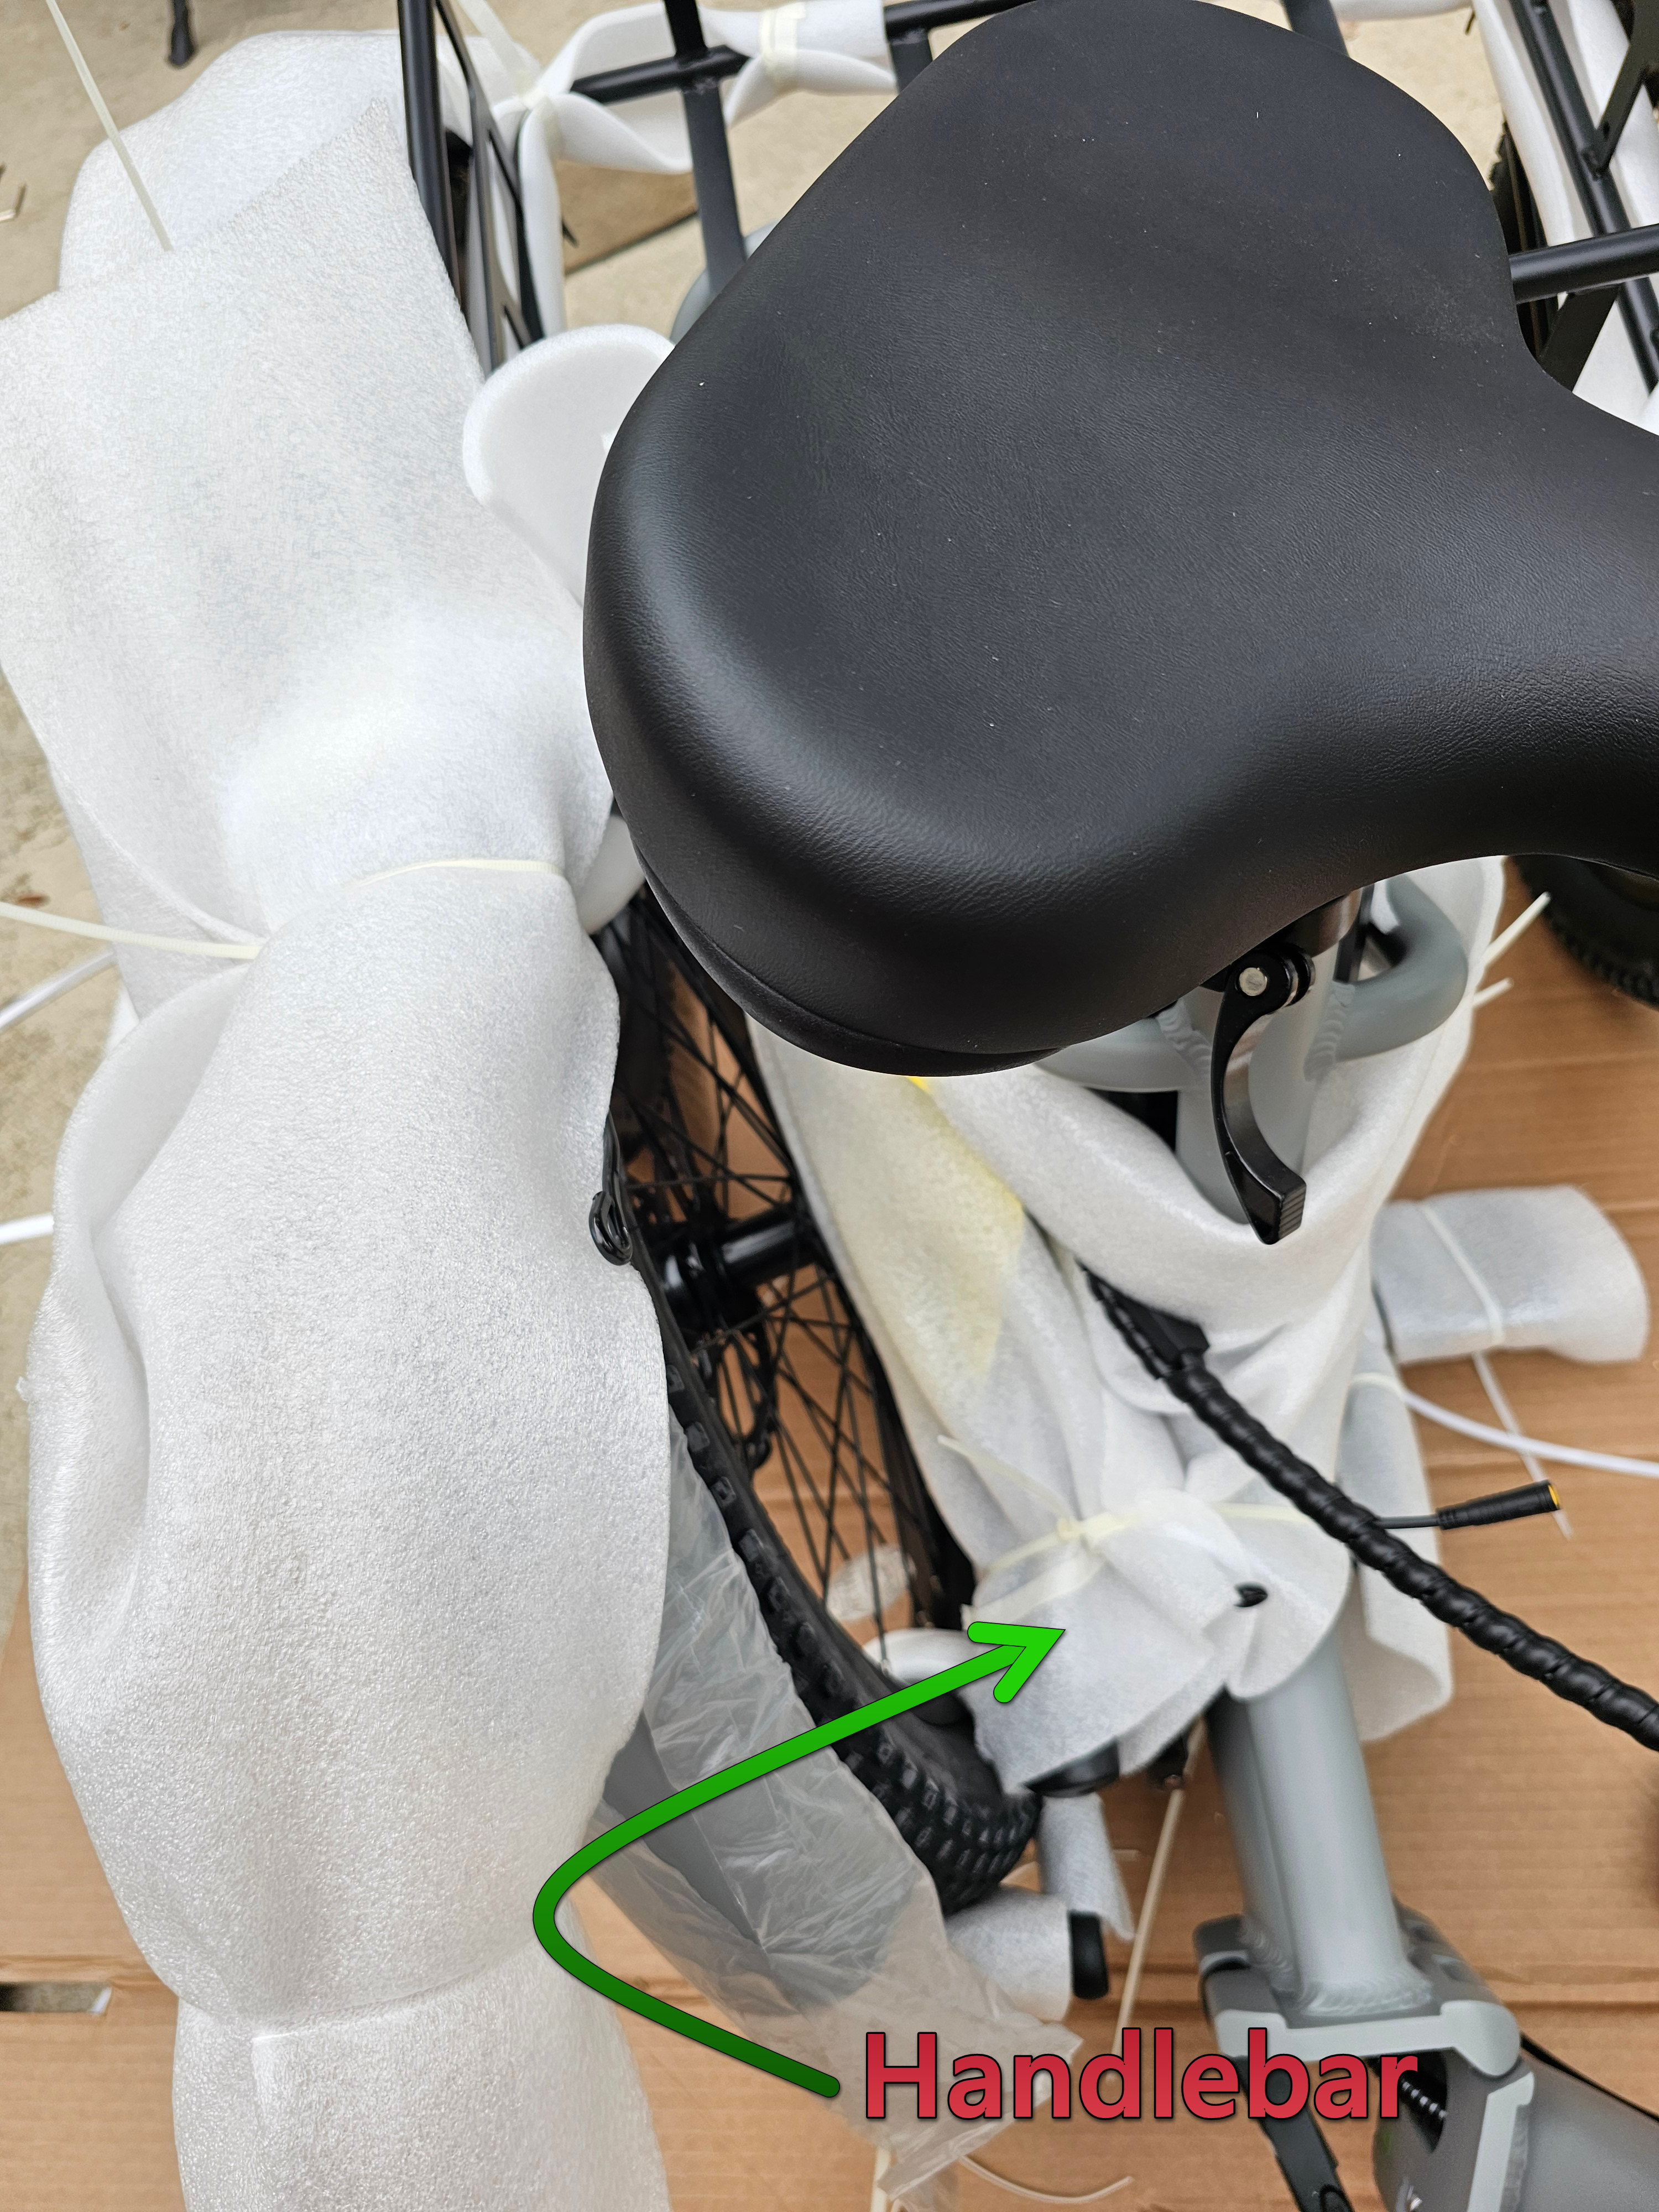
STEP EIGHT
Remove any remaining protective wrapping and install the handlebar. Note that Mooncool designed the tube with a flat side making it impossible to orient the handlebar incorrectly. Secure it in place with the locking clamp – you can adjust the height later. Double-check to be certain the handlebar is centered and secure; not wobbly.

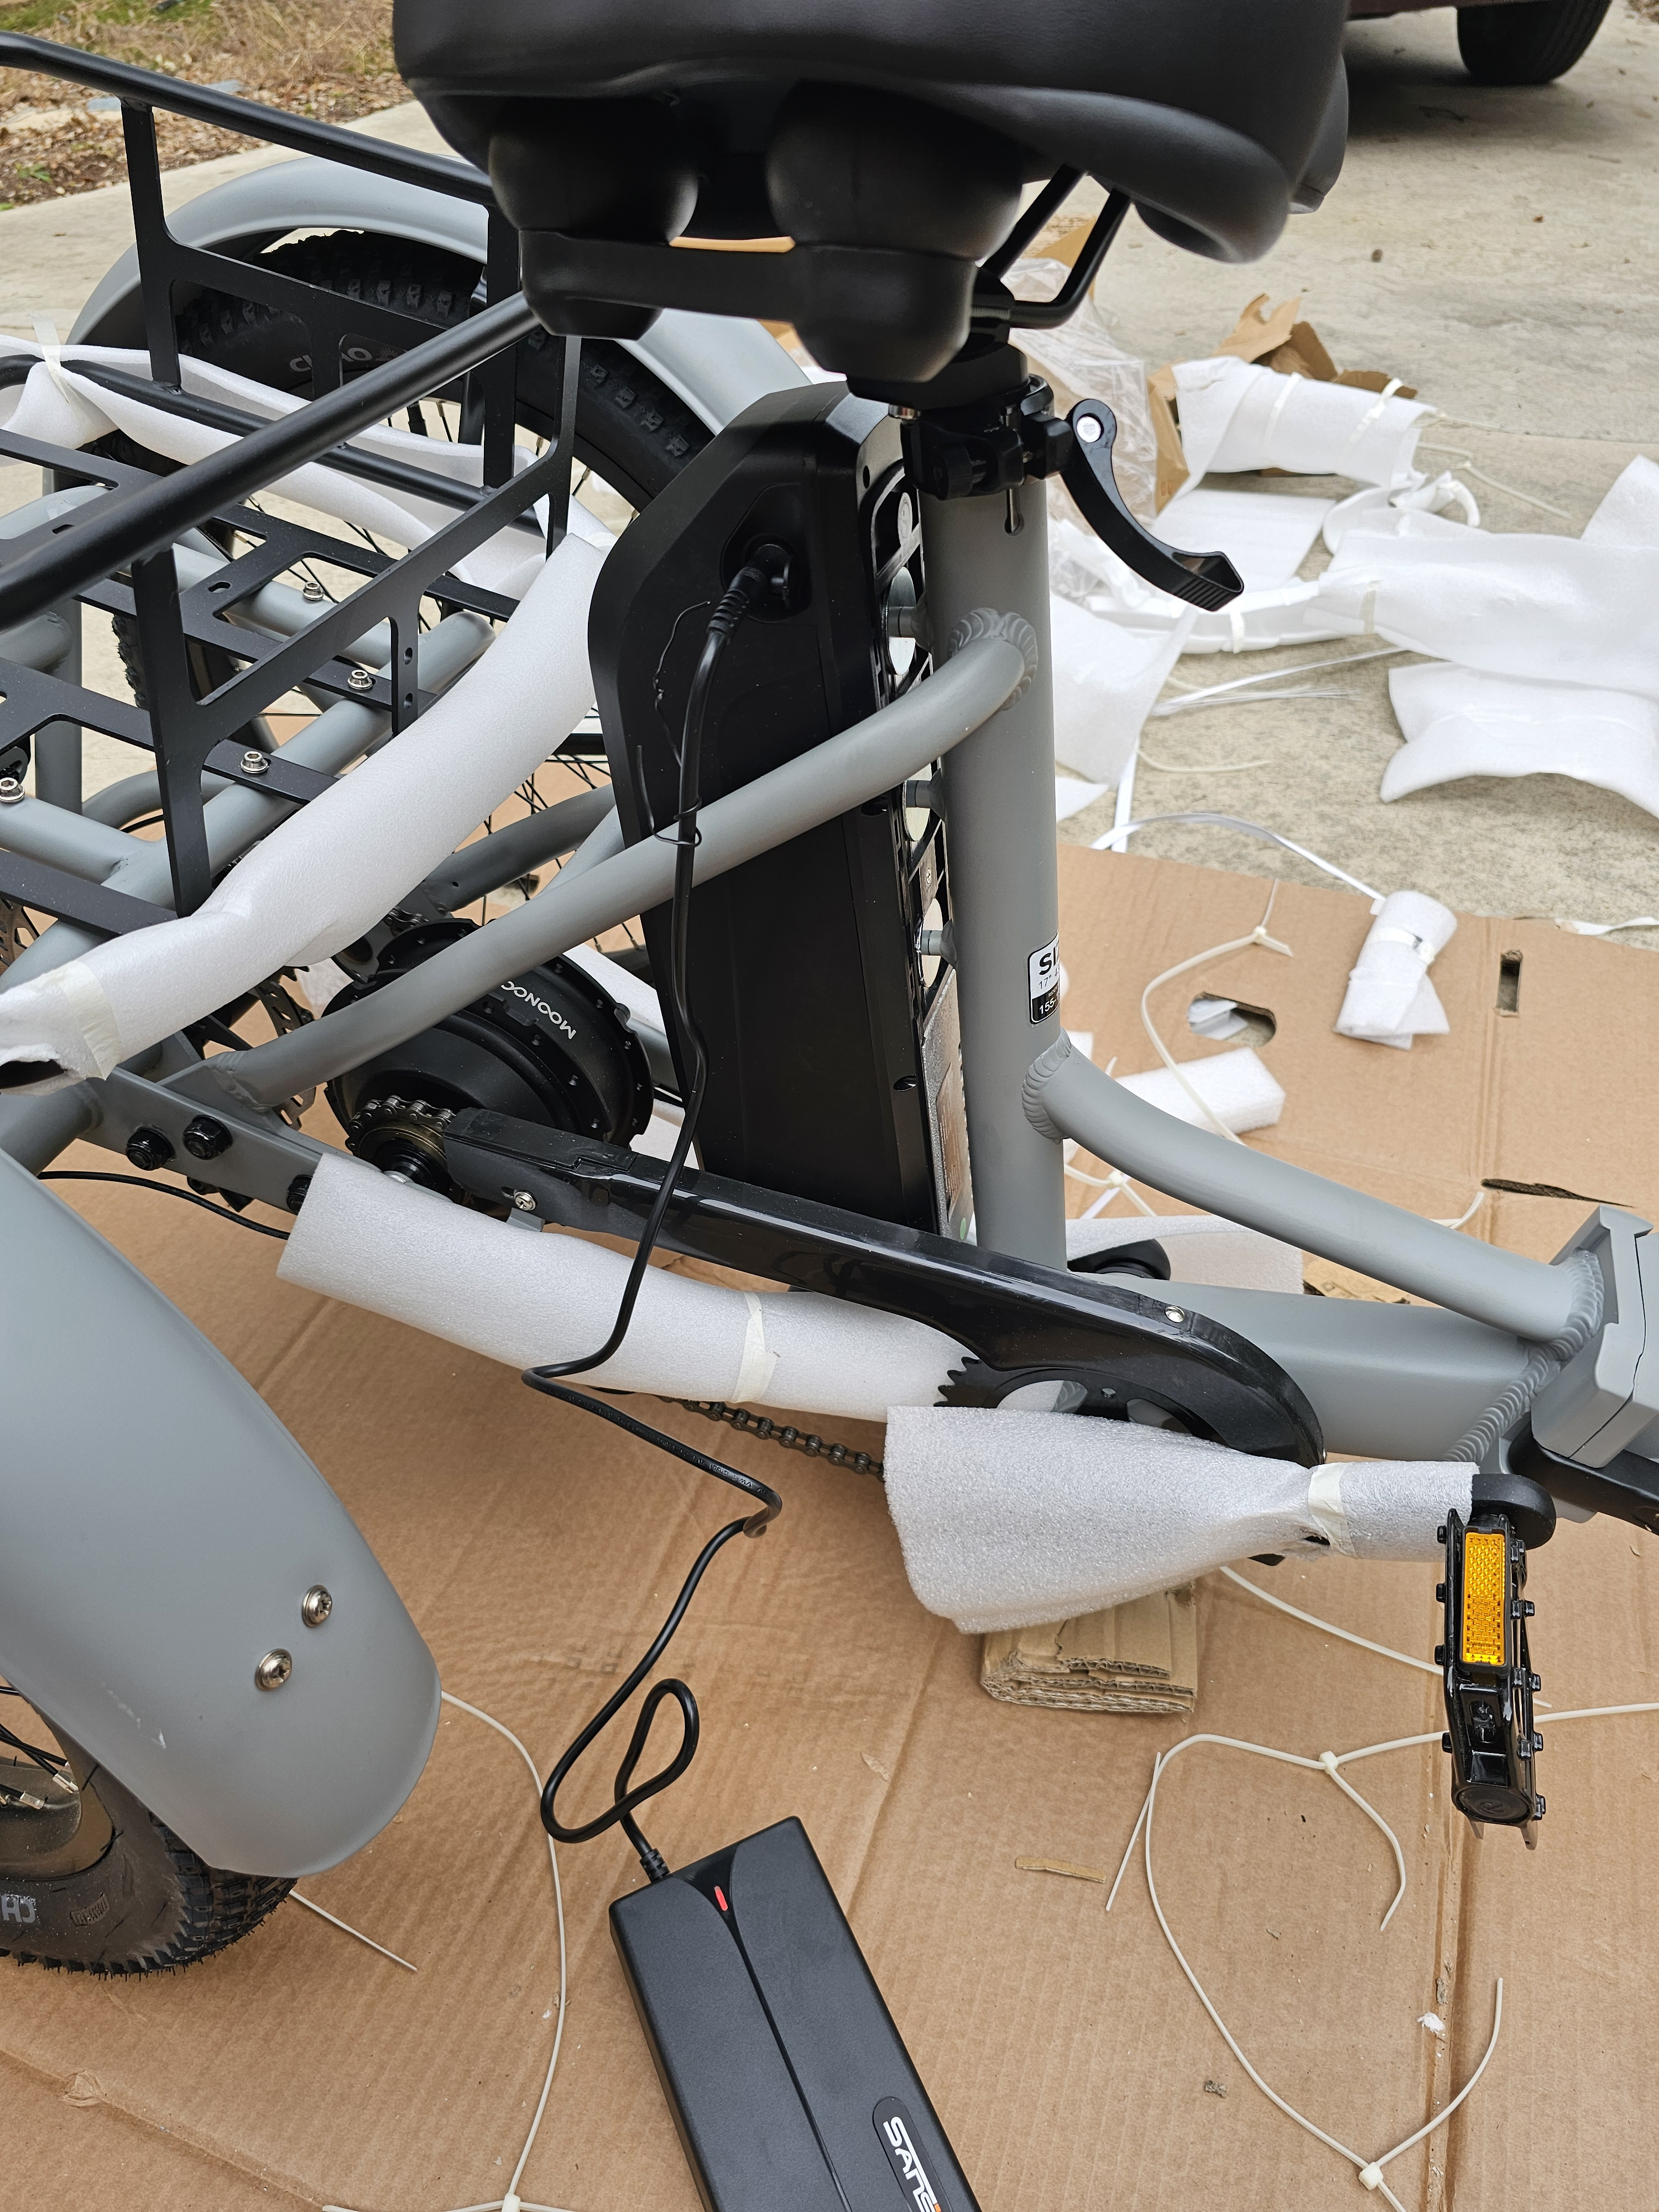
At this point, you can access the battery. I like to connect the battery charger and let the battery be charging while I continue the assembly process. The battery charging port is near the top right=hand side of the battery. It is not necessary to remove the battery for charging. If you want to remove the battery, you’ll need the keys that are zip ties to the handlebar.
STEP NINE
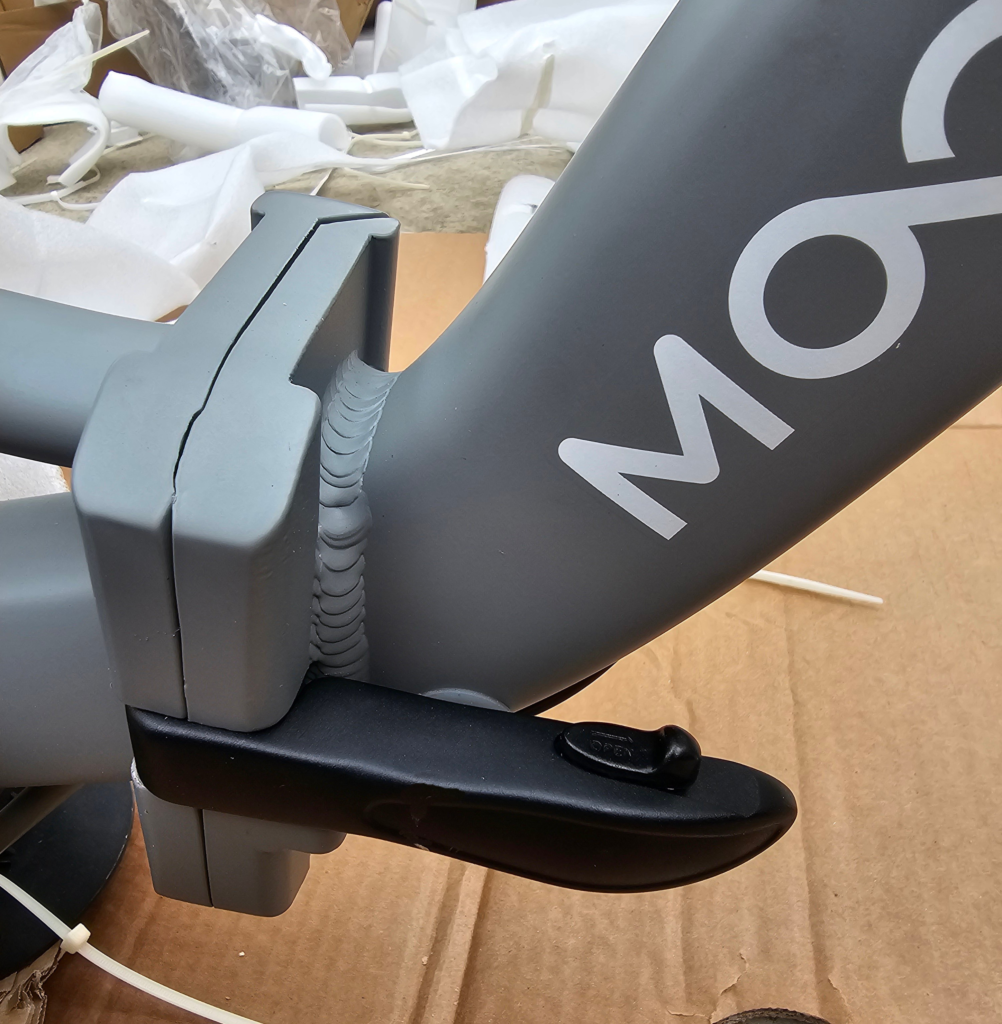
Unfold the trike and lock the folding mechanism securely into place, following instructions in the user manual.
STEP TEN
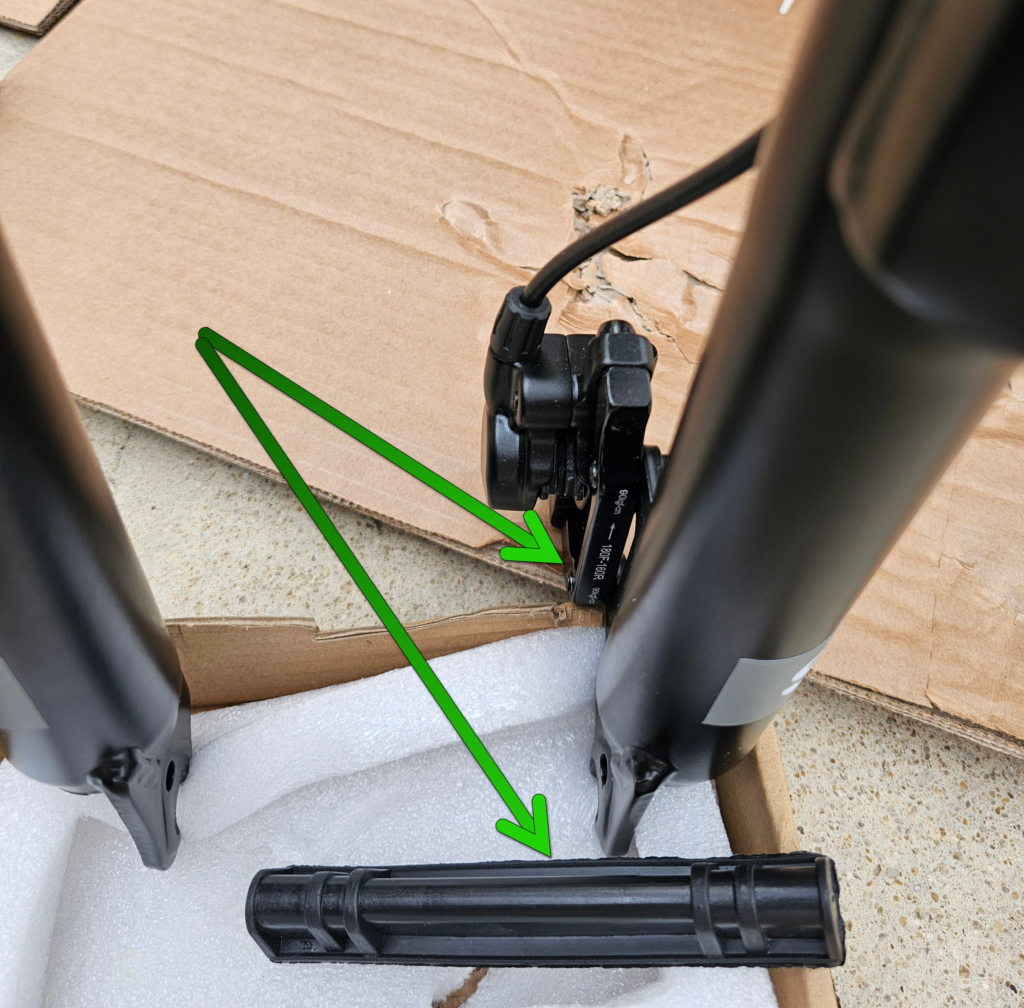
The TK1 is shipped with a protective spacer between the suspension forks…remove it after preparing a protective place to rest the forks using something similar to that shown below. Also remove the protective plastic insert from between the brake pads.
STEP ELEVEN
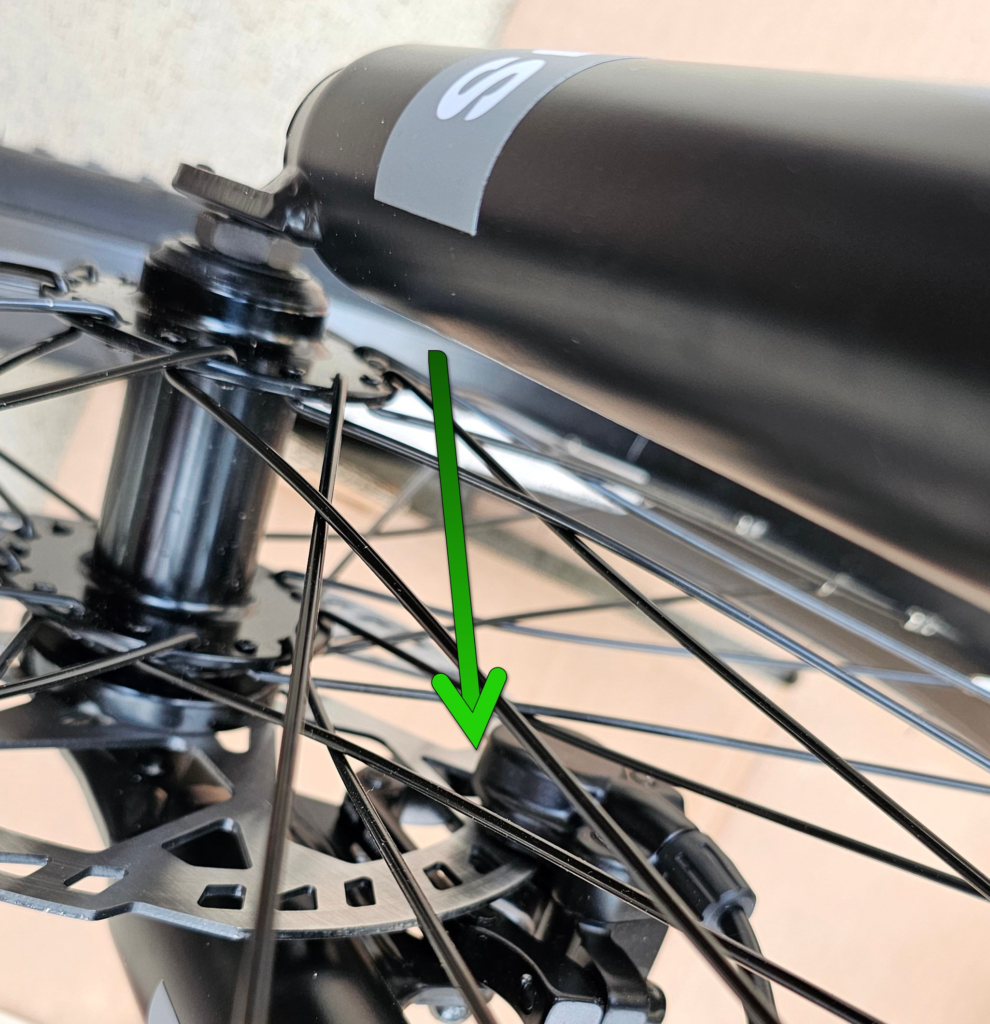
Lift the front of the trike and carefully put the front wheel in place between the front forks while carefully sliding the brake disc between the brake pads. Insert the axle into the disc brake side of the wheel…tighten and clamp securely. Consult the Mooncool instructions and pay attention to the position of the two springs.
STEP TWELVE
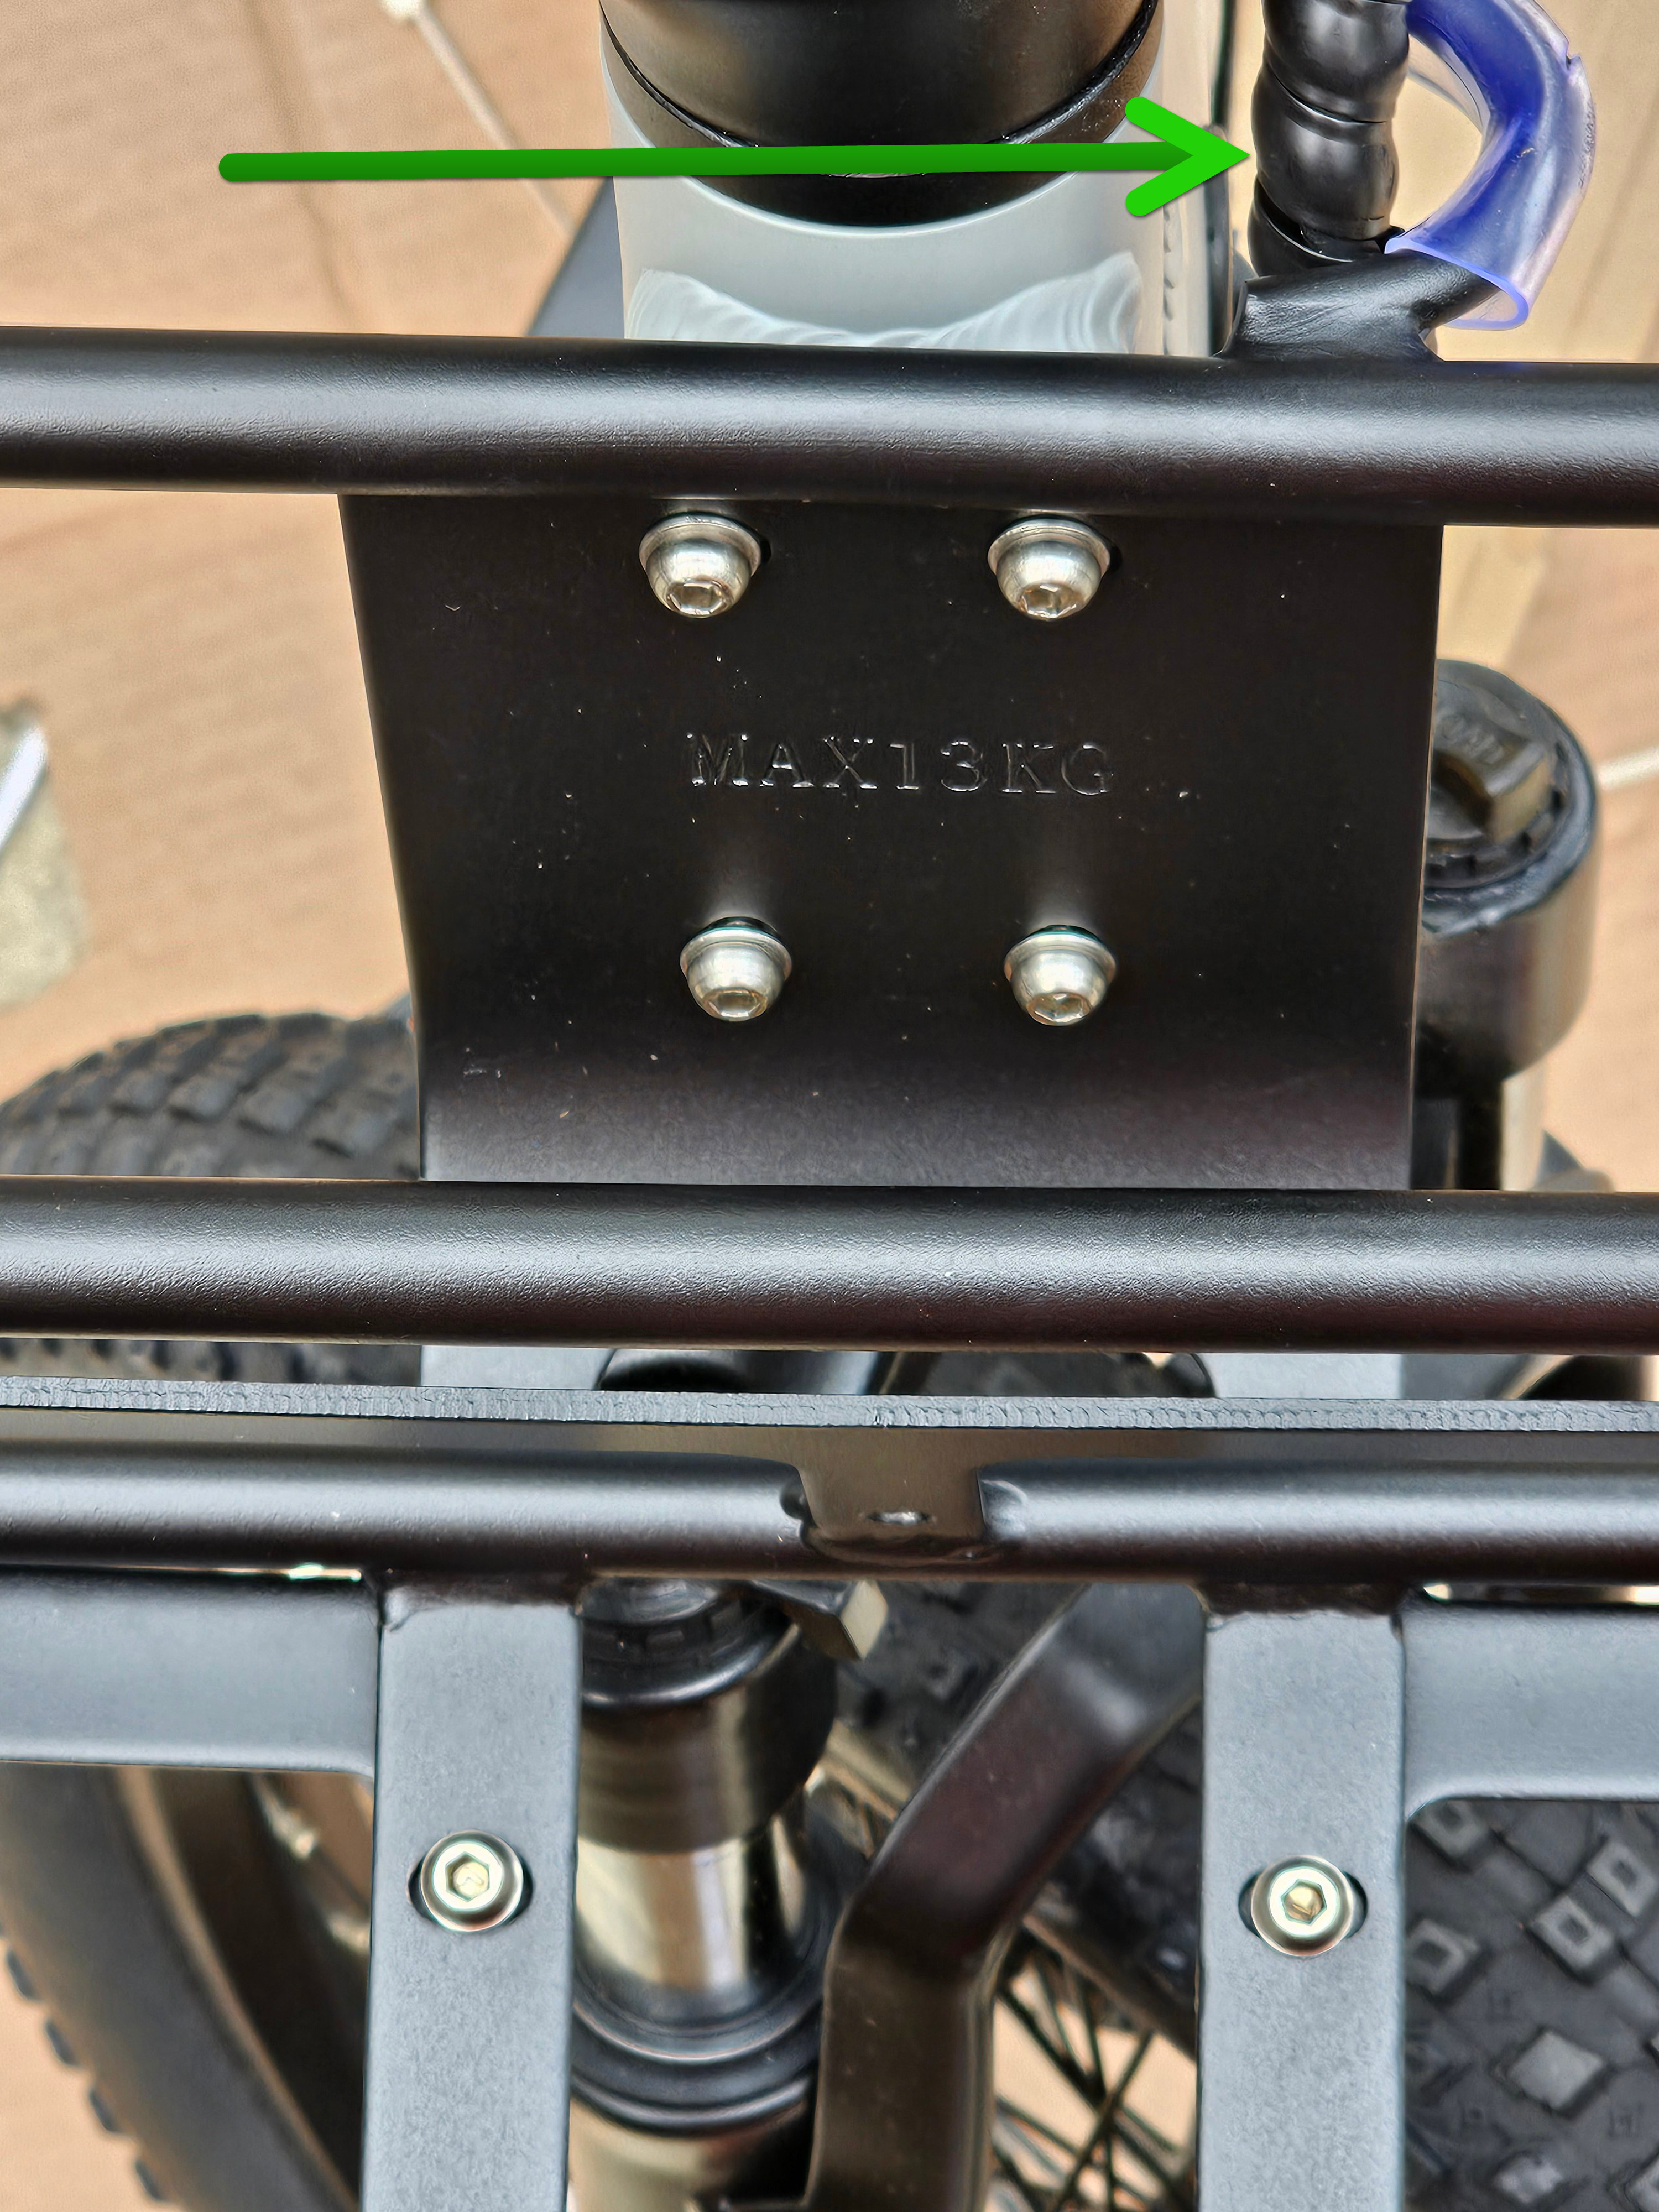
Install the front basket base bracket (supports the basket), and then install the front basket onto the base bracket.
Tuck the wiring into the retainer hook before you tighten the first screw of the front basket base bracket.
Attach the headlight to the front of the basket. Attach the wiring extension, being sure to orient the plug pins properly. Install the front basket base bracket (it supports the basket), and then install the front basket onto the base bracket.
BEFORE YOU RIDE
Make an intensive visual inspection of the assembled trike, just to be sure you haven’t missed anything. Then roll the trike while walking alongside and activate the brake levers, one at a time. Both levers should stop the trike abruptly. Turn on the power by pressing the M button on the display for a couple of seconds. Then check operation of the headlight, taillights, turn signals, and horn (consult user manual). Enjoy the ride and be safe!